This post may contain affiliate sales links. Please read my disclosure policy.
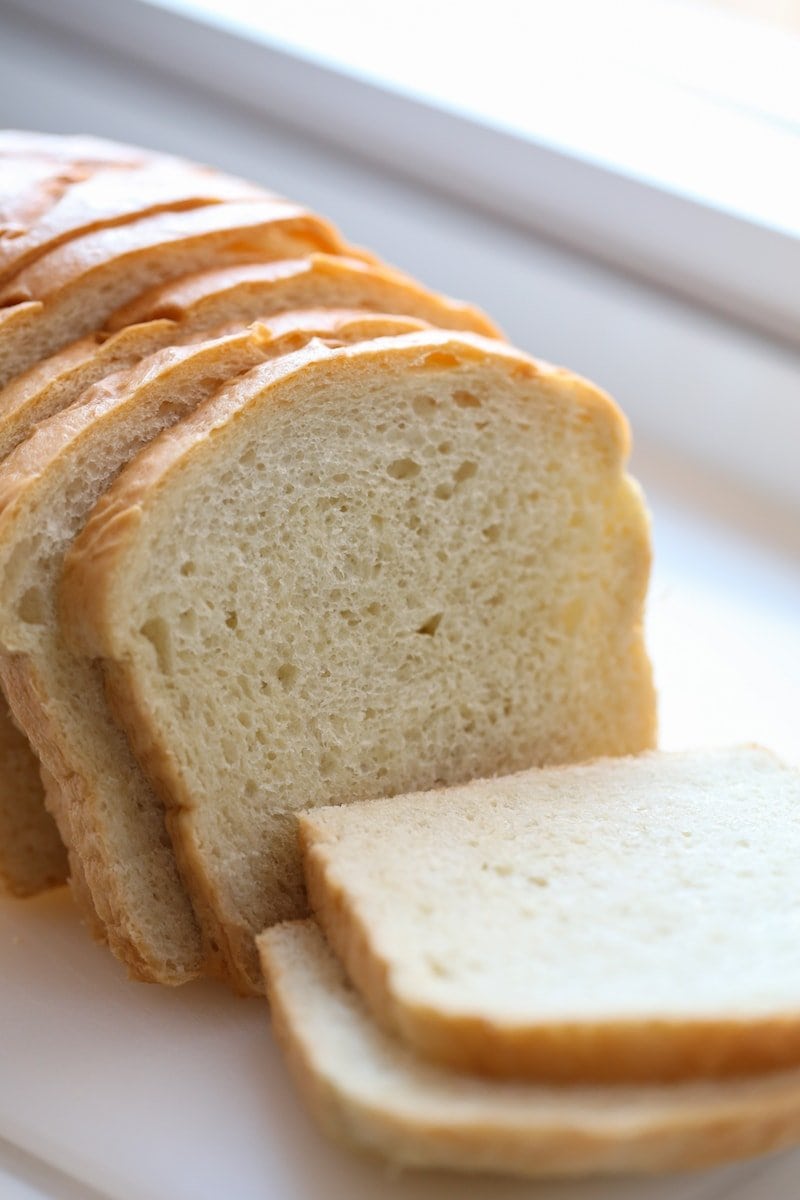
There’s nothing quite like the smell of fresh bread baking in your kitchen, and this Easy Sandwich Bread Recipe delivers a soft, fluffy loaf that’s perfect for sandwiches, toast, or just enjoying with a smear of honey butter. Made with simple ingredients this recipe is easy to follow, even if it’s your first time making bread. Say goodbye to store-bought bread and hello to your new go-to recipe for homemade sandwich bread.
Why You’ll Love this Homemade Bread Recipe
This easy sandwich bread recipe is perfect for beginners and experienced bakers alike, thanks to its simple ingredients and straightforward instructions. You don’t need any fancy equipment—just a large bowl, a wooden spoon, and a little time. The result is a fluffy, versatile loaf that’s ideal for sandwiches, toast, or enjoying fresh out of the oven with butter. Plus, it’s much tastier and more affordable than store-bought bread, making it a great choice for anyone who loves the flavor and satisfaction of homemade bread. This bread recipe is perfect turned into grilled cheese or served alongside chili or soup.
In order to have success, I’m going to write out everything I can possibly think of so you can have some amazing bread to show for the 3+ hours of work. Bread making IS work, but relatively easy work that is so so worth it!! Plus 2 hours is just waiting for it to rise, so it’s really not so bad!
Ingredients Needed for this Basic Bread Recipe
For ANY bread recipe, you will use the same basic ingredients. Whether it’s for crescent rolls, pizza dough or even cinnamon rolls, the ingredients generally are the same. Most of these items should be easy to find, if not already in your pantry!
Pro Tip: Be sure to double check your yeast to ensure it’s not expired.
- Warm Water – to proof the yeast, you stir it together with warm water. If the water is too hot, you will kill your yeast. Aim for 107-110° F.
- Active Dry Yeast. I buy the packets of yeast for ease, but any kind or brand of active dry yeast is fine. Just make sure it’s not expired. I like keeping my yeast in the fridge.
- Honey. I dissolve the honey into the warm water to act as food for the yeast to help it proof quicker.
- All Purpose Flour. For two white loaves of bread, I use unbleached all-purpose flour.
- Granulated Sugar. I like my bread on the slightly sweeter side, so I add in 1/4 cup (which equates to 2 tablespoons per loaf…so not *that* sweet overall).
- Salt. Do not forget the salt! This makes an enormous difference in the finished product.
- Melted Butter. Adds flavor and the fat adds texture too.
Bread Variations
- Whole Wheat Bread: Swap out some all-purpose flour with whole wheat flour for a heartier loaf.
- Sourdough Starter: Incorporate a sourdough starter for a tangy flavor profile.
- Olive Oil Substitute: Replace melted butter with olive oil for a lighter bread.
- Instant Yeast: You can use instant yeast instead of Active dry yeast, just be aware that it works more quickly, which reduces the rise times.
- Egg Wash: Brush the top of the dough with egg wash before baking for a shiny, golden brown crust.
Scared to Work With Yeast? Read This First!
Nervous to work with yeast? Scared this bread recipe won’t work for you? RELAX! This whole bread making process is much easier than you think. Take a breath and read my best tips for beginners:
- First things first is check your yeast. Make sure it is fresh and not past its expiration date. This recipe calls for active dry yeast, not fast acting, quick rise yeast (though that would totally work in a pinch).
- Use warm water and honey to activate your yeast. If you are concerned about killing your yeast by using water that is too hot, err on the side of too cold. You’re looking for lukewarm water, the temperature baby bath water would be. Use an instant read thermometer and aim for 107-110° F.
- You’ll know your yeast is activated if you see foam and small bubbles forming at the top of your water-yeast mixture after 5-10 minutes.
- If you don’t see any bubbles or any sign that your yeast is alive, throw it out and start again. You get soft and airy bread from yeast that creates air bubbles as it rises and then bakes.
- I recommend kneading by hand because you are much less likely to over-knead and add too much flour. If you are using a stand mixer, you’ll have to watch it carefully to ensure you get the right texture. You’re looking for a slightly tacky, smooth dough that doesn’t stick to your hands.
How to Make Homemade Sandwich Bread
If you’re new to this process, I’d recommend making this by hand and forgoing the stand mixer. You want to be able to feel the dough and not accidentally over-knead it (which can be easy to do when using a machine). All increments and specific instructions are located in the actual bread recipe card at the bottom of this post.
1. Proof Yeast
Stir warm water, active dry yeast and honey together until dissolved. Set aside 5-10 minutes to bubble and foam. It should start creating bubbles within 5 minutes. If it doesn’t seem to be doing anything, your water may have been too hot OR the yeast is expired. Throw away and try again with fresh yeast.
2. Form the Bread Dough
In a large bowl, add 4 cups of the all purpose flour, sugar, salt and melted butter. Stir together gently. (Or use a stand mixer with the dough hook attachment.) Create a well in the middle and pour in the yeast mixture.
As you mix, it should be a thick batter. Switch to kneading with your hands. As you knead, sprinkle the remaining flour* into the dough until it is smooth and slightly sticky. It should feel tacky, but not stick to your hands. This process should take about 6 minutes.
*DO NOT pour entire amount of flour onto dough and try to knead it in. YOU WILL get a tough, dry dough. Just go little by little to get the texture you’re looking for. You may have leftover flour due to many different reasons (humidity, flour brand, the way you measure the flour) and that’s completely normal.
Pro Tip: The “windowpane test” is a good indicator to see if your dough has been kneaded enough. Take a small ball of the dough and stretch it into a square. Keep on stretching until it becomes a thin film in the middle without breaking. The dough must be thin enough to pass light through it. If it is obtained without any tear, then your dough is properly kneaded.
3. Rise, Form into Loaves, Rise Again
Place dough into a clean, well greased bowl. Cover with plastic wrap or a clean kitchen towel. Let dough rise in a warm place for 1-2 hours or until it has doubled in size.
Pro Tip: If your kitchen is on the cooler side, try placing the dough into your oven with just the light on.
Prepare 2 loaf pans (I used 1-pound loaf pans. 8 1/2″ x 4 1/2″ x 2 3/4” high) by greasing well with butter or nonstick spray.
On a lightly floured work surface, divide dough into two, form into loaves and place into loaf pans. Cover with a kitchen towel and let rise again for about 1 hour or until doubled in size.
4. Bake Your Bread & Enjoy!
After about 45 minutes of rising, preheat oven to 350° F. Bake 30-40 minutes, keeping a close eye to not over bake. When bread is removed from the oven and still hot, brush the tops with butter.
Cool 20 minutes in pans before removing to cooling racks. Cool completely before cutting into slices.
Storage Directions for Sandwich Bread
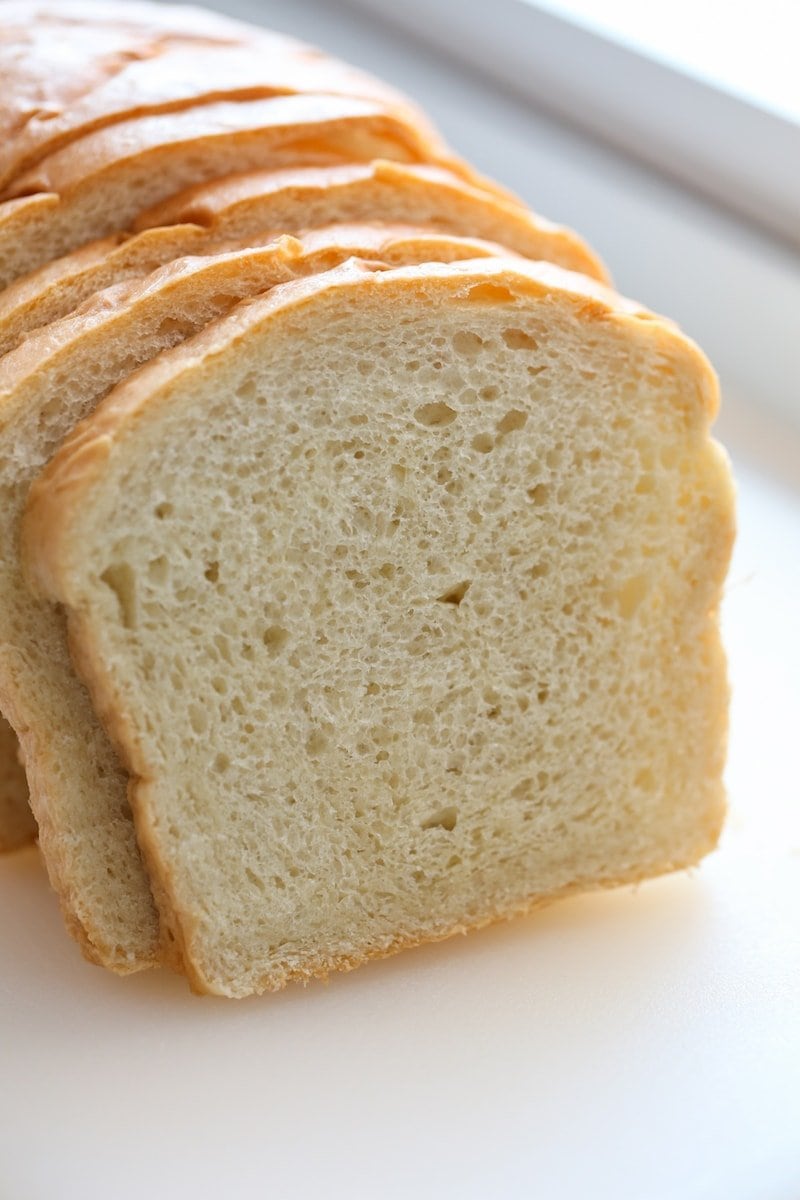
The options are just about endless when it comes to storing this white sandwich bread. The best way to store this bread is in an airtight container or plastic bag in the fridge. While it’s fine to keep on the counter or in the cupboard at room temperature, you will definitely notice mold a lot sooner than if kept in the fridge. Shelf life on the counter is about 3 days. Shelf life in the refrigerator is 5 days. See notes below on freezing.
When and How to Freeze Bread
There are two options for freezing this bread: before baking and after baking.
Freezing Before Baking
To freeze this bread before baking, make the recipe as listed. After the first rise, form into loaves, place into loaf pans (I’d recommend the disposable ones) and immediately cover well and freeze. To bake, remove from the freezer, defrost and rise (should take 6-8 hours on the counter). Then bake according to recipe directions. Unbaked dough will last in the freezer for up to 4 months.
Freezing After Baking
To freeze this bread after baking, make recipe in entirety. After the loaves have cooled completely, place into an airtight container or bag and freeze. Will last in the freezer for up to 3 months. To defrost, simply transfer bread from freezer to fridge until its fully defrosted. If you’re wanting to use this bread for sandwiches, I recommend cutting into slices before freezing.
More Bread Recipes you will Love:
- Bread Bowl Recipe
- Hot Cross Buns
- Homemade Pizza Dough
- Dinner Rolls
- Soft Zucchini Bread
- Banana Nut Bread
Simple, homemade sandwich bread that’s soft, fluffy, and perfect for just about anything is right at your fingertips. Plus, there’s something so satisfying about pulling a warm, freshly baked loaf out of your own oven. Once you try it, you might never go back to store-bought again! The printable recipe card is below! Have a great day, friends! 🙂
If you make this recipe, I would really appreciate it if you would give it a star rating and leave your review in the comments! If you have a picture of your finished dish, post it on Instagram using the hashtag #laurenslatest and tagging me @laurens_latest.

Easy Sandwich Bread Recipe
Ingredients
- 2 cups warm water aim for 107-110° F
- 0.5 oz active dry yeast 2 packets
- 1/4 cup honey
- 6-7 1/2 cups all purpose flour unbleached
- 1/4 cup granulated sugar
- 2 teaspoons salt
- 1/4 cup melted butter slightly cooled
- 2 tablespoons butter for brushing on top after baking, optional
Instructions
- In a liquid measuring cup, stir warm water together with yeast and honey. Set aside 5 minutes to proof and bubble up.
- In a large bowl, add 4 cups all purpose flour, sugar, salt and melted butter. Stir together gently.
- Create a well in the middle of the flour mixture and pour in the yeast mixture.
- Start mixing using a large spoon until a dough forms. Switch to kneading with your hands, sprinkling the remaining flour* into the dough until it is smooth and slightly sticky. It should feel tacky, but not stick to your hands. This process should take about 6 minutes.
- Place dough into a well greased bowl and roll around to coat. Cover with plastic wrap or a clean kitchen towel and rise 1-2 hours or until doubled in size.
- Prepare 2 loaf pans by greasing well with butter or nonstick spray.
- Remove dough from bowl and divide into two even amounts. Gently press into two rectangles the width of your loaf pans. Roll up to form a log and place into each greased loaf pan. Cover with a kitchen towel and let rise again for about 1 hour or until doubled in size.
- After about 45 minutes of rising, preheat oven to 350° F.
- Bake loaves for 30-40 minutes or until completely cooked through. Do not over bake!
- When bread is removed from the oven and still hot, brush the tops with butter.
- Cool 20 minutes in pans before removing to cooling racks. Cool completely before cutting into slices. Store in airtight containers in the refrigerator to keep up to 4 days. OR place into the freezer.





Hello, Just had to let you know a friend requested some Wheat bread. So I used 3 cups Wheat flour with 3 cups all purpose flour. It worked fantastically. The bread is soft , moist and delicious. I am not sure why but my bread machine which is a new upper end machine does not turn out bread this good.
Thank you once again for a great recipe, Lon
Hello, made this bread last night. It turned out just right. It tastes real good. This will be my favorite bread to make. I am trying to work up courage to make your dark chocolate cheesecake. I make your signature cheesecake often and it always turns out great.
This is my first time making bread and so far it has turned out good.
I am currently on keto, but have made a flour mixture that will take the place of regular AP flour 1:1. I’m going to try this because I used to make bread all the time and prefer homemade bread to store bought (especially keto bread – yuck). I will let you know if it works so all the other keto bread-loving people out there can try it if it turns out to be edible! And I think I will do one loaf in the oven and one in my bread maker….just for fun!
There are so many different sizes of loaf pans, I don’t understand why the pan size wouldn’t be posted with the recipe!!
Donna, as long as it’s not a mini loaf pan, any standard loaf pan you have will work with bread. I used a lightly colored 8 1/2″ x 4 1/2″ x 2 3/4” high that bakes a 1-lb loaf.
Thank you so much!!
My dough is so sticky it’s impossible. It’s just a huge sticky ´mess. What am I doing wrong? I used instant yeast that I store in my fridge and it only gave me very little bubbles…
I had to throw it out ?
Hi! I have not made this recipe, but perhaps the yeast was cold, so let it come to room temperature before using it. I hope this helps.
I am not a bread making expert at all, but I make this recipe about once every 2-3 weeks and I feel like it is nearly foolproof. It is my favorite recipe by far.
I love this recipe. I’ve never cooked a loaf of regular bread, and I’m almost 50 years old! I decided to see if my flour, from over fifteen years ago, was still good, and to my surprise it worked just fine.
The directions were excellent. I think the only thing I would recommend is to show pictures of the process from beginning to end, which would be about 8-10 pics.
Thanks for the wonderful recipe ?
Best white fluffy loaves of bread!!! Perfect recipe. Ended up using 6-1/2 cups all together of flour
We loved this bread recipe! I made it in a kitchenaid mixer with the dough attachment and used regular instant rise yeast packets. Super easy!
Any good bread recipes for the bread machine?? Need one with soft texture. Also a good raisin bread recipe for the machine.
I tried it today and it came out really good. Thank you for this amazing recipe. I had made sandwich bread recipe once before and it turned out to be a disaster. So, I halved this recipe to try and see how it works. My kids loved it and ate half the loaf within a couple of hours of making it. It tasted yum with some salted butter on top.
This looks great and I am trying to make bread for the very first time. As a matter of a fact, i have never used yeast before. when you say .5 oz, how much is that by tsp measurement? I also have a pretty big baking pan. It’s 13x4x4. Do I need to up any of the ingredients?
Thanks a mil
Jen
4 1/2 teaspoons.
You don’t have a temperature for the oven to bake the bread. What temperature to bake the bread?
Step 6: After about 30 minutes or rising, preheat oven to 350 degrees.
I love this recipe but it doesn’t raise above my pan edges, I get a short loaf. The texture seems good and not too dense but I’m not sure where Im going wrong! Amazing taste though!
can you make half a recipe and also how to store this bread
Holy moly, I saw this published as today, but realized looking at the comments that it must be a repost. You might want to change the part about fall being right on our door though, since we still have two more seasons to get through first! 😀
I always always end up with holes in my loaf. Is this due to me not kneading enough??
Holes on the outside or inside?
Can I use my mixer with the kneading attachment?
Yes!
Inside
I have used this recipe for times now and absolutely love it even I can’t mess it up LOL thank you for your sharing your recipes you are a great cook
What type of pans do you use?
Isn’t the bread to sweet for sandwiches because of the honey and sugar?
No, I don’t think it’s too sweet at all. But you can reduce the sugar by half if you’re worried about it.
I made it and it did not raise as loafs- why?
Thank you
Made this yesterday! I made the honey wheat. It turned out perfectly. Love this recipe, fairly easy and delicious. Thank you
This is one of my favorite recipes from you. I’ve never been much of a cook but feel so accomplished that I can make my own bread thanks to this awesome recipe!
My husband is one of those weird people who prefer store bought bread (I don’t get it..). But that was until THIS recipe. We love this recipe! Thank you!
[…] If the super quick Pillsbury Monkey Bread version doesn’t tickle your fancy, you can totally make this recipe from scratch by using my homemade white bread recipe. […]
I have made a lot of bread but this is the best recipe yet.
Lauren, I have made this recipe several times and love it. I am wanting to make for a friend who is vegan and will need to substitute oil for the butter. Have you ever done that and is it possible. I have read that it is but not sure about flavor and texture. What are your thoughts? Thank you,
For the vegans out there; I made it with canola oil and 1 t butter flavoring. It worked!
Can I sub bread flour for all purpose? I have 5 bags of it I’m trying to get through.
Yes, definitely! You won’t have to knead the dough as long because bread flour has more gluten in it, but besides that everything will stay the same about the recipe.
[…] thing, you may want to try my Low Fat Lemon Poppyseed Bread, my Cinnamon Swirl Donut Bread or my Homemade White Bread. All non-banana-but-still-delicious […]
This bread is sooooo delicious!! The recipe is easy to follow. My family loved it so much they won’t eat store bought bread anymore haha.
First real attempt at bread. Will definitely be making this again. Now the wife thinks I am good at the bread thing. Thanks.
I was looking for a bread recipe and I came across this one, this is the best best bread recipe by far. My husband is a picky eater but he just loves this bread and so does the rest of the family. Thank you Miss Laure.
[…] past week I made a couple of loaves of homemade bread! A little slice of heaven on earth. This no sugar/desserts thing was particularly challenging this […]
My family loves this recipe!! I make the whole wheat version to use in school lunches…I slice it and wrap two slices together in plastic wrap and freeze it, so I can pull out just what I need! Nothing better than fresh baked bread!
Can I use bread flour with this recipe?
What size breadpans are you using???
Whole wheat sounds good. what is the whole wheat version of this recipe?
In the recipe card, there are directions for making honey whole wheat bread. It’s listed as step 10.
Loved this recipe!! I prefer to knead my own bread instead of using a mixer so this was the main reason I tried this recipe. I certainly was not disappointed, it was spot on for taste and texture!! I decided to do a cinnamon raisin bread with the second loaf. Wasn’t sure how it would come out, but WOW it was amazing! This will be my go to for now for our family, thanks for sharing!!
Can this be made with G Fflour ??
Probably not. The texture (and structure of the bread) would be way off, I think.
[…] (Also, on the weekends, I’m not making fancy meals at all. I’m talking chicken salad, homemade sandwich bread or hard boiling some eggs. Anything I can do to save time later in the week for meal prep, […]
OMG this looks amazing!! I need to try this 🙂
This is amazing! Is there anywhere you recommend buying flour in bulk (besides Costco or Sam’s)…like mail order so I don’t have to lug 3 kids and 25 pounds of flour out of Costco?
I go to kalona the Amish have a wide variety
This looks delicious, can’t wait to try it! I was planning on baking bread this weekend, so this post is perfect timing!!
I find when I make homemade bread it gets stale over night. How do you store your homemade bread and how long does it last before it goes stale?
When bread is still slightly warm. Cover in plastic to retain moisture. There’s a fine line between most and dry bread. Sealing while still slightly warm is my fermilure.
Any bread recipes without yeast? Our stores are sold out.