You have 0 items in your cart
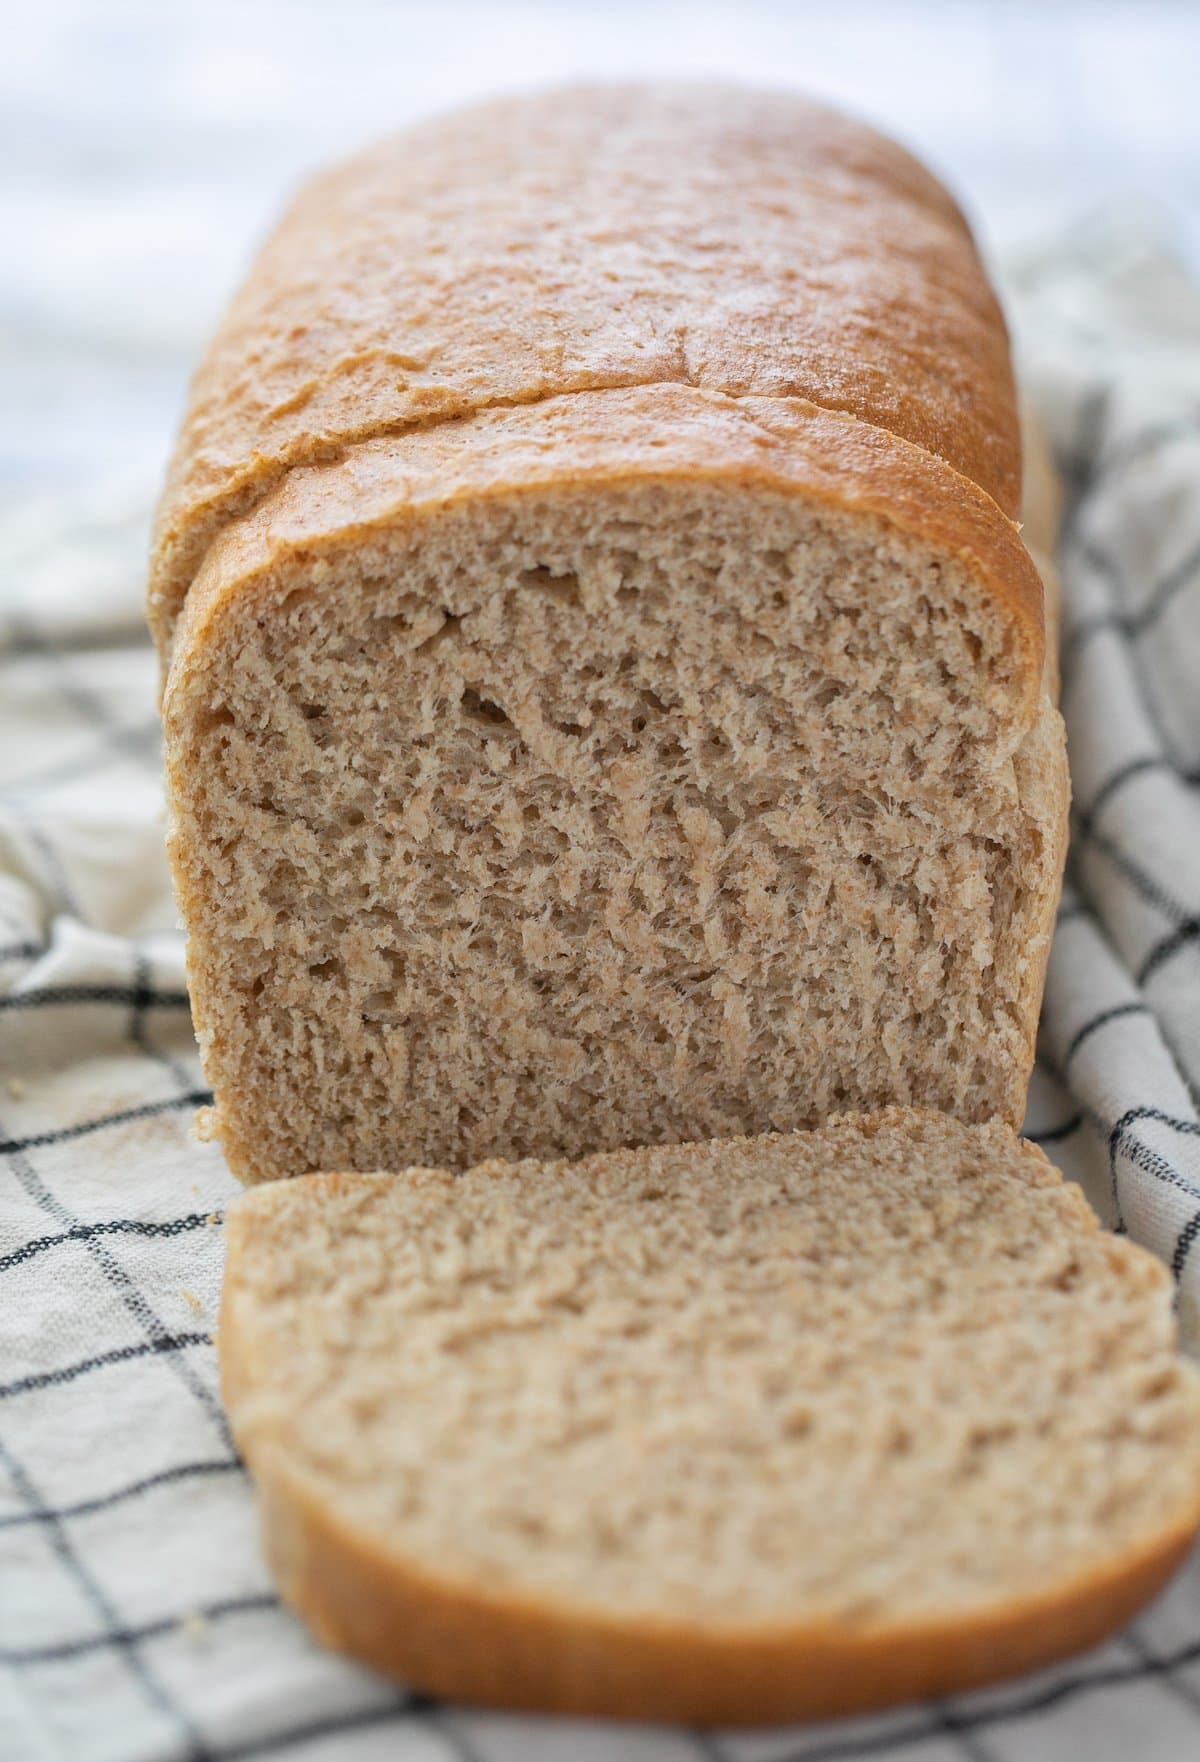
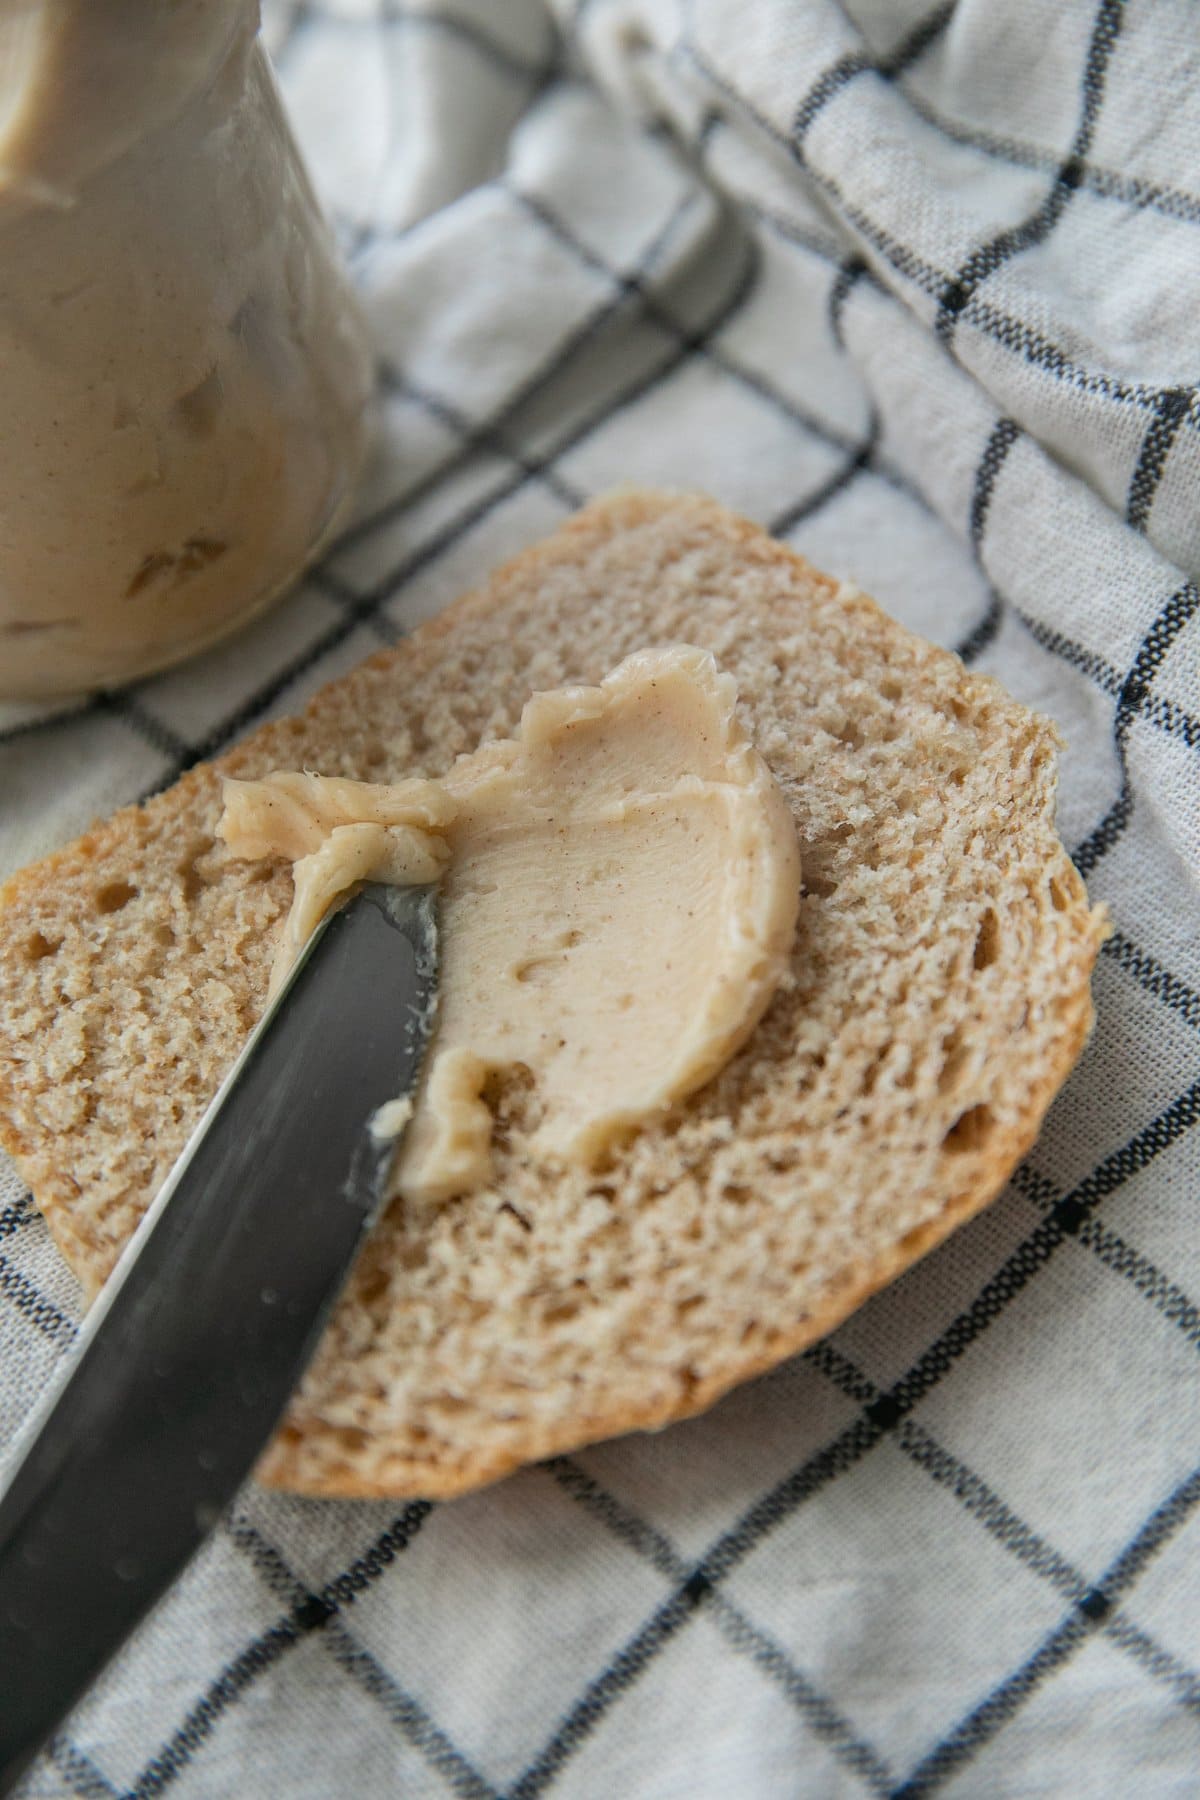
Whole Wheat Bread
This post may contain affiliate links. View my privacy policy and disclosure policy for more details.
Based on my classic white bread recipe, this is my simple Whole Wheat Bread recipe. Made with yeast and made easy with all of my tips and tricks! Perfect with butter, jams, honey, etc!
Try my honey butter recipe with this bread.
Whole Wheat Bread
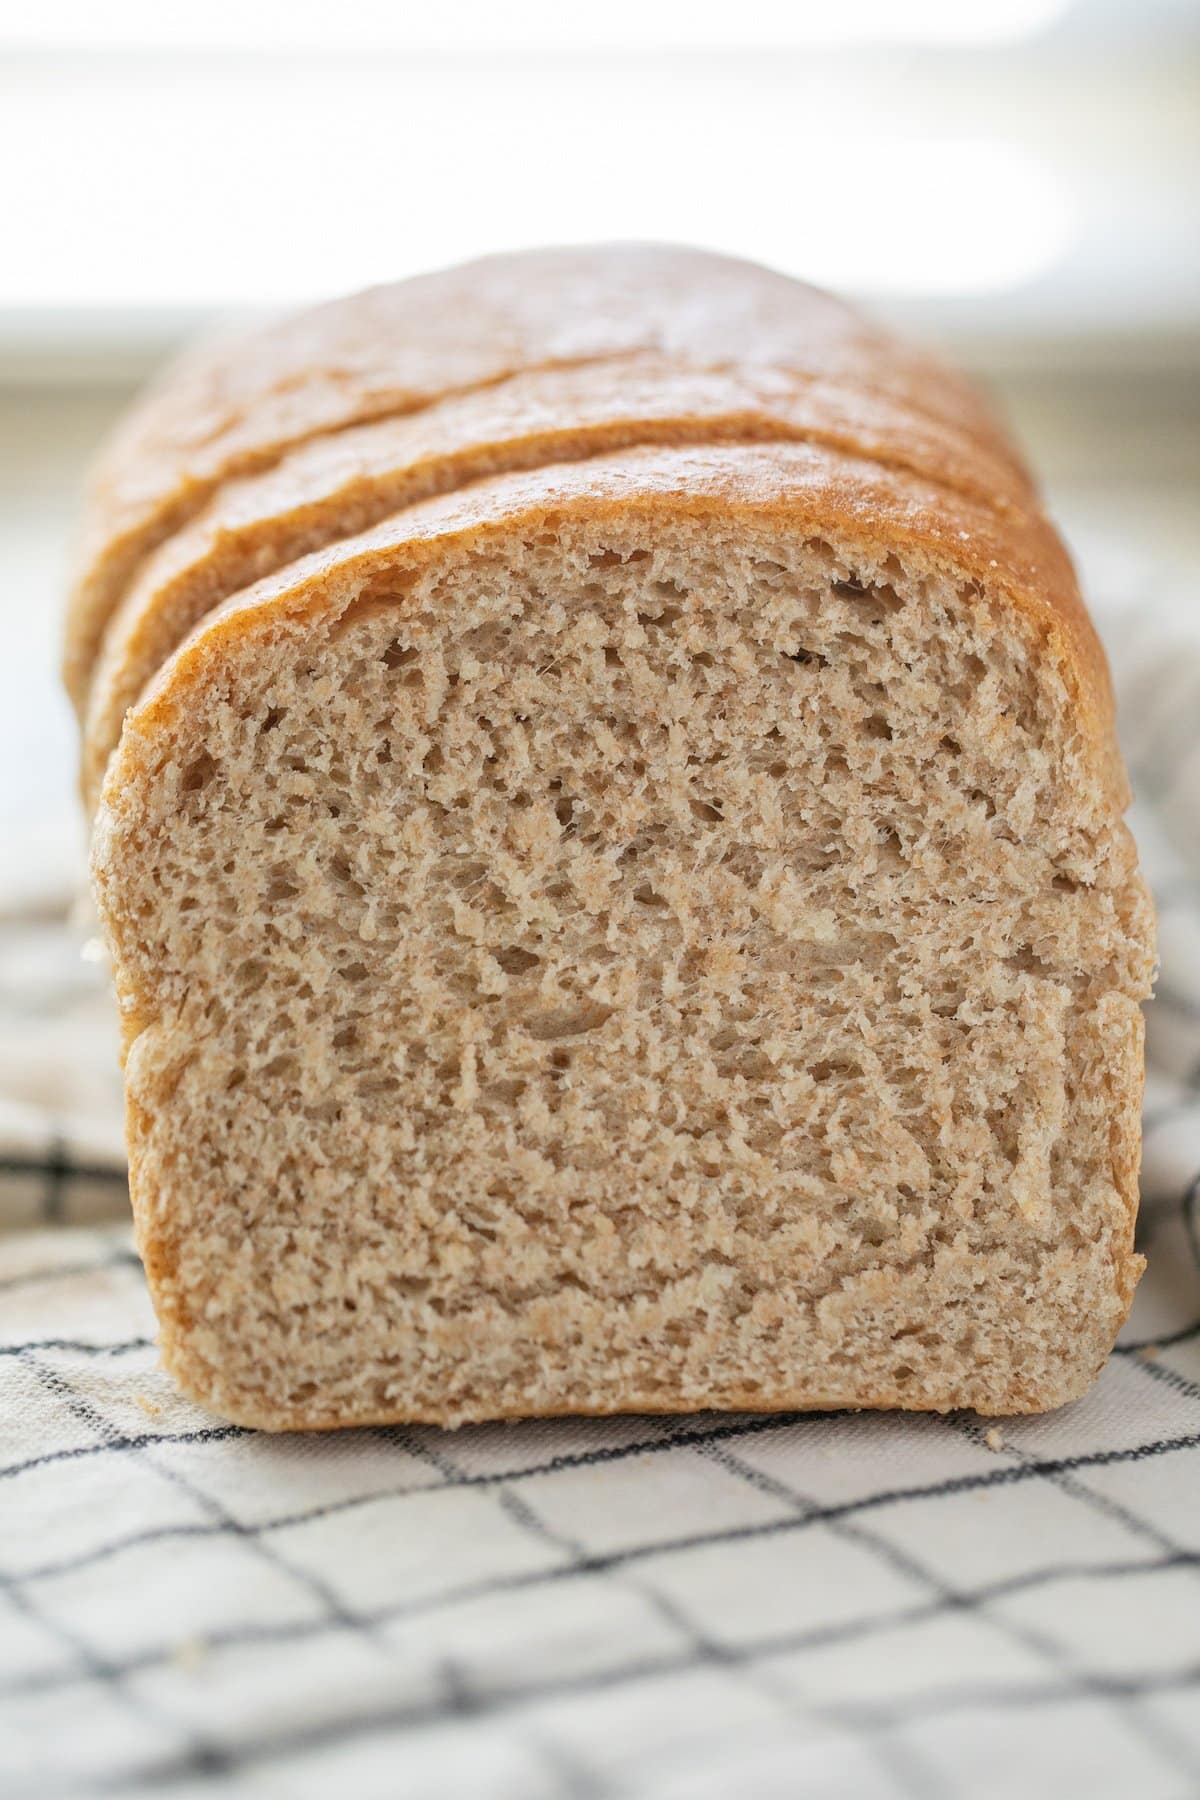
If you’ve been following this blog for some time, this Whole Wheat Bread recipe might look a little familiar. That’s because it is based on my homemade white bread recipe! I replace some of the all-purpose flour with whole wheat and baby are we in business. You get the same soft fluffy crumb with a bit more texture and color from the whole wheat flour. You still gotta work for this bread though, however that’ll be easier with all of my tips and tricks found below. Oh, and did I mention this recipe makes TWO loaves?
Main Ingredients Needed
Here is everything you’ll need to make this whole wheat bread. This list may look a little familiar if you’ve made my homemade white bread recipe 🙂
- Warm Water + Honey – warm water (~100F) is not only used to dissolve the honey but also to help activate the yeast. The honey is for flavor and to also help the yeast proof quicker.
- Yeast – this is where all of the magic happens! I buy the packets of yeast for ease, but any kind or brand of active dry yeast is fine. Just make sure its not expired.
- All Purpose Flour + Whole Wheat Flour – I used a blend of both all purpose flour and whole wheat flour to make this yeasted dough a little easier to manage. Side note: you won’t need all of the whole wheat flour listed in the recipe card, just enough to get the dough to be where it needs to be.
- Sugar – I like my bread on the slightly sweeter side, so I add in 1/4 cup (which equates to 2 tablespoons per loaf…so not *that* sweet overall.)
- Salt – do not forget the salt! This makes an enormous difference in the finished product.
- Butter – adds flavor and the fat adds texture too.
Working with Yeast Tips + Tricks
Nervous to work with yeast? Scared this whole wheat bread recipe won’t work for you? RELAX! Take a breath and read my tips and tricks:
- First things first is check your yeast. Make sure it is fresh and not past it’s expiration date. This recipe calls for active dry yeast, not fast acting, quick rise yeast (though that would totally work in a pinch).
- Use warm water and honey to activate your yeast. If you are concerned about killing your yeast by using water that is too hot, err on the side of too cold. You’re looking for lukewarm water, the temperature baby bath water would be.
- You’ll know your yeast is activated if you see foam and small bubbles forming at the top of your water-yeast mixture after 5-10 minutes.
- If you don’t see any bubbles or any sign that your yeast is alive, throw it out and start again. You get soft and airy bread from yeast that creates air bubbles as it rises and then bakes.
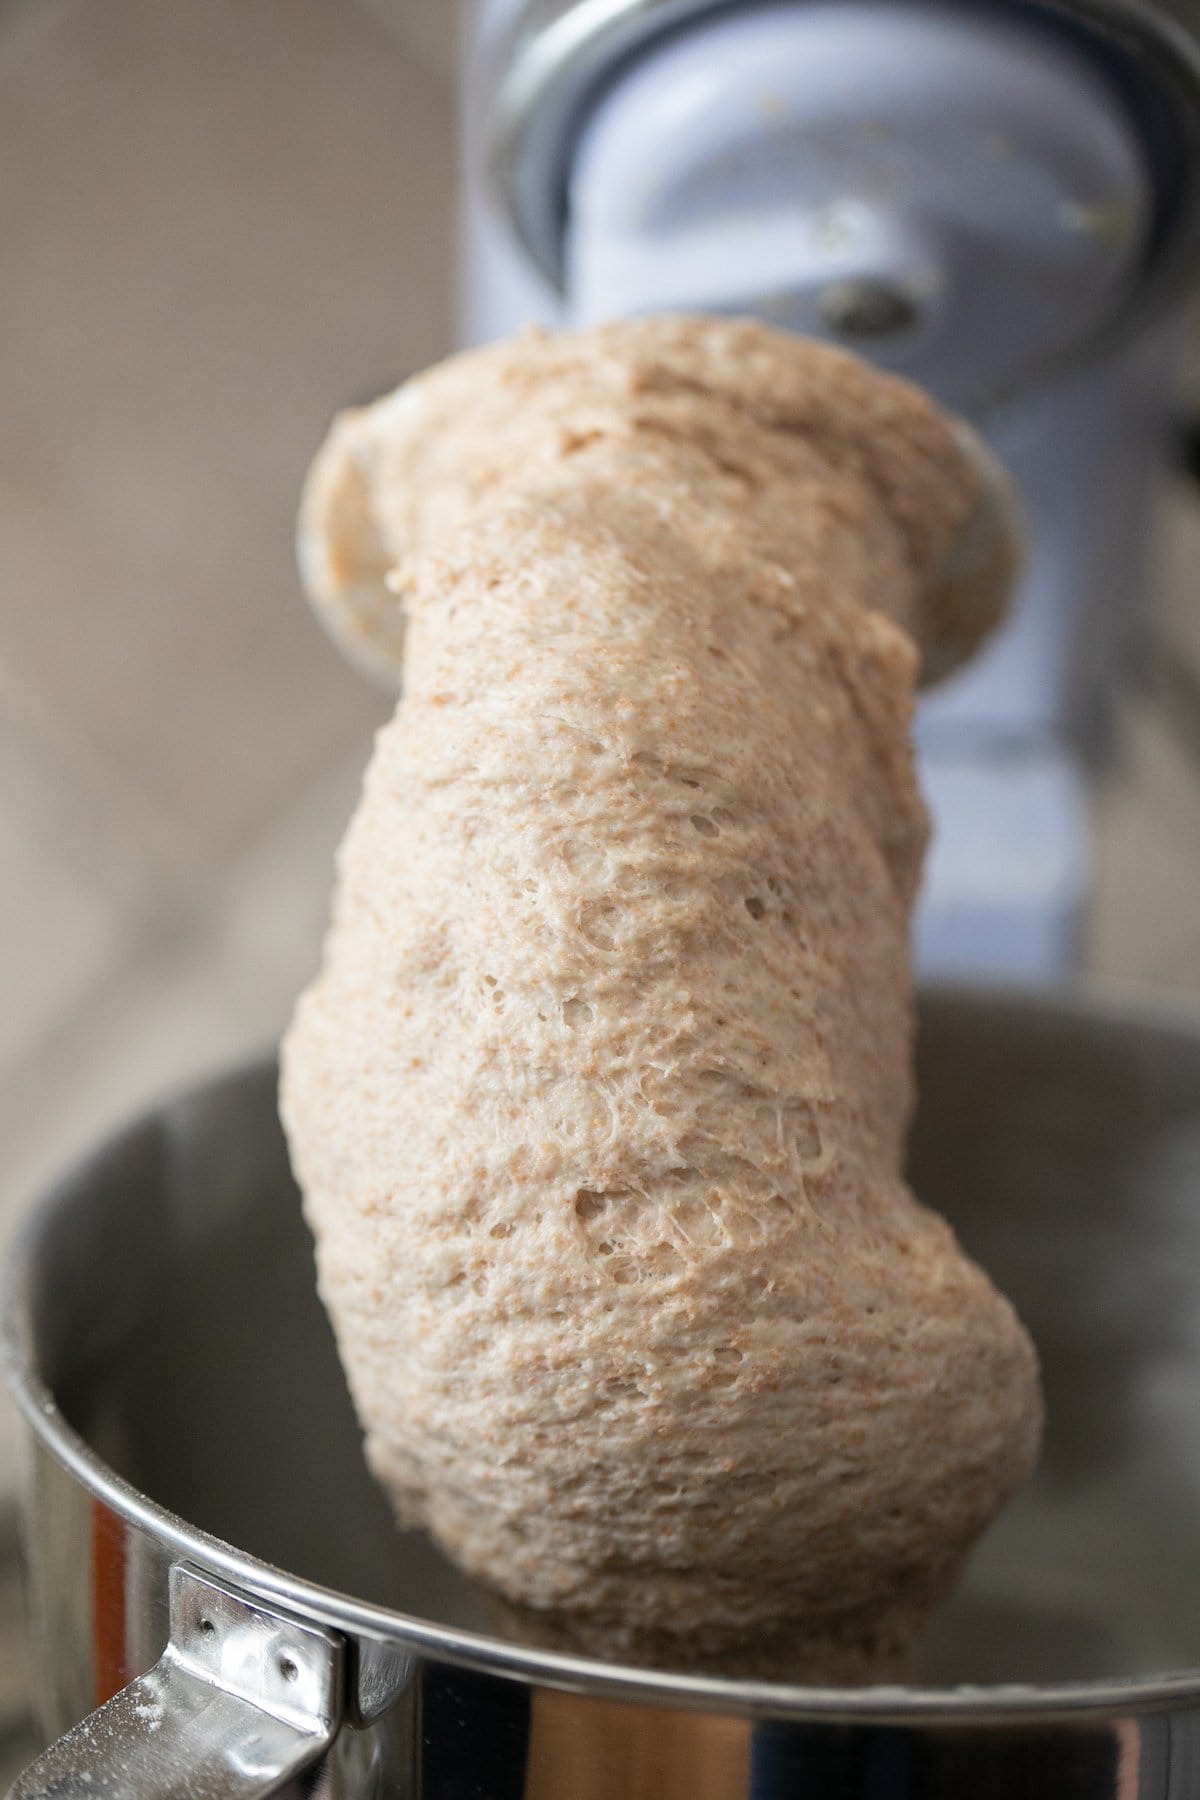
- I recommend kneading by hand because you are much less likely to over-knead and add too much flour. If you are using a stand mixer, you’ll have to watch it carefully to ensure you get the right texture. You’re looking for a slightly tacky, smooth dough that doesn’t stick to your hands.

How to Make Whole Wheat Bread
For full details on how to make Whole Wheat Bread, see the recipe card down below 🙂
Step 1: Proof Yeast
In a liquid measuring cup, stir warm water together with yeast and honey. Set aside 10 minutes to proof and bubble up.
Step 2: Make Dough + Knead
In a large bowl, add 3 cups all-purpose flour, 1 cup of whole wheat flour, sugar, salt, and melted butter. Stir together gently. Create a well in the middle and pour in the yeast mixture.
Start mixing using a large spoon until a dough forms. Switch to kneading with your hands, sprinkling whole wheat flour into the dough until it is smooth and slightly sticky. It should feel tacky, but not stick to your hands. This process should take about 6 minutes. DO NOT pour the entire amount of whole wheat flour onto the dough and try to knead it in. YOU WILL get a tough, dry dough. Just go little by little to get the texture you’re looking for.
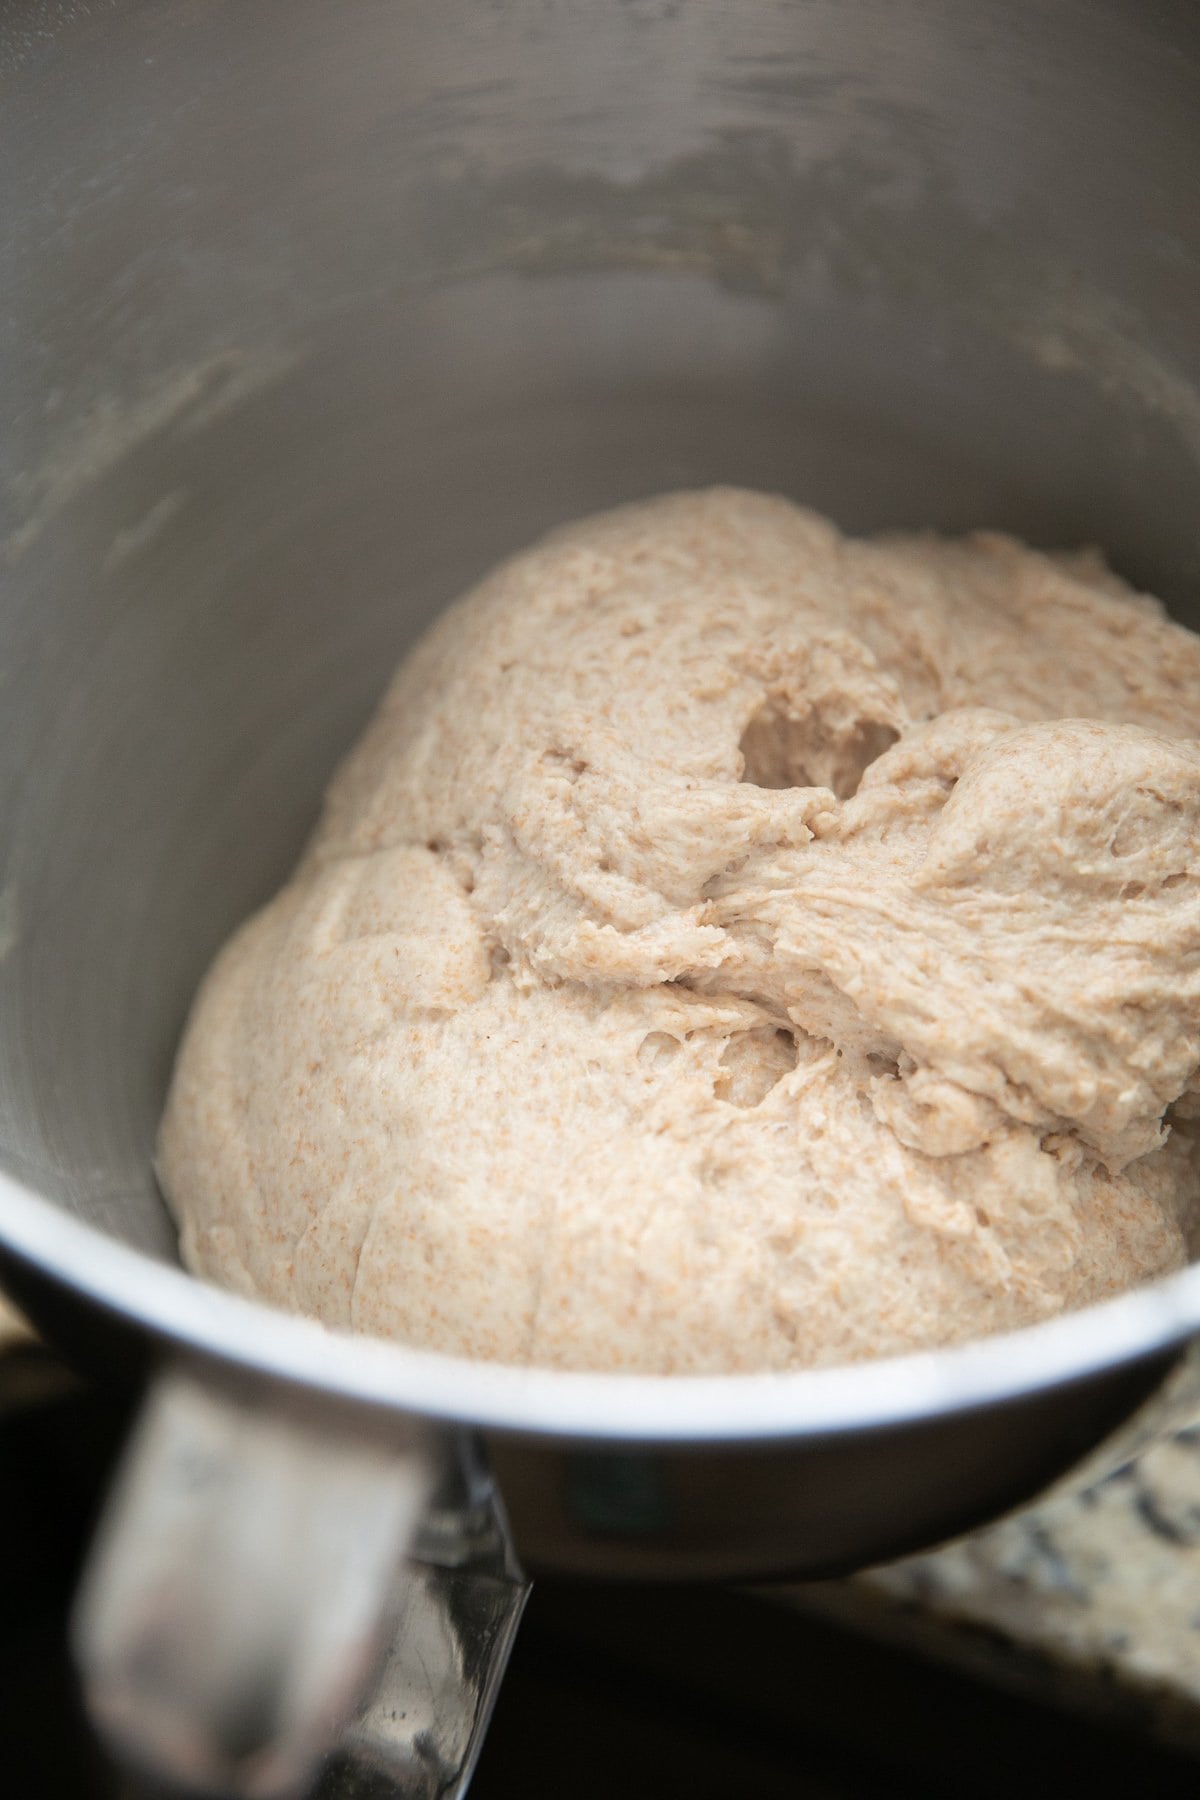
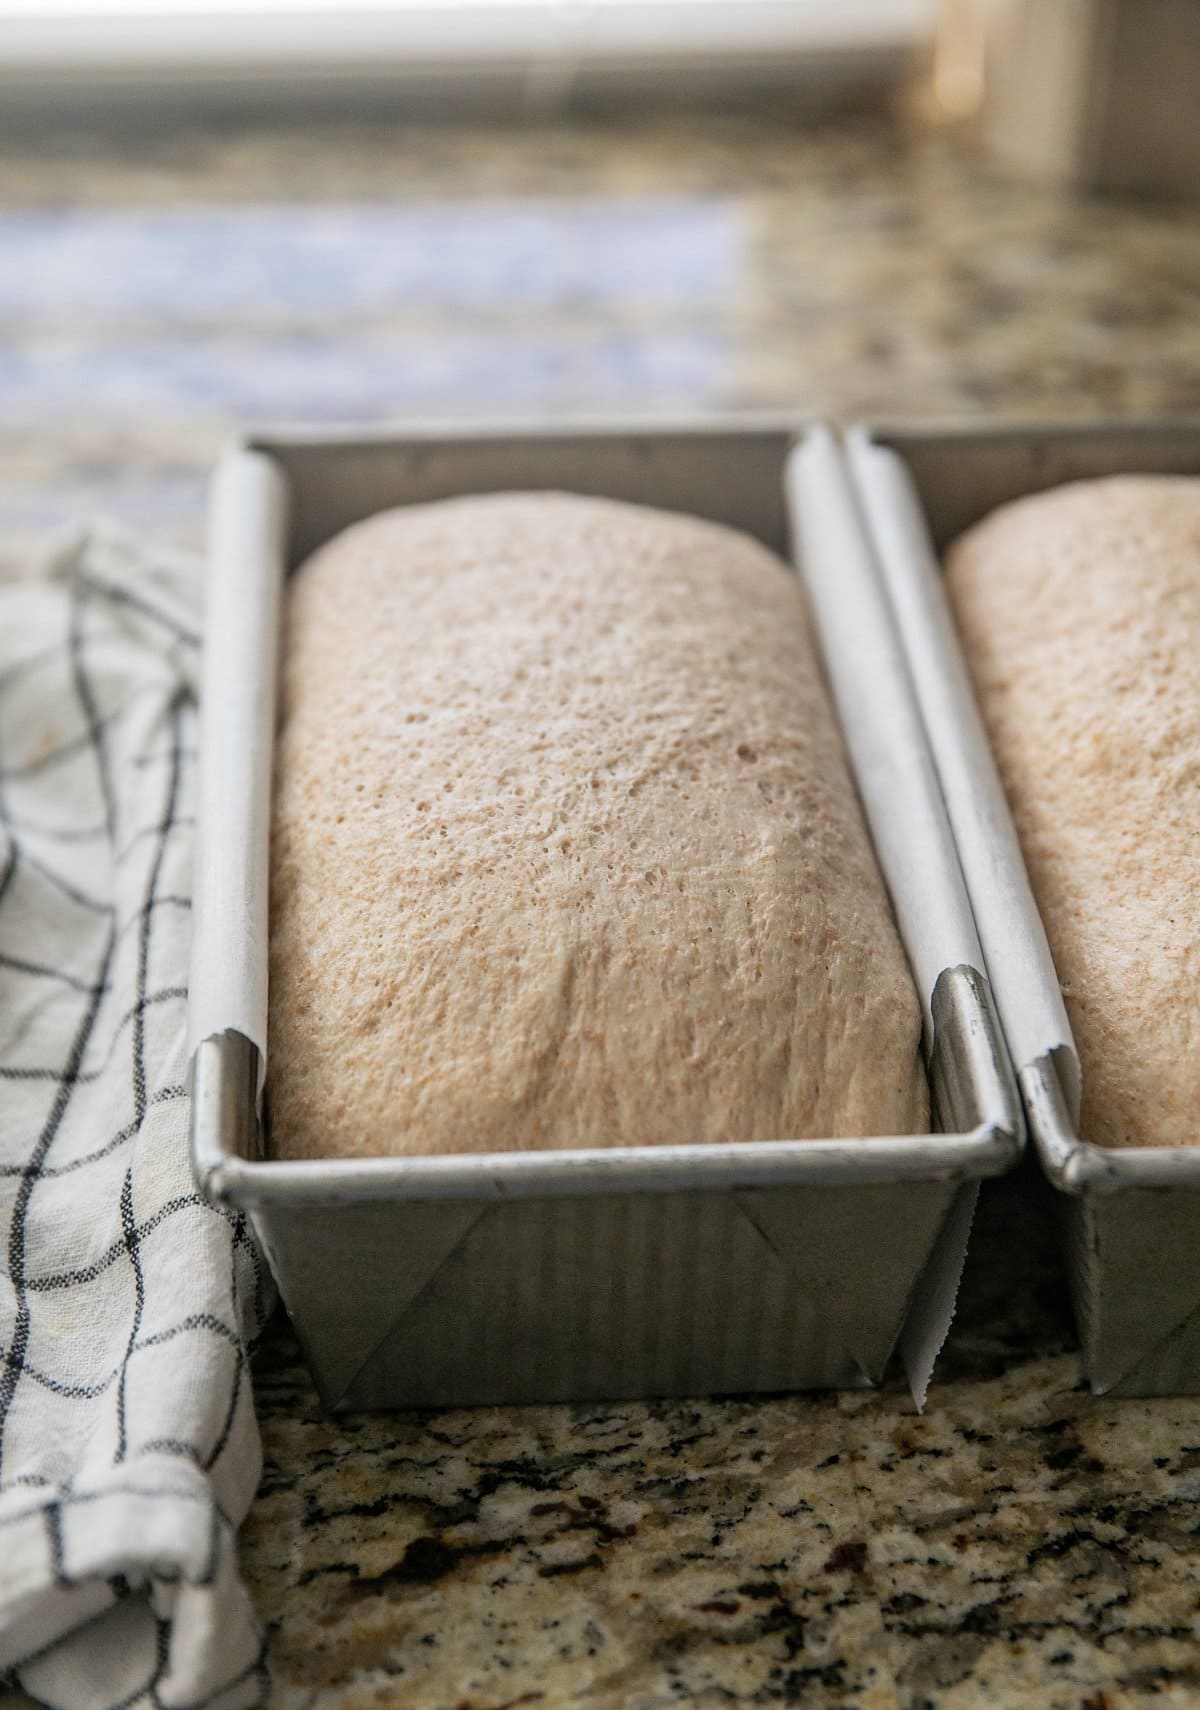
Step 3: Rise, Divide + Rise
Place dough into a well-greased bowl and roll around to coat. Cover gently with a clean kitchen towel and rise 1 hour or until doubled in size.
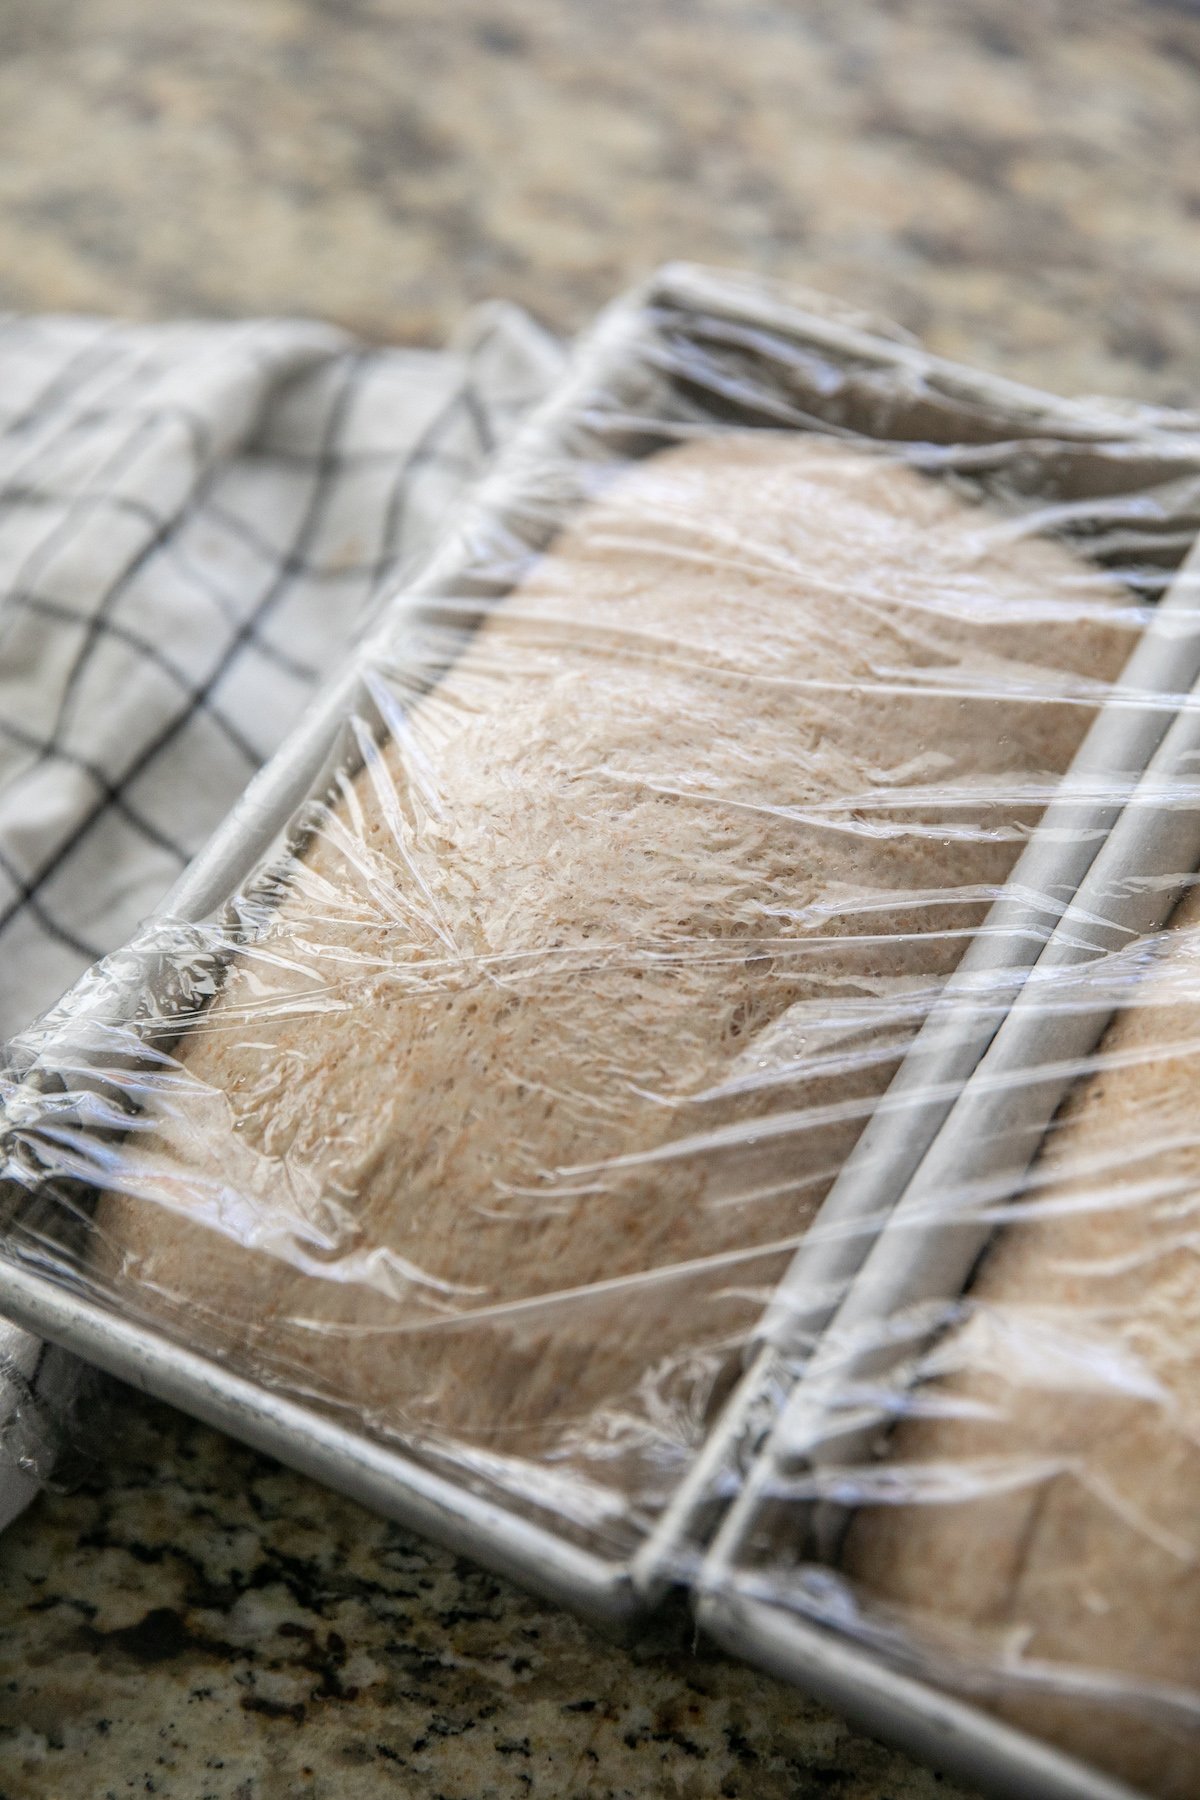
Remove dough from bowl and divide into two even amounts. Gently press into two rectangles the width of your loaf pans. Roll up to form a log and place it into each greased loaf pan. Cover and rise again for about 45 minutes or until doubled in size.
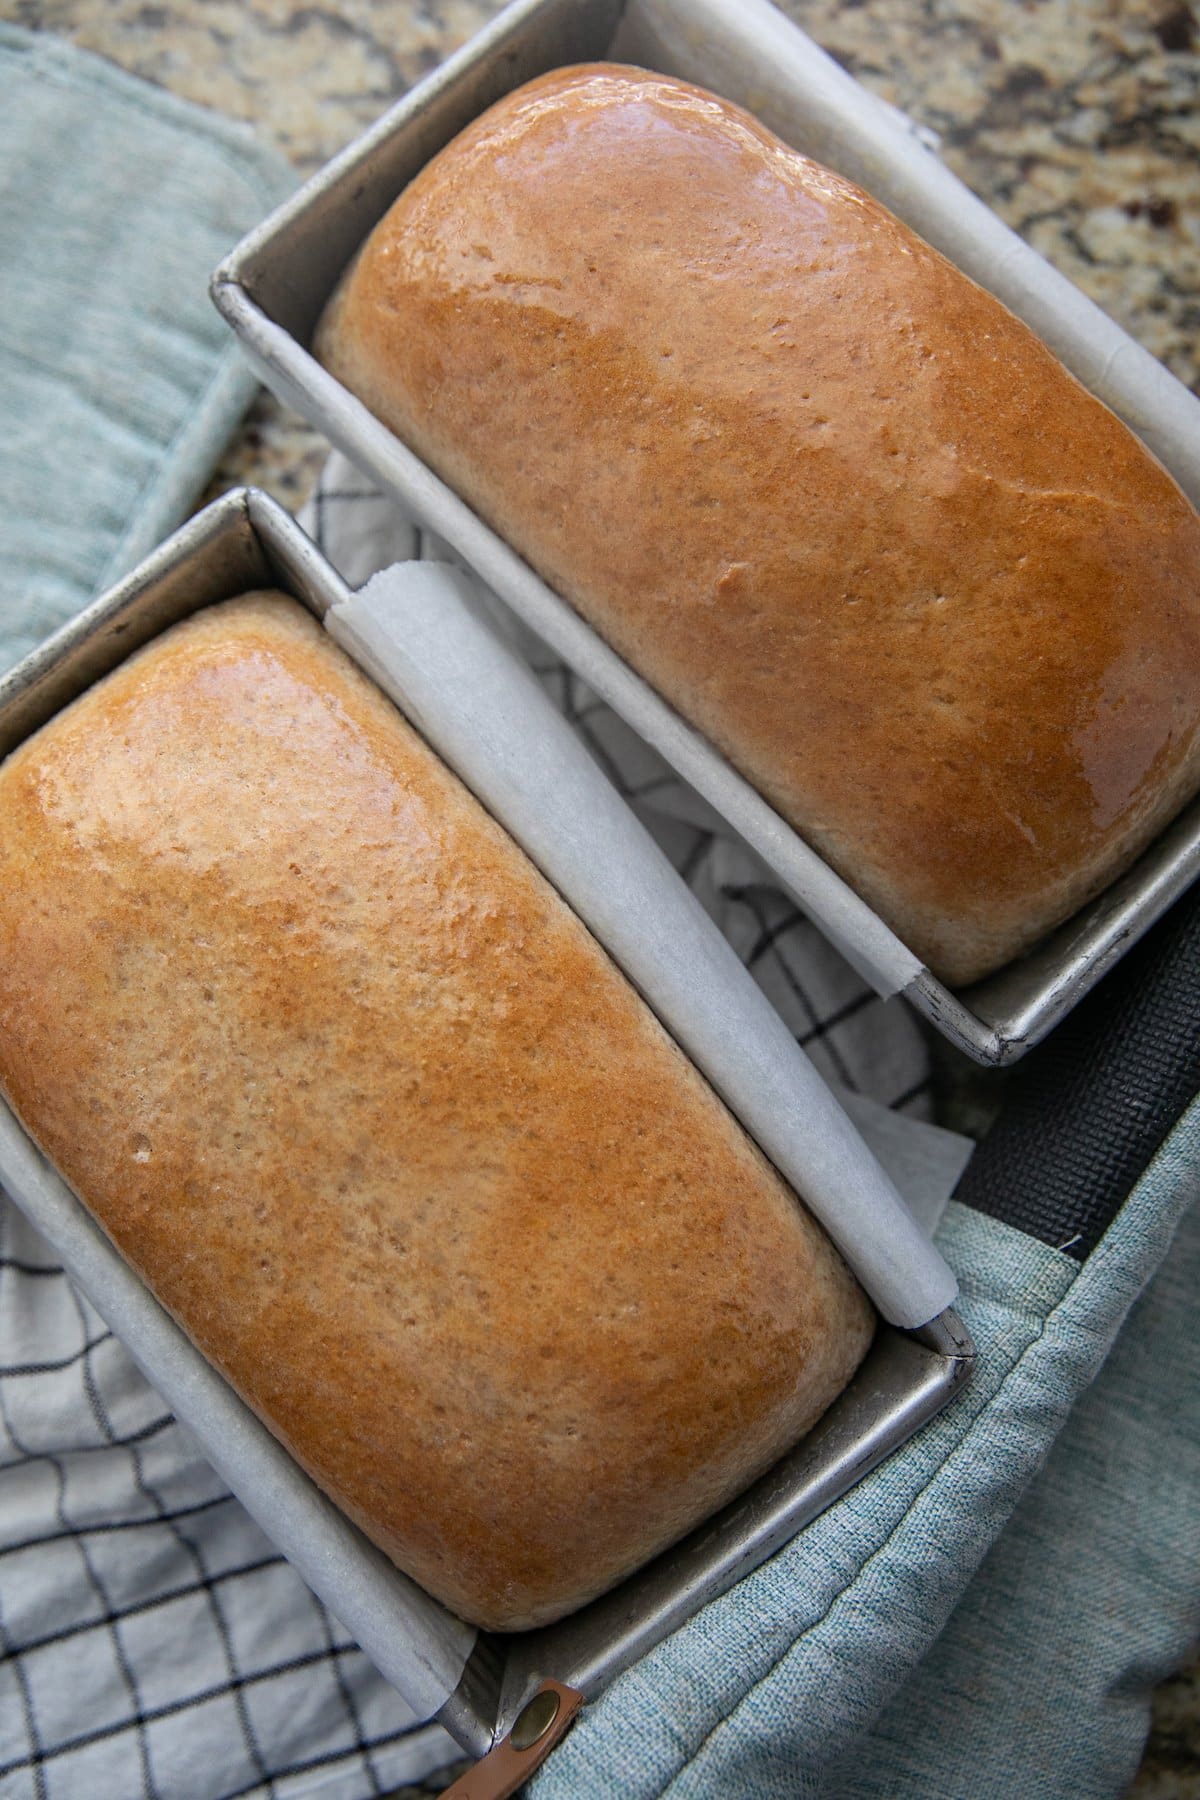
Step 4: Bake + Cool
After about 30 minutes or rising, preheat the oven to 350 degrees.
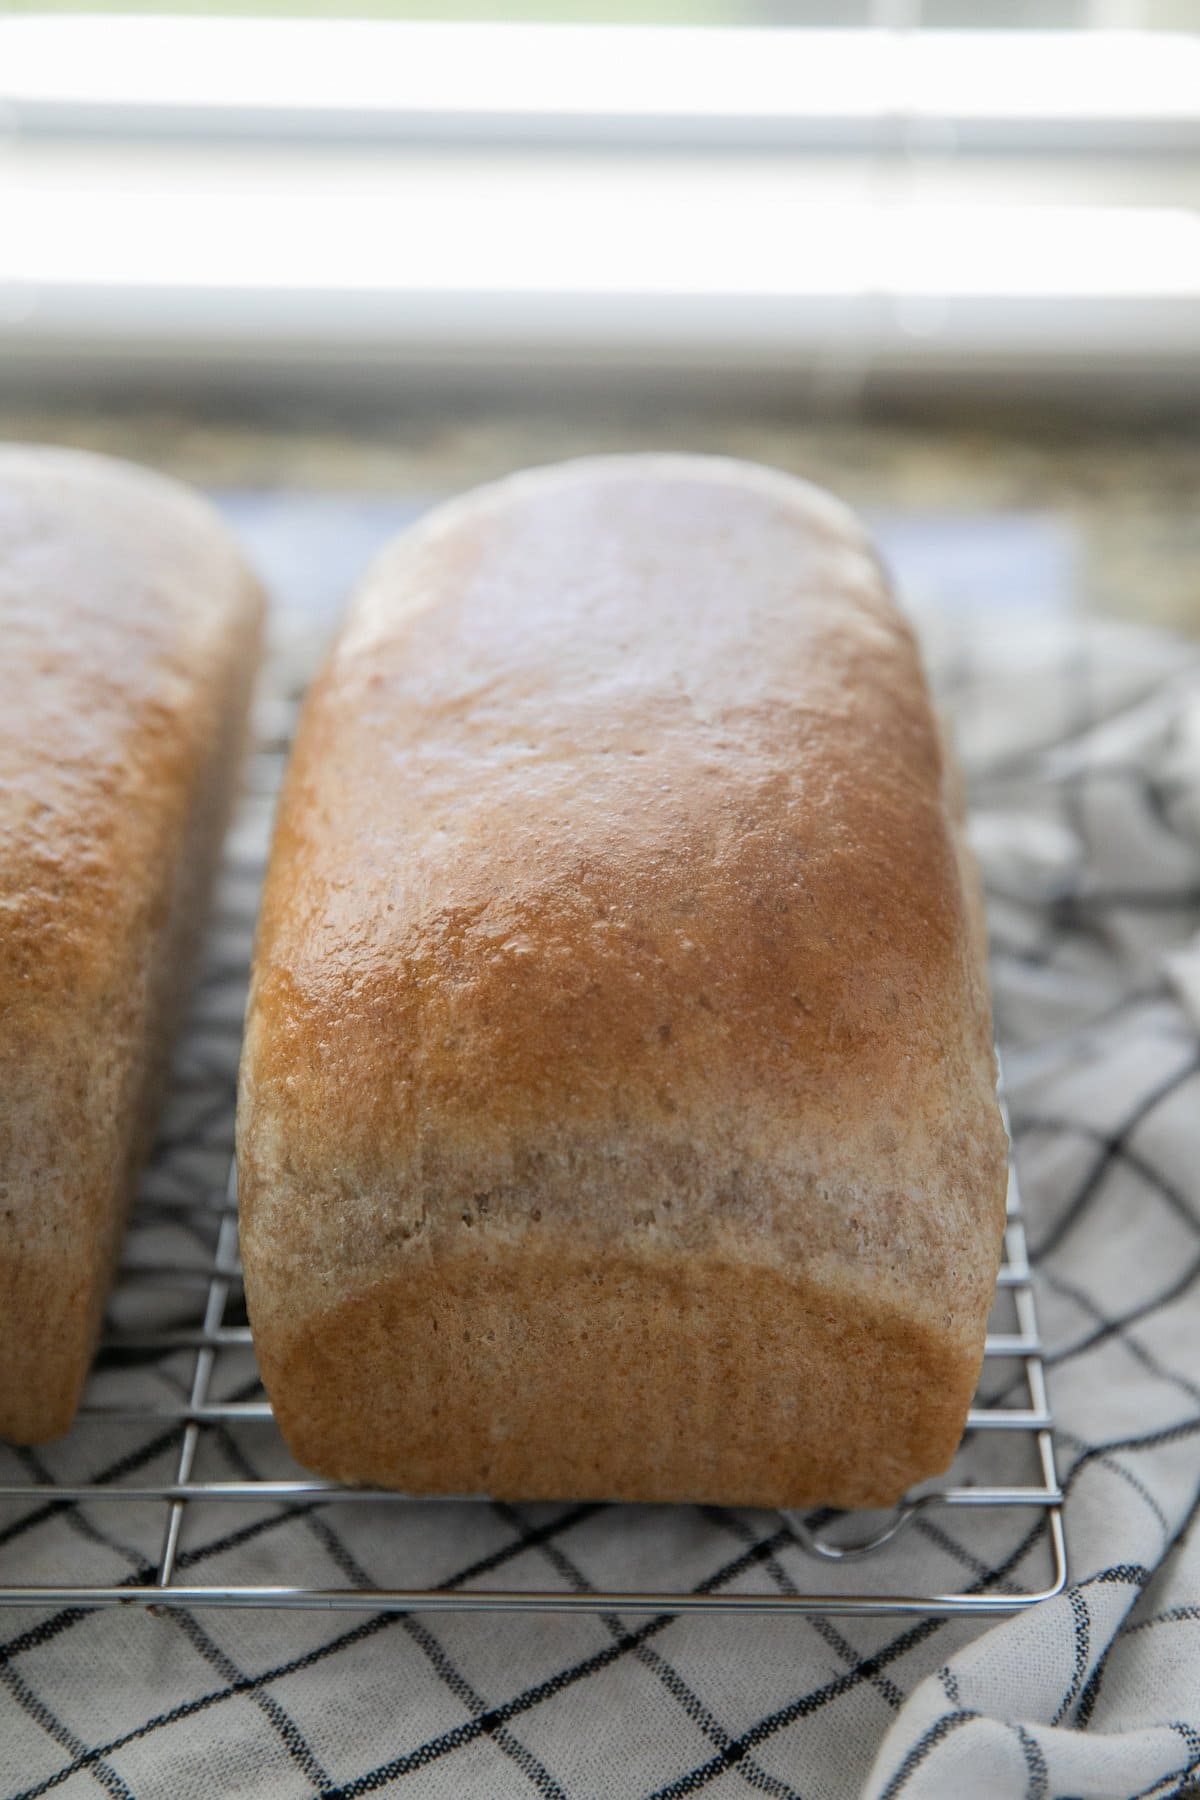
Bake loaves for 30-40 minutes or until completely cooked through. Try to not overbake! Cool 20 minutes in pans before removing to cooling racks. Cool completely before cutting into slices.
Optional step: when bread is removed from the oven and still hot, rub the tops with butter.
Storing Whole Wheat Bread
There are two main strategies for storing whole wheat bread, room temperature or in the fridge (both stored in airtight containers). However, there are a couple of things to consider before you decide how to store your loaves. Room temp shelf life is about 3 days while refrigerator shelf life is about 5 days. So you’ll notice mold growing a little sooner if you store it at room temperature. If you store it in the fridge though, you might find that your bread is drier. Choose accordingly depending on your family’s needs. You could also share a loaf with a neighbor or friend if you can only handle one.
Freezing Instructions
Luckily for you, you also have the option of freezing your whole wheat bread! You can do this either after it’s baked or before. Here’s how to do both:
Baked
To freeze this bread after baking, make the recipe in its entirety. After the loaves have cooled completely, place them into an airtight container or bag and freeze. It Will last in the freezer for up to 3 months.
To defrost, simply transfer bread from the freezer to the fridge until it’s fully defrosted. If you’re wanting to use this bread for sandwiches, I recommend cutting it into slices before freezing.
Unbaked
To freeze this bread before baking, make the recipe as listed. After the first rise, form into loaves, place into loaf pans (I’d recommend the disposable ones) and immediately cover well and freeze.
To bake, remove from the freezer, defrost and rise (should take 6-8 hours on the counter). Then bake according to recipe directions. The unbaked dough will last in the freezer for up to 4 months.
Loved this Whole Wheat Bread? Check out these other recipes:
My family loves this recipe, and so do I since it’s healthier for them!
The printable recipe card is down below, enjoy friends 🙂

Whole Wheat Bread
A simple Whole Wheat Bread recipe made with yeast and made easy with all of my tips and tricks! Perfect with butter, jams, honey, etc!
Ingredients
- 2 cups warm water
- .5 oz active dry yeast 2 packets
- 1/4 cup honey
- 3 cups all purpose flour unbleached
- 3 cups whole wheat flour you will need anywhere from 2 1/2 to 3 1/2 cups
- 1/4 cup granulated sugar
- 2 teaspoons salt
- 1/4 cup butter melted
Instructions
- In a liquid measuring cup, stir warm water together with yeast and honey. Set aside 10 minutes to proof and bubble up.
- In a large bowl, add 3 cups all purpose flour, 1 cup of whole wheat flour, sugar, salt and melted butter. Stir together gently. Create a well in the middle and pour in the yeast mixture.
- Start mixing using a large spoon until a dough forms. Switch to kneading with your hands, sprinkling whole wheat flour into the dough until it is smooth and slightly sticky. It should feel tacky, but not stick to your hands. This process should take about 6 minutes. DO NOT pour entire amount of whole wheat flour onto dough and try to knead it in. YOU WILL get a tough, dry dough. Just go little by little to get the texture you’re looking for.
- Place dough into a well greased bowl and roll around to coat. Cover gently with a clean kitchen towel and rise 1 hour or until doubled in size.
- Remove dough from bowl and divide into two even amounts. Gently press into two rectangles the width of your loaf pans. Roll up to form a log and place into each greased loaf pan. Cover and rise again for about 45 minutes or until doubled in size.
- After about 30 minutes or rising, preheat oven to 350 degrees.
- Bake loaves for 30-40 minutes or until completely cooked through. Try to not over bake!
- Optional step: when bread is removed from the oven and still hot, rub the tops with butter.
- Cool 20 minutes in pans before removing to cooling racks. Cool completely before cutting into slices. Store in airtight containers in the refrigerator to keep up to 4 days. OR place into the freezer.
Nutrition
Serving: 1sliceCalories: 146kcalCarbohydrates: 28gProtein: 4gFat: 2gSaturated Fat: 1gPolyunsaturated Fat: 0.3gMonounsaturated Fat: 1gTrans Fat: 0.1gCholesterol: 5mgSodium: 211mgPotassium: 79mgFiber: 2gSugar: 5gVitamin A: 60IUVitamin C: 0.02mgCalcium: 9mgIron: 1mg
Rate This RecipePlease consider Leaving a 5-Star Review!


Hi Katie, how many slices is your nutritional info based on?
Also, if I wanted to make the loaves a bit bigger, could I do this recipe ×1.5 for 2 loaves? So that they are big enough for my kids sandwiches?
Made this recipe and was planning on 2 loaves. Well I got 2 loaves but they were small. Temperature of dough was fine but just not what I expected. Any ideas? Taste is great.
so good and delicious did have to add alittle extra flours but oh my goodness delicious
Thank you so much Lee ann!
we love this recipe so good and delicious
When I added the yeast mix into the flours mix it was super runny and didn’t form much of a dough. During the kneading process mine was super sticky and I needed about 3 cups of flour during this process to get it to a dough ball and not sticky. I also used King Arthur Unbleached All Purpose Flour. All in all it turned out so good and will definitely be making this again. We ate one loaf right away and froze the other for another time. Thank you for a great recipe.
I’ve never made homemade bread before but I tried this recipe and I’m in love with it! So easy and so good! My whole family loves it!
Tried this recipe mainly because I had extra wheat flour and I AM SO HAPPY I DID. It turned out perfect-was easy to follow your directions-Im making it again today!! Thank you so much❤️
Does anyone have a clue what size loaf pans are used for this recipe?? I see where someone else asked but was never answered. A couple of different questions were never answered!
Donna, any 1-loaf pan will work. Mine is 8 1/2″ x 4 1/2″ x 2 3/4″ high. Bakes 1 loaf.
https://rstyle.me/+cmMj0BMfklO9gB4pzQ3YjA
What size loaf pans are recommended for this recipe?
Lori, any 1-loaf pan will work. Mine is 8 1/2″ x 4 1/2″ x 2 3/4″ high. Bakes 1 loaf.
https://rstyle.me/+cmMj0BMfklO9gB4pzQ3YjA
Are the nutrition facts for both loaves combined, one loaf, or by the slice?
Sky, per slice.
This recipe doesn’t make 2 loaves unless you want half size. I have made it twice now with same results. I will need to use 3/4 of the raised dough in one pan to even get close to a sandwich slice. It raises great in the bowl but not when you half the dough for the two pans.
can all purpose flower be replaced with bread flour in this recipe?
You can, or try this recipe: https://laurenslatest.com/soft-white-sandwich-bread/
Oh my goodness!! I had a happy accident with this recipe!! First of all, it went together beautifully. I put my lovely dough into a bowl to rise. Meanwhile, I set the oven on to heat up a bit to help it along— then the phone rang, and then I was asked to pop out to the grocery for an item. When I got home I smelled my bread!!!! I’d forgotten to turn the oven off! I was sure my dough would be ruined! But instead I got on large rustic loaf of wheat bread that tasted really great! Granted it was a nice dense loaf. Which I do like, still moist with a crusty outside. In short, even I couldn’t ruin this wheat bread recipe! Whew!
I was going to post a picture but I don’t see that option… it was a beauty!
I love this recipe. I like the sweetness of the bread! Great for so many things!
Best whole wheat bread recipe I’ve found so far! Quick, easy & delicious.
I make a double 50/50 ww & unbleached flour loaf recipe in my bread machine and remove it for final rising in loaf pans. I am going to try this recipe as mine does not have honey. Im sure it,will be good. I like that it can be made and frozen for later baking, Thank you for those ideas
I want to give this a try but i only have instant yeast. Would I still use the same amount?