You have 0 items in your cart
Easter Cake Pops
March 20, 2024
Leave a comment!
This post may contain affiliate links. View my privacy policy and disclosure policy for more details.
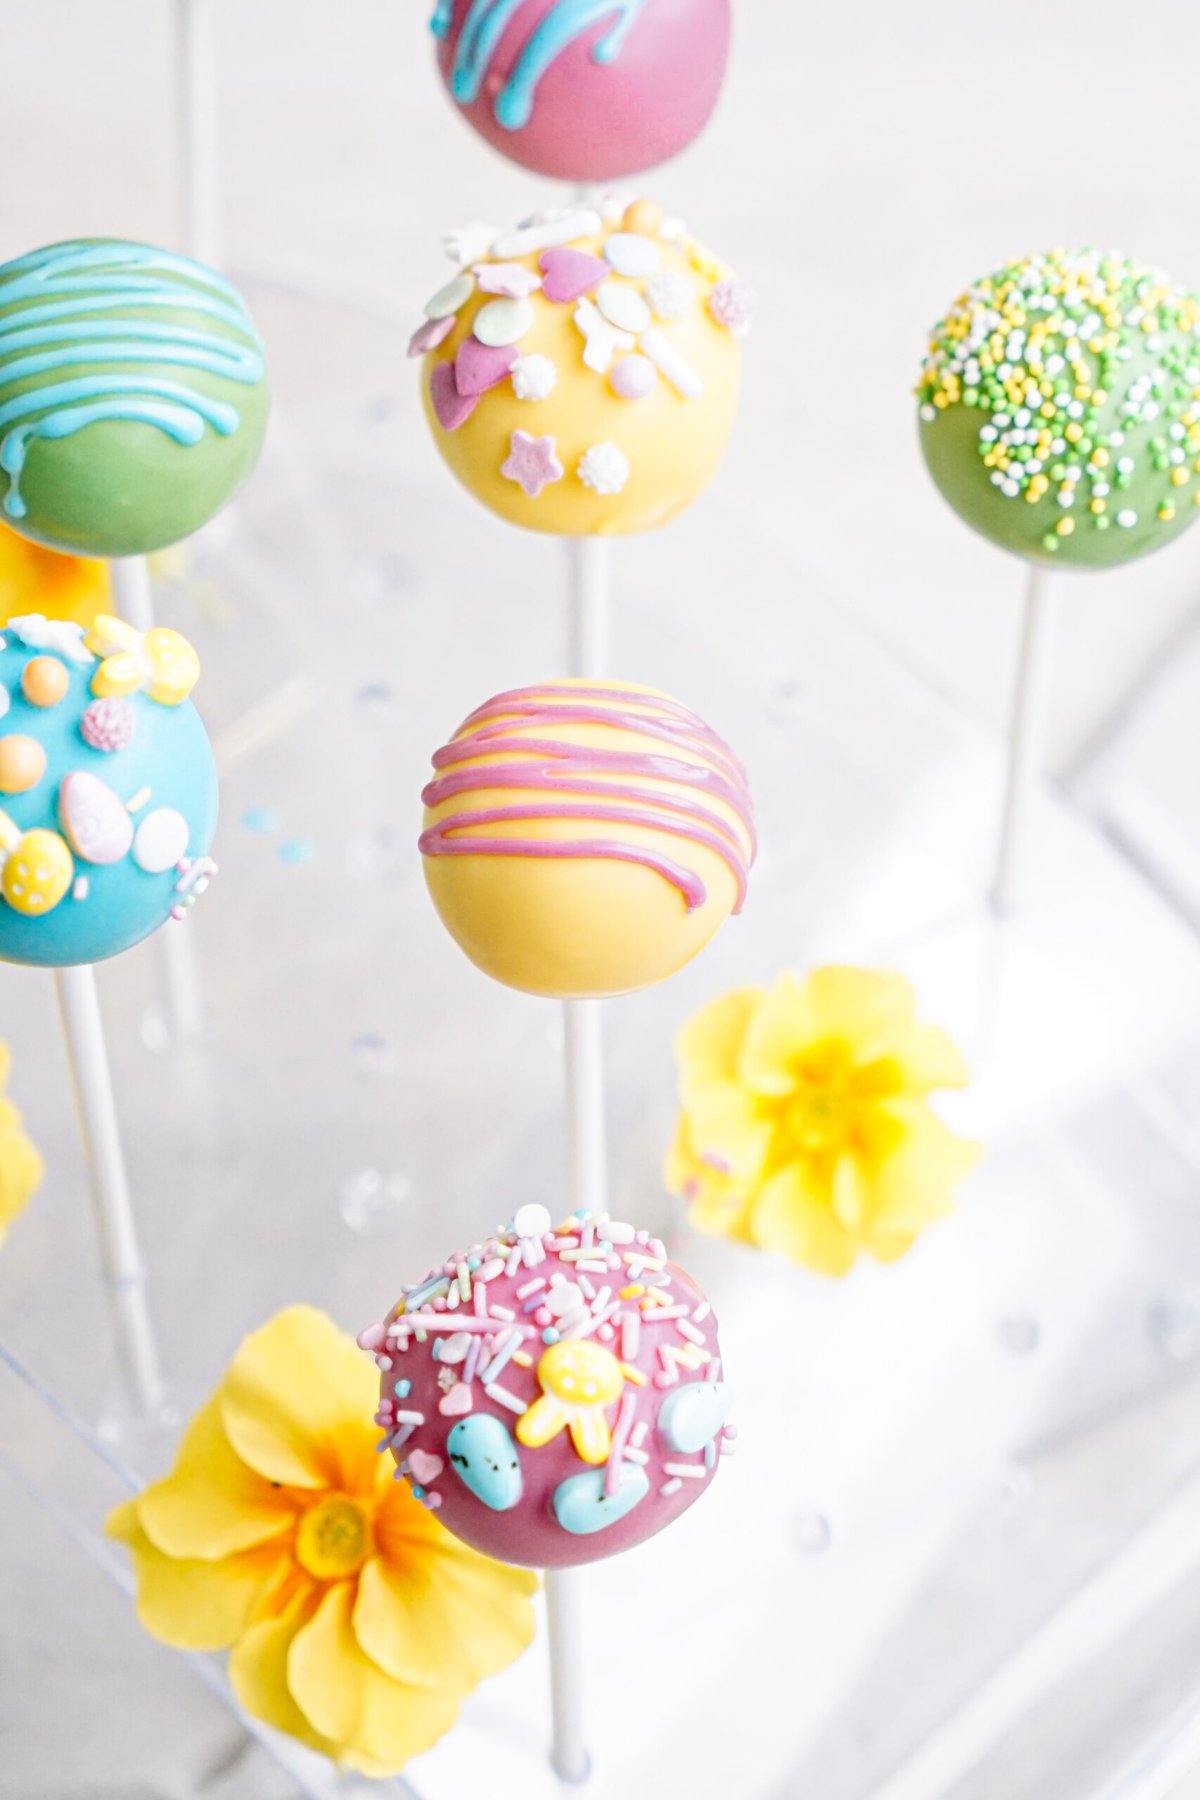
Looking for the perfect treat for your Easter celebration? Dive into these Easter Cake Pops! Whip up these delightful cake pops with a white cake mix, eggs, oil, and cream cheese frosting. Let your creativity run wild and decorate by dipping the cake pops into pastel chocolate candy coating and Easter sprinkles for a fun and festive touch.

Why You’ll Love These Easter Cake Pop Ideas
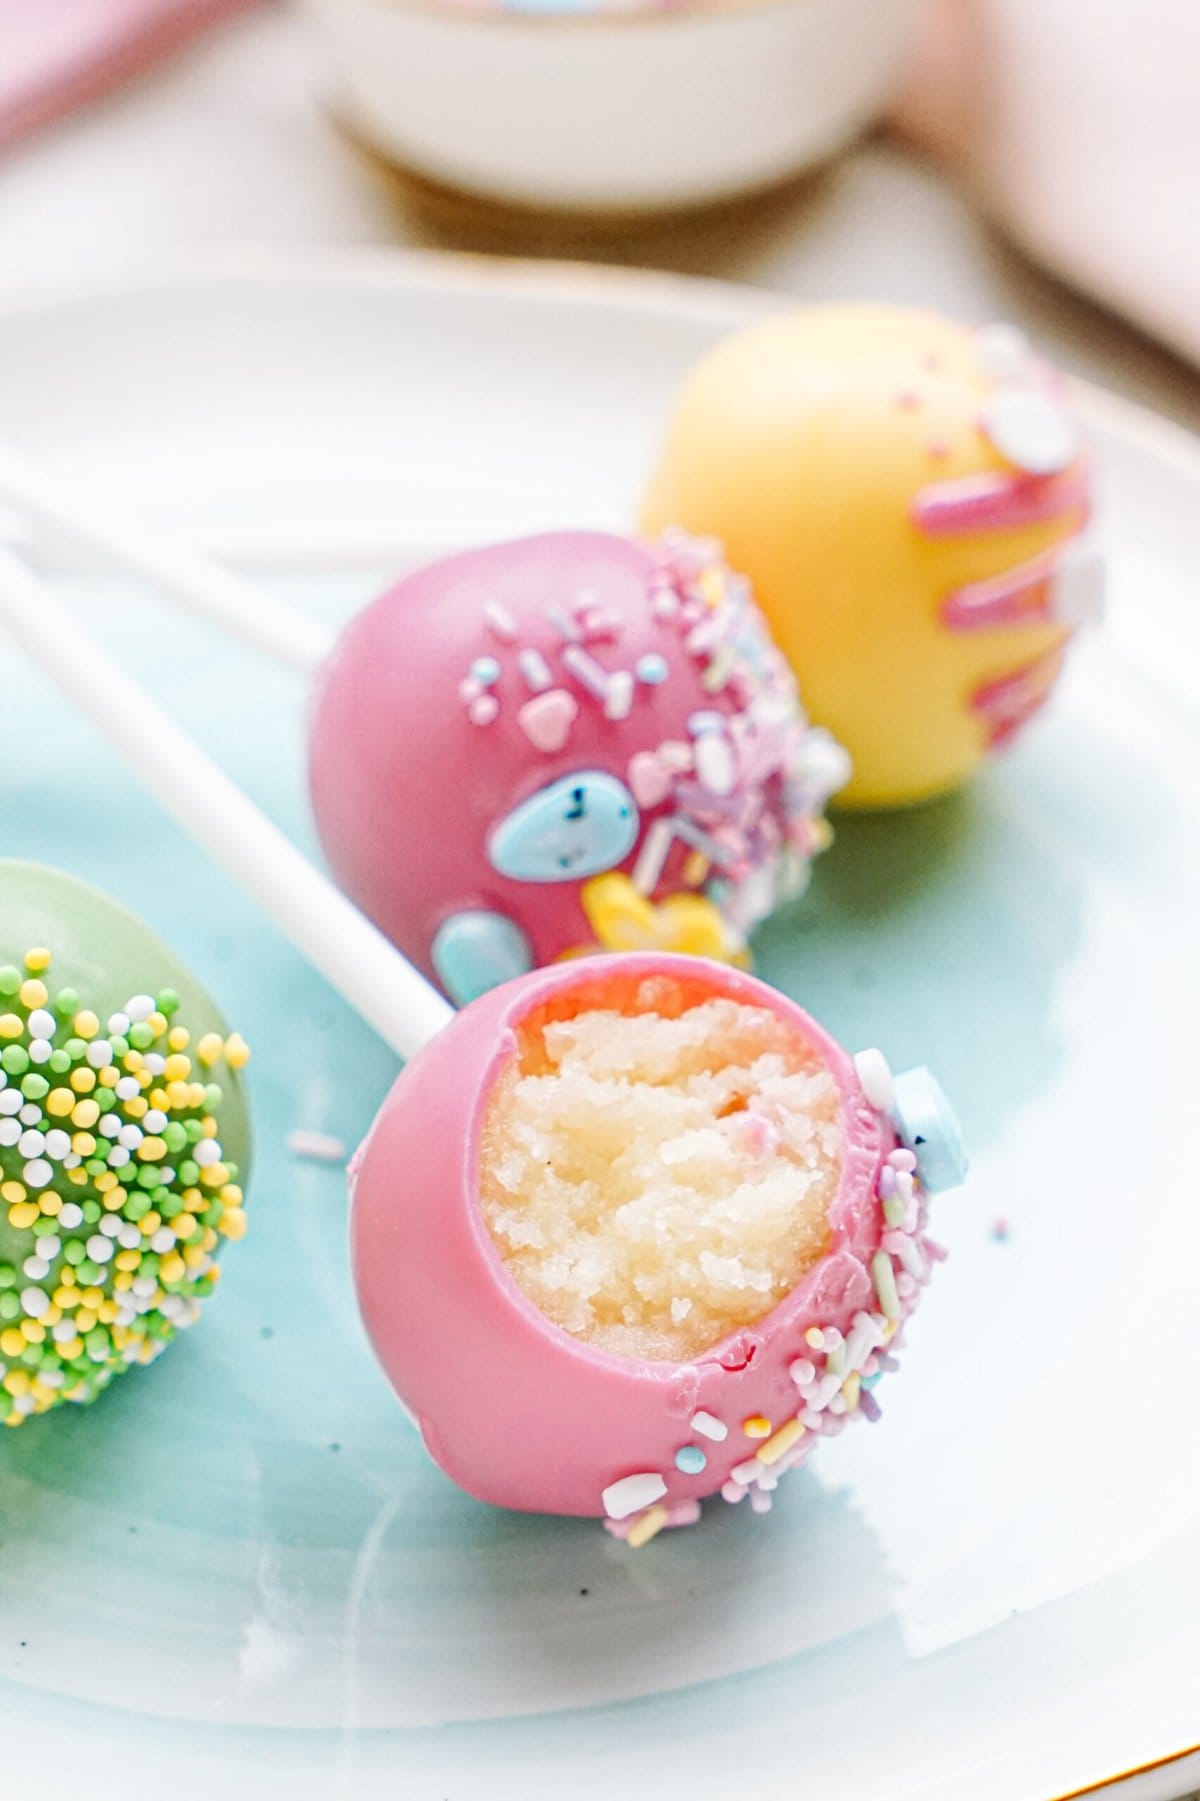
Easter is just around the corner, and what better way to celebrate than with some adorable Easter cake pops to adorn your Easter table spread?! These cake balls have an outer layer of hardened sweet chocolate coating with moist white cake and cream cheese frosting on the inside. These delightful cake pops are not only fun to make but also a hit with both kids and adults alike. Perfect for your Easter gatherings and adaptable to make for birthday parties or any occasion!
I make this as simple as possible by using a white boxed cake mix and my homemade cream cheese frosting. You can even take more help from the store and use a can of premade frosting if you’d like. Get your kids involved for a fun activity and decorate with different pastel colors of sprinkles, Easter jimmies or sanding sugar! These cute little cake pops take food on a stick to the next level!
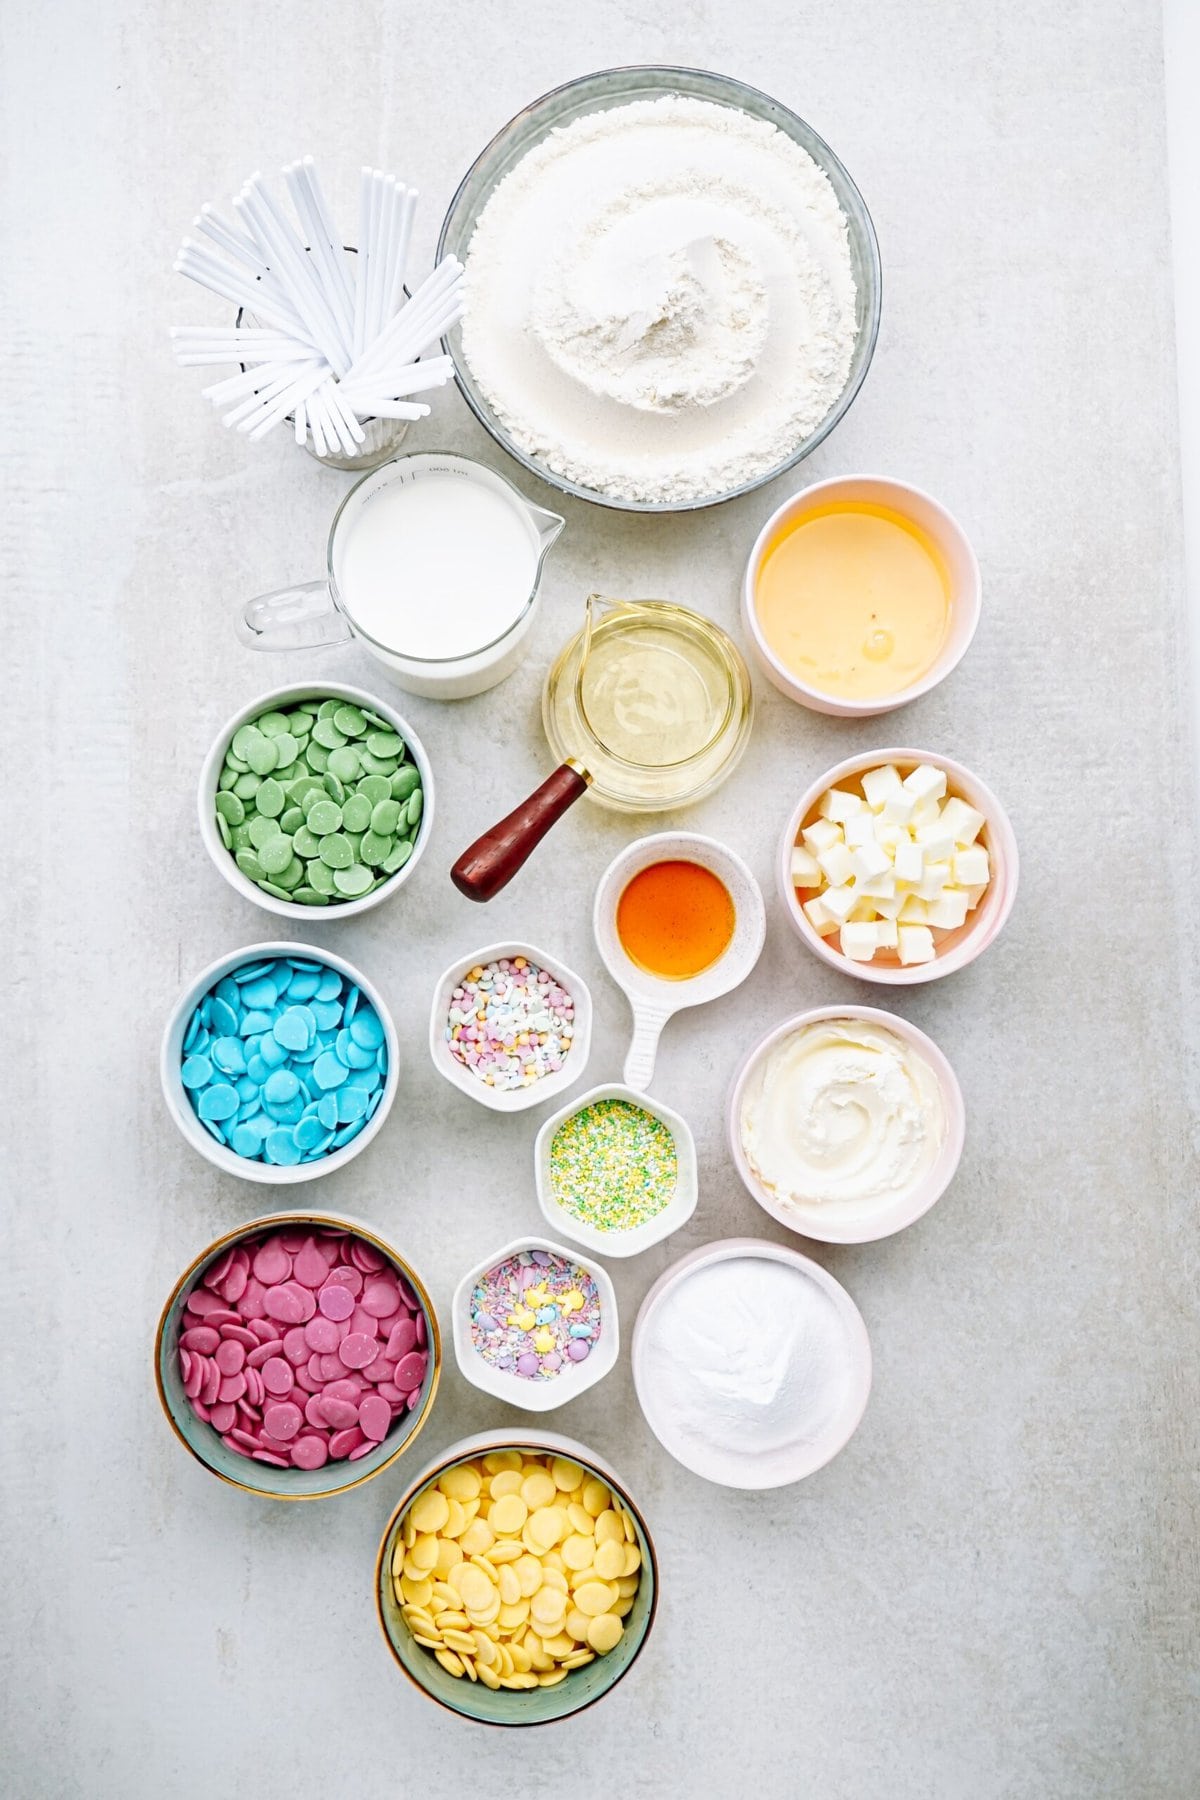
Ingredients Needed to Make Easter Cake Pops
- White Cake Mix: I used a box of Duncan Hines white cake mix. Feel free to use your favorite cake mix. If you want to make a cake from scratch, use my Homemade Vanilla Cake recipe.
- Eggs: Use room temperature eggs. See the directions on your cake mix for quantity.
- Cream Cheese Frosting: For that luscious, creamy filling. Store-bought or homemade is fine- I used my homemade Cream Cheese Frosting. A Vanilla Buttercream Frosting would also be good with cake pops.
- Easter Sprinkles: Optional, but they add a pop of color and fun.
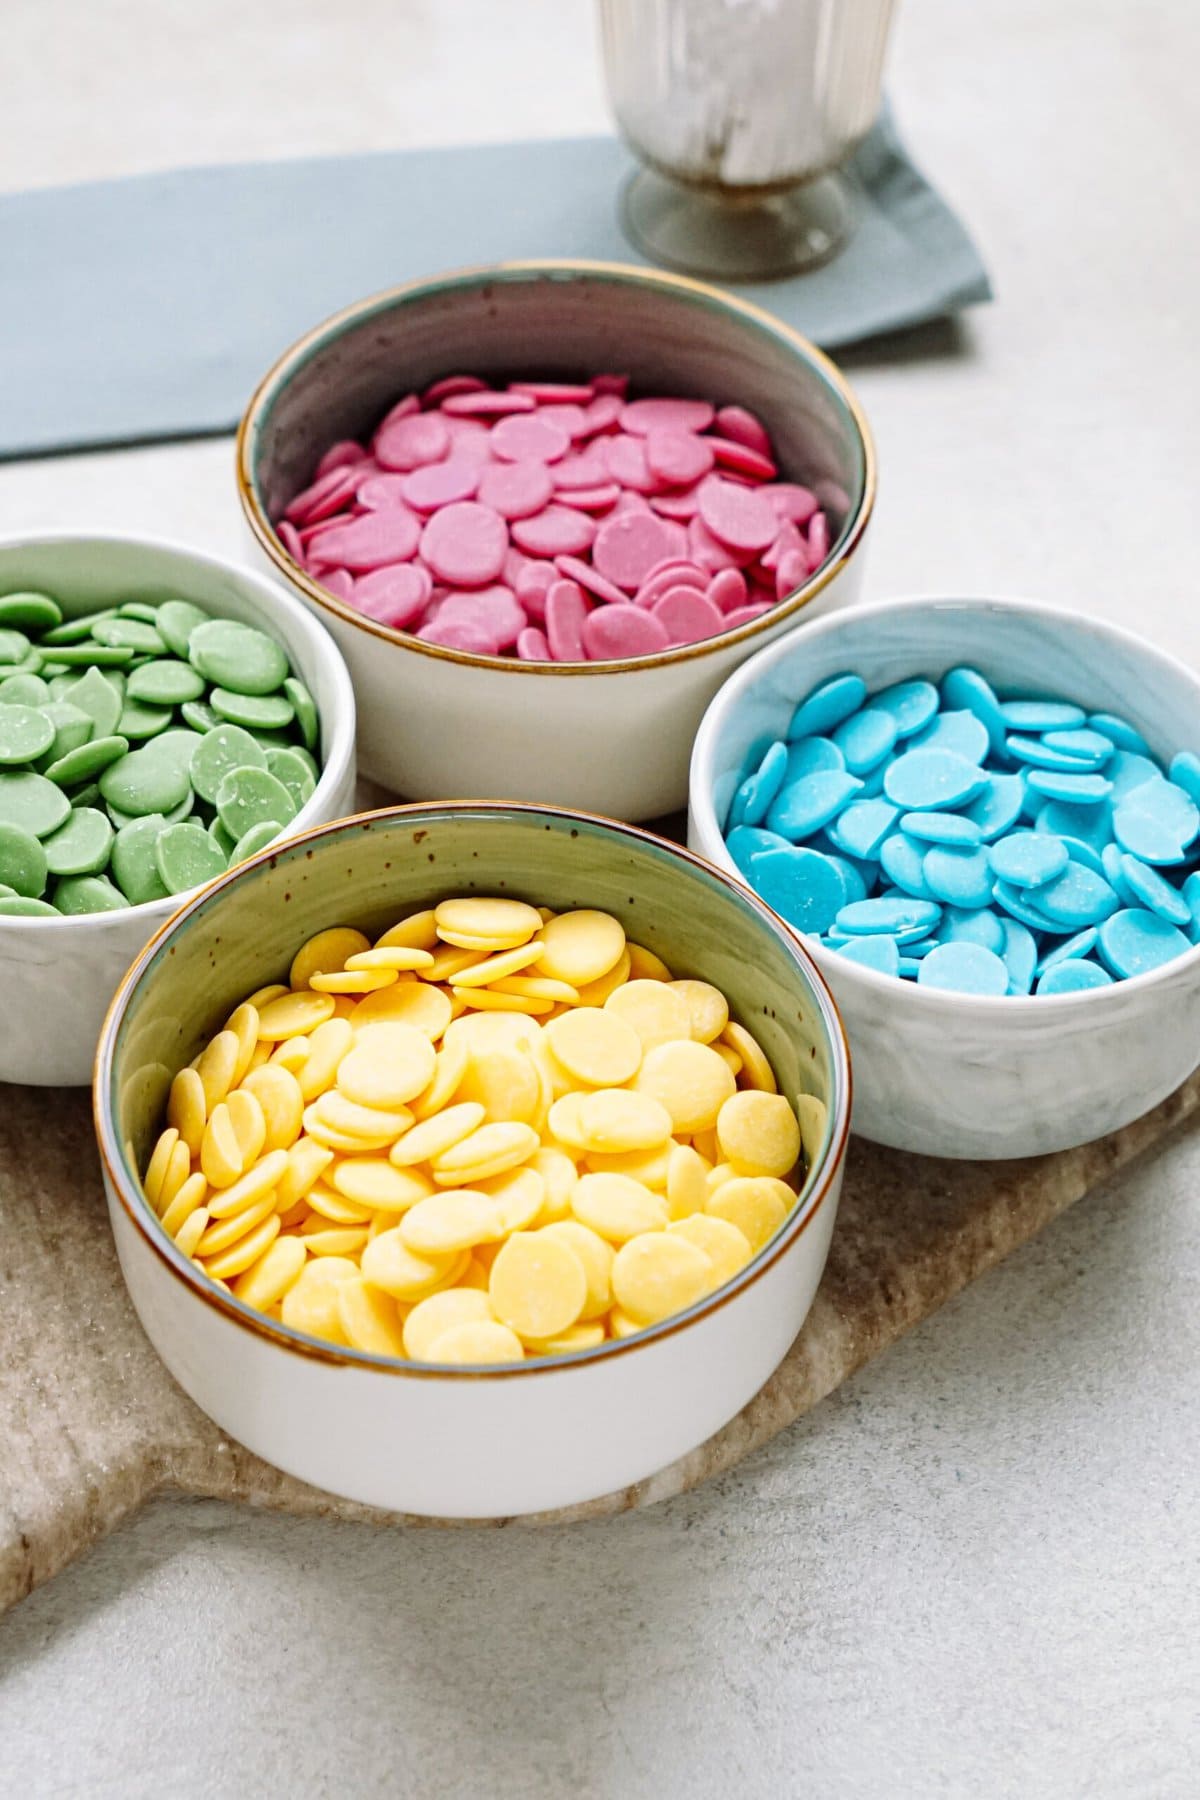
- Pastel Chocolate Melting Wafers: Pink, green, yellow, blue or white candy melts for that Easter egg vibe.
- Easter Sprinkles and Jimmies: For decorating the cake pops.
- Pantry Staples: vegetable oil, water
Equipment
- 40 cake pop sticks– you’ll need a 6″ lollipop stick to insert into each cake ball.
- cake pop holder– optional, but super helpful while your cake pops are drying.
Variations
- Use different cake mix flavors, like chocolate, lemon or vanilla cake mix for variety.
- Experiment with various frosting flavors like chocolate, strawberry or vanilla frosting.
- Try various colors and shapes of spring theme sprinkles or drizzle white chocolate over the top of the cake pops for decoration.
How to Make Easter Cake Pops
Not only are these ridiculously delicious (and slightly addicting) but they’re so pretty and so easy to make. For full recipe details, including ingredient measurements, see the printable recipe card down below. Here are step-by-step instructions for making and assembling cake pops for Easter.
1. Preheat Oven + Prep Pan
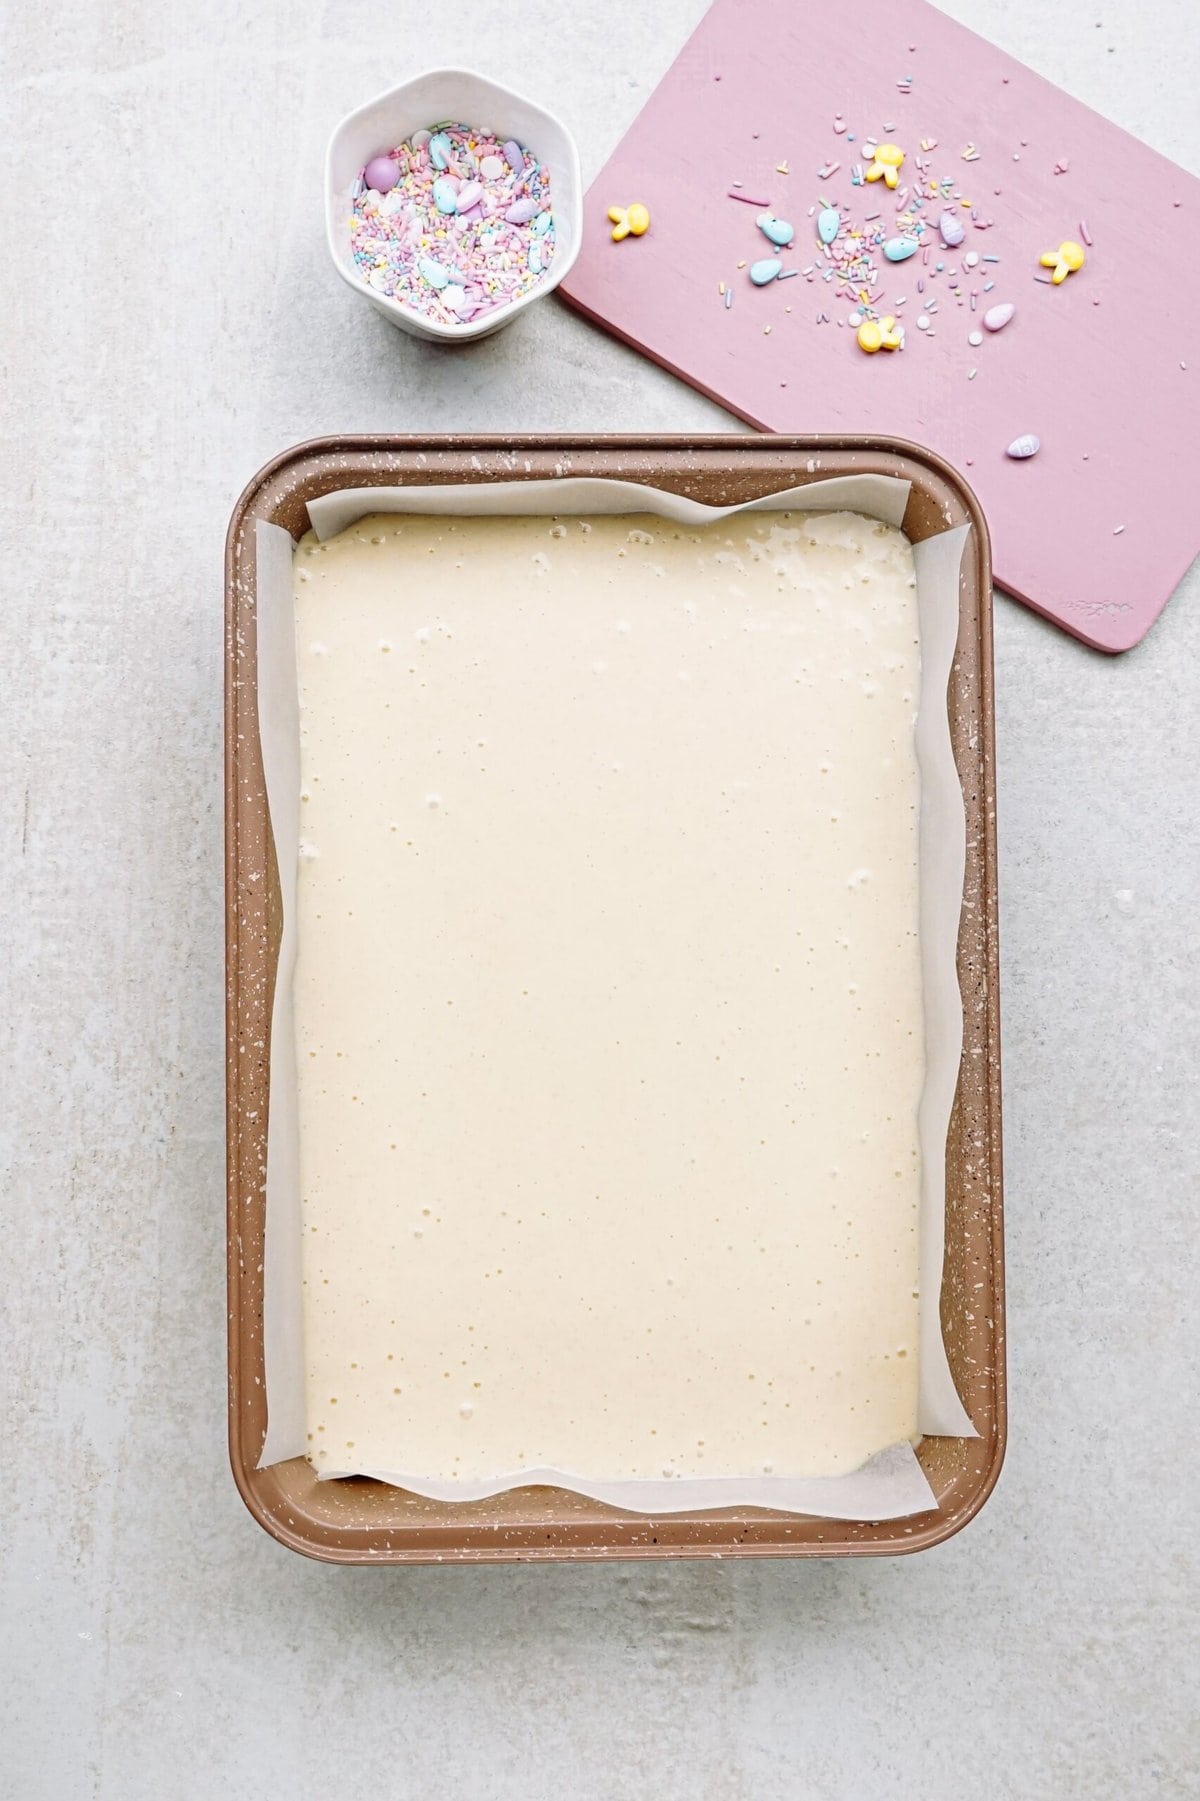
Preheat oven to 350° F (or whatever your cake mix requires). You’ll need a sheet pan or cookie sheet to place all the cake balls on and transfer to the freezer. Line the sheet pan with a piece of parchment paper or waxed paper. Set aside. Spray a 9×13 cake pan with non stick cooking spray. Set aside.
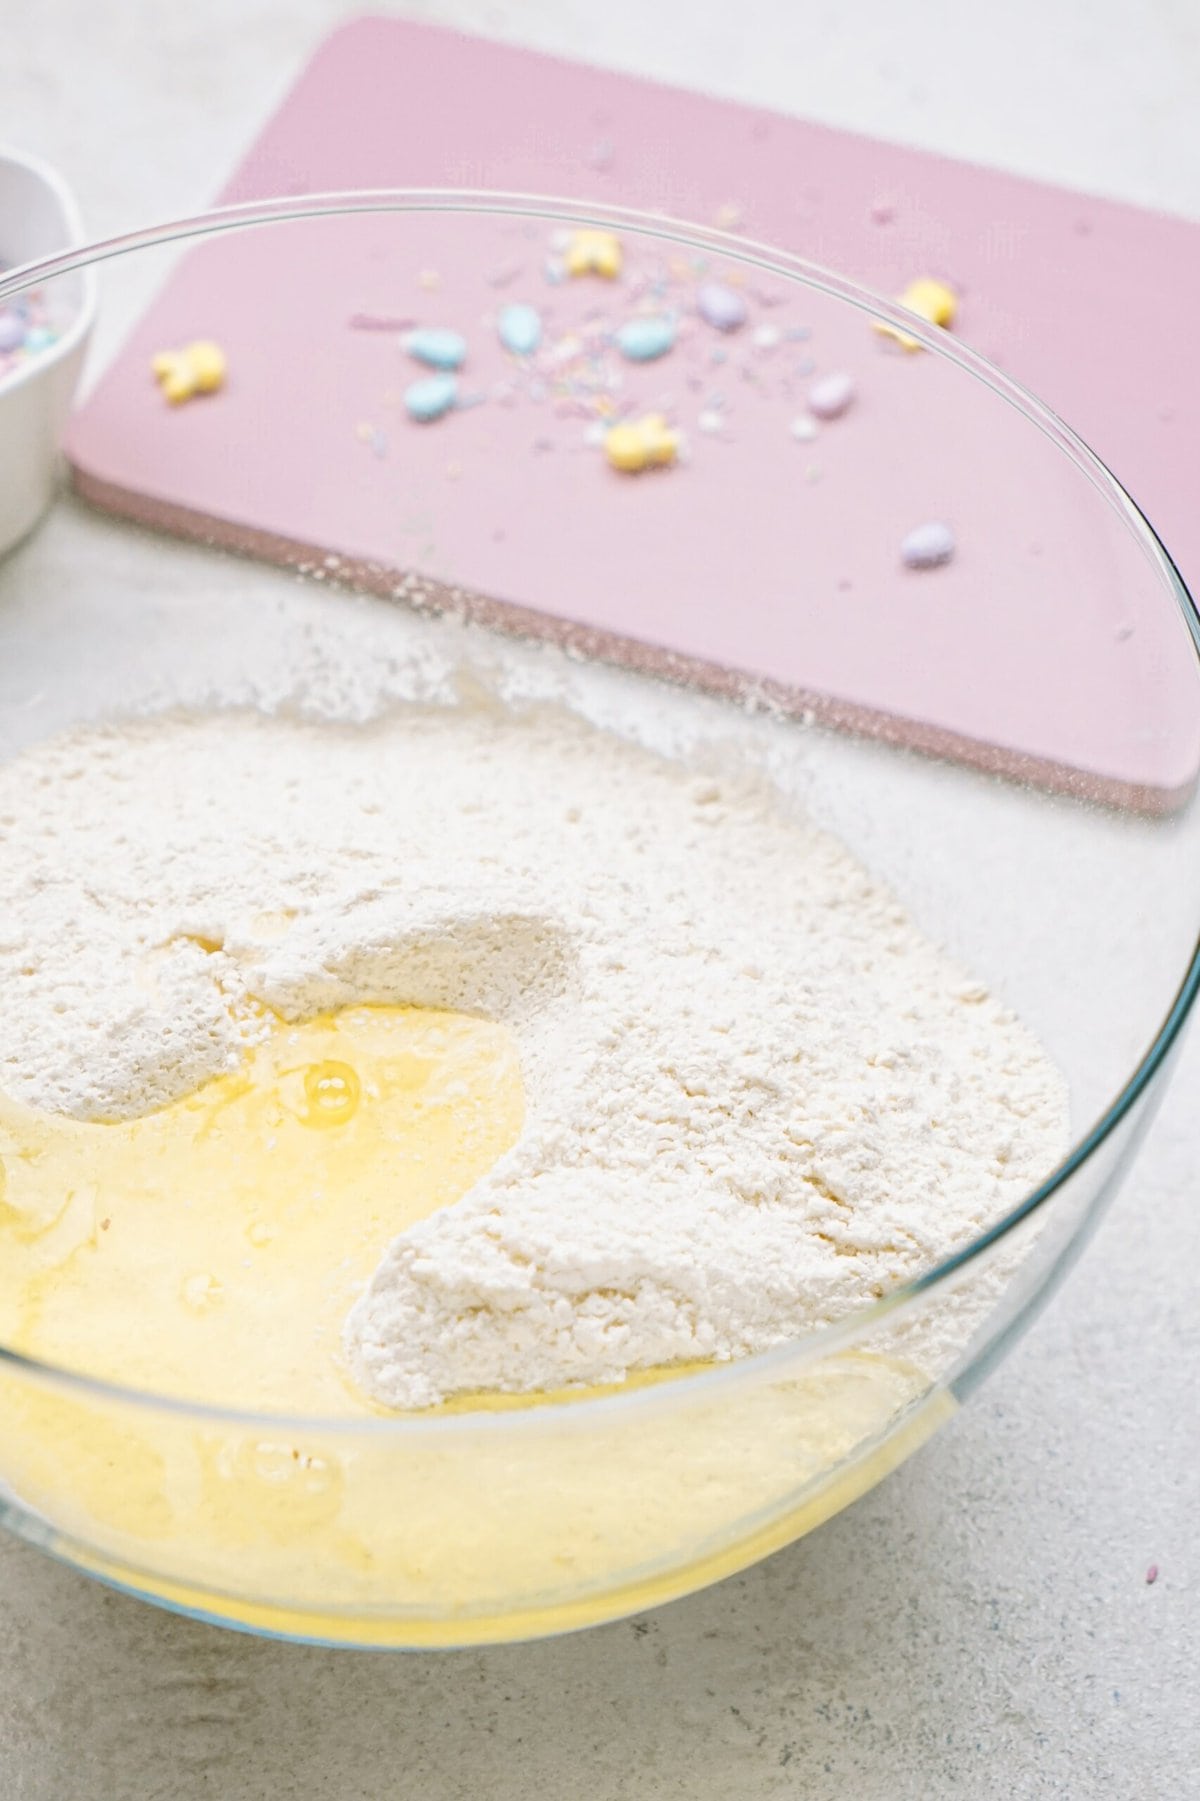
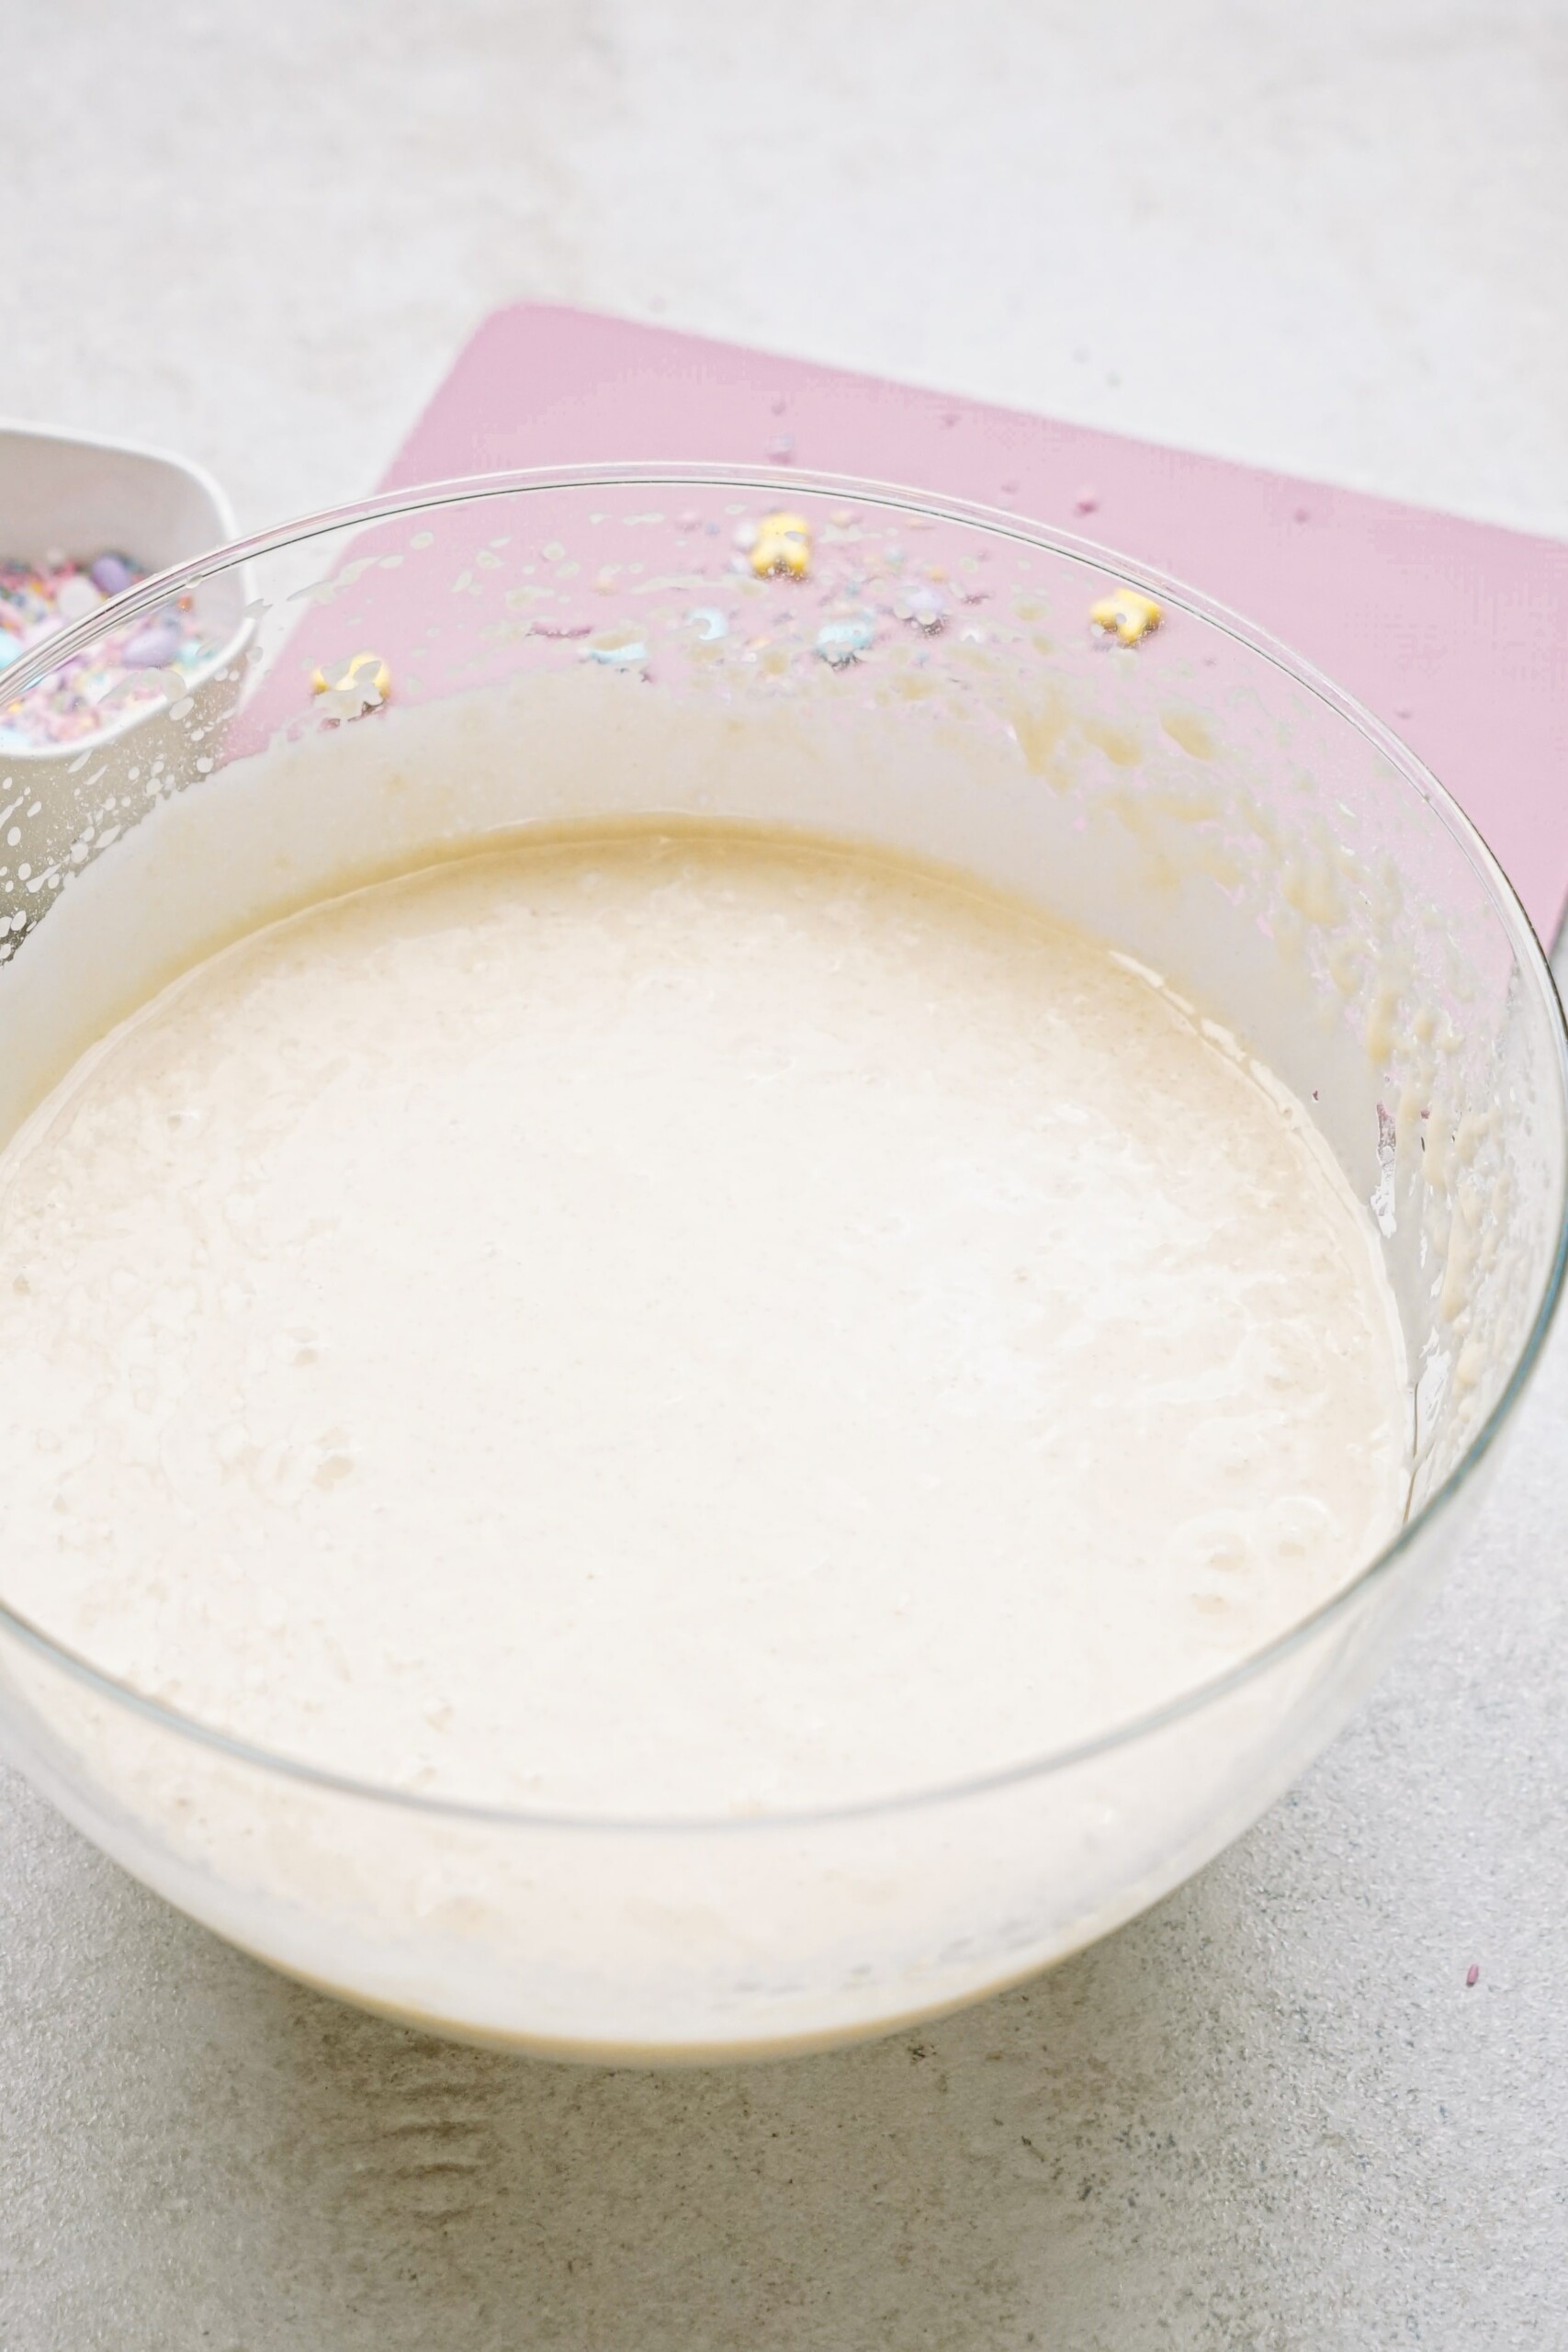
2. Make + Bake White Cake
In a large bowl, mix cake mix and other ingredients indicated on the box together. Then bake cake according to package directions. Allow to cool completely. Depending on which brand of cake mix you use, you may need to change the measurements for eggs, oil, and water listed in the recipe card.
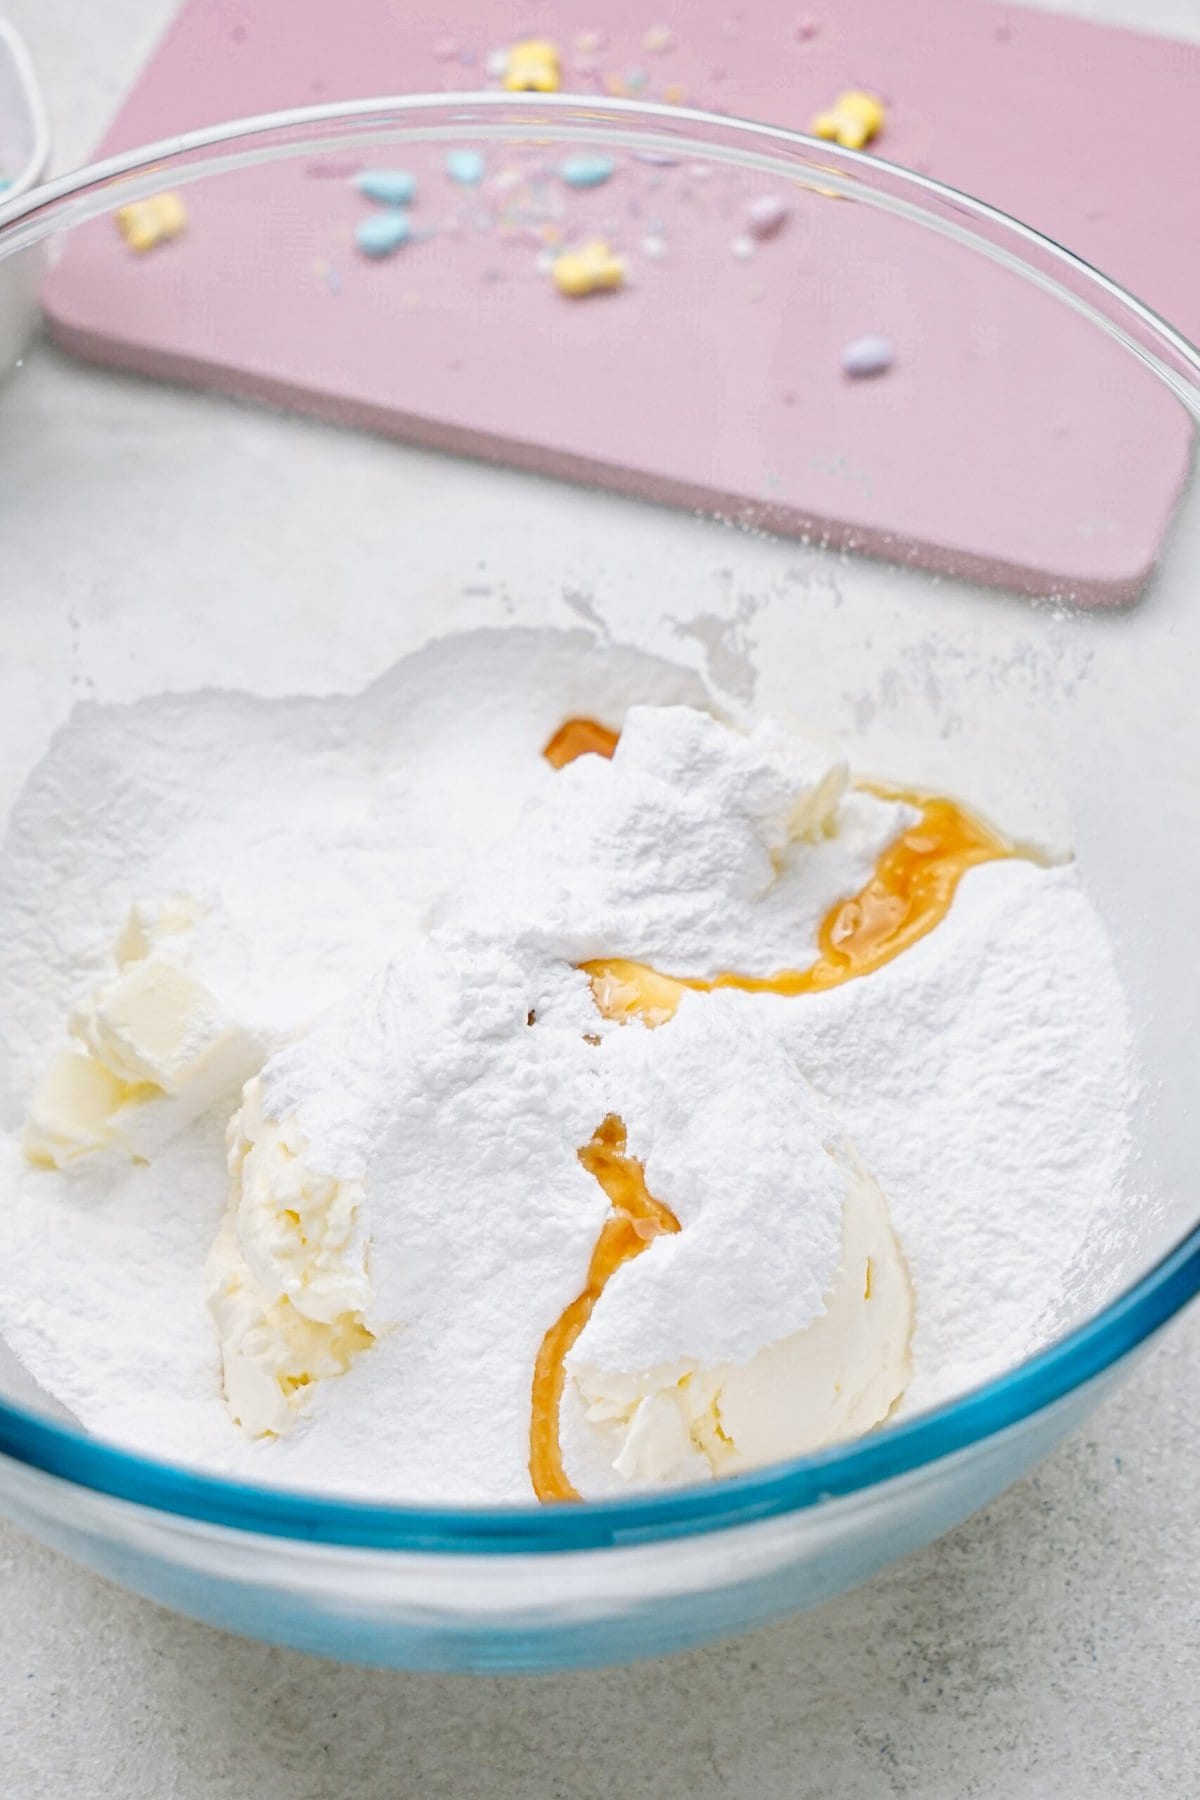
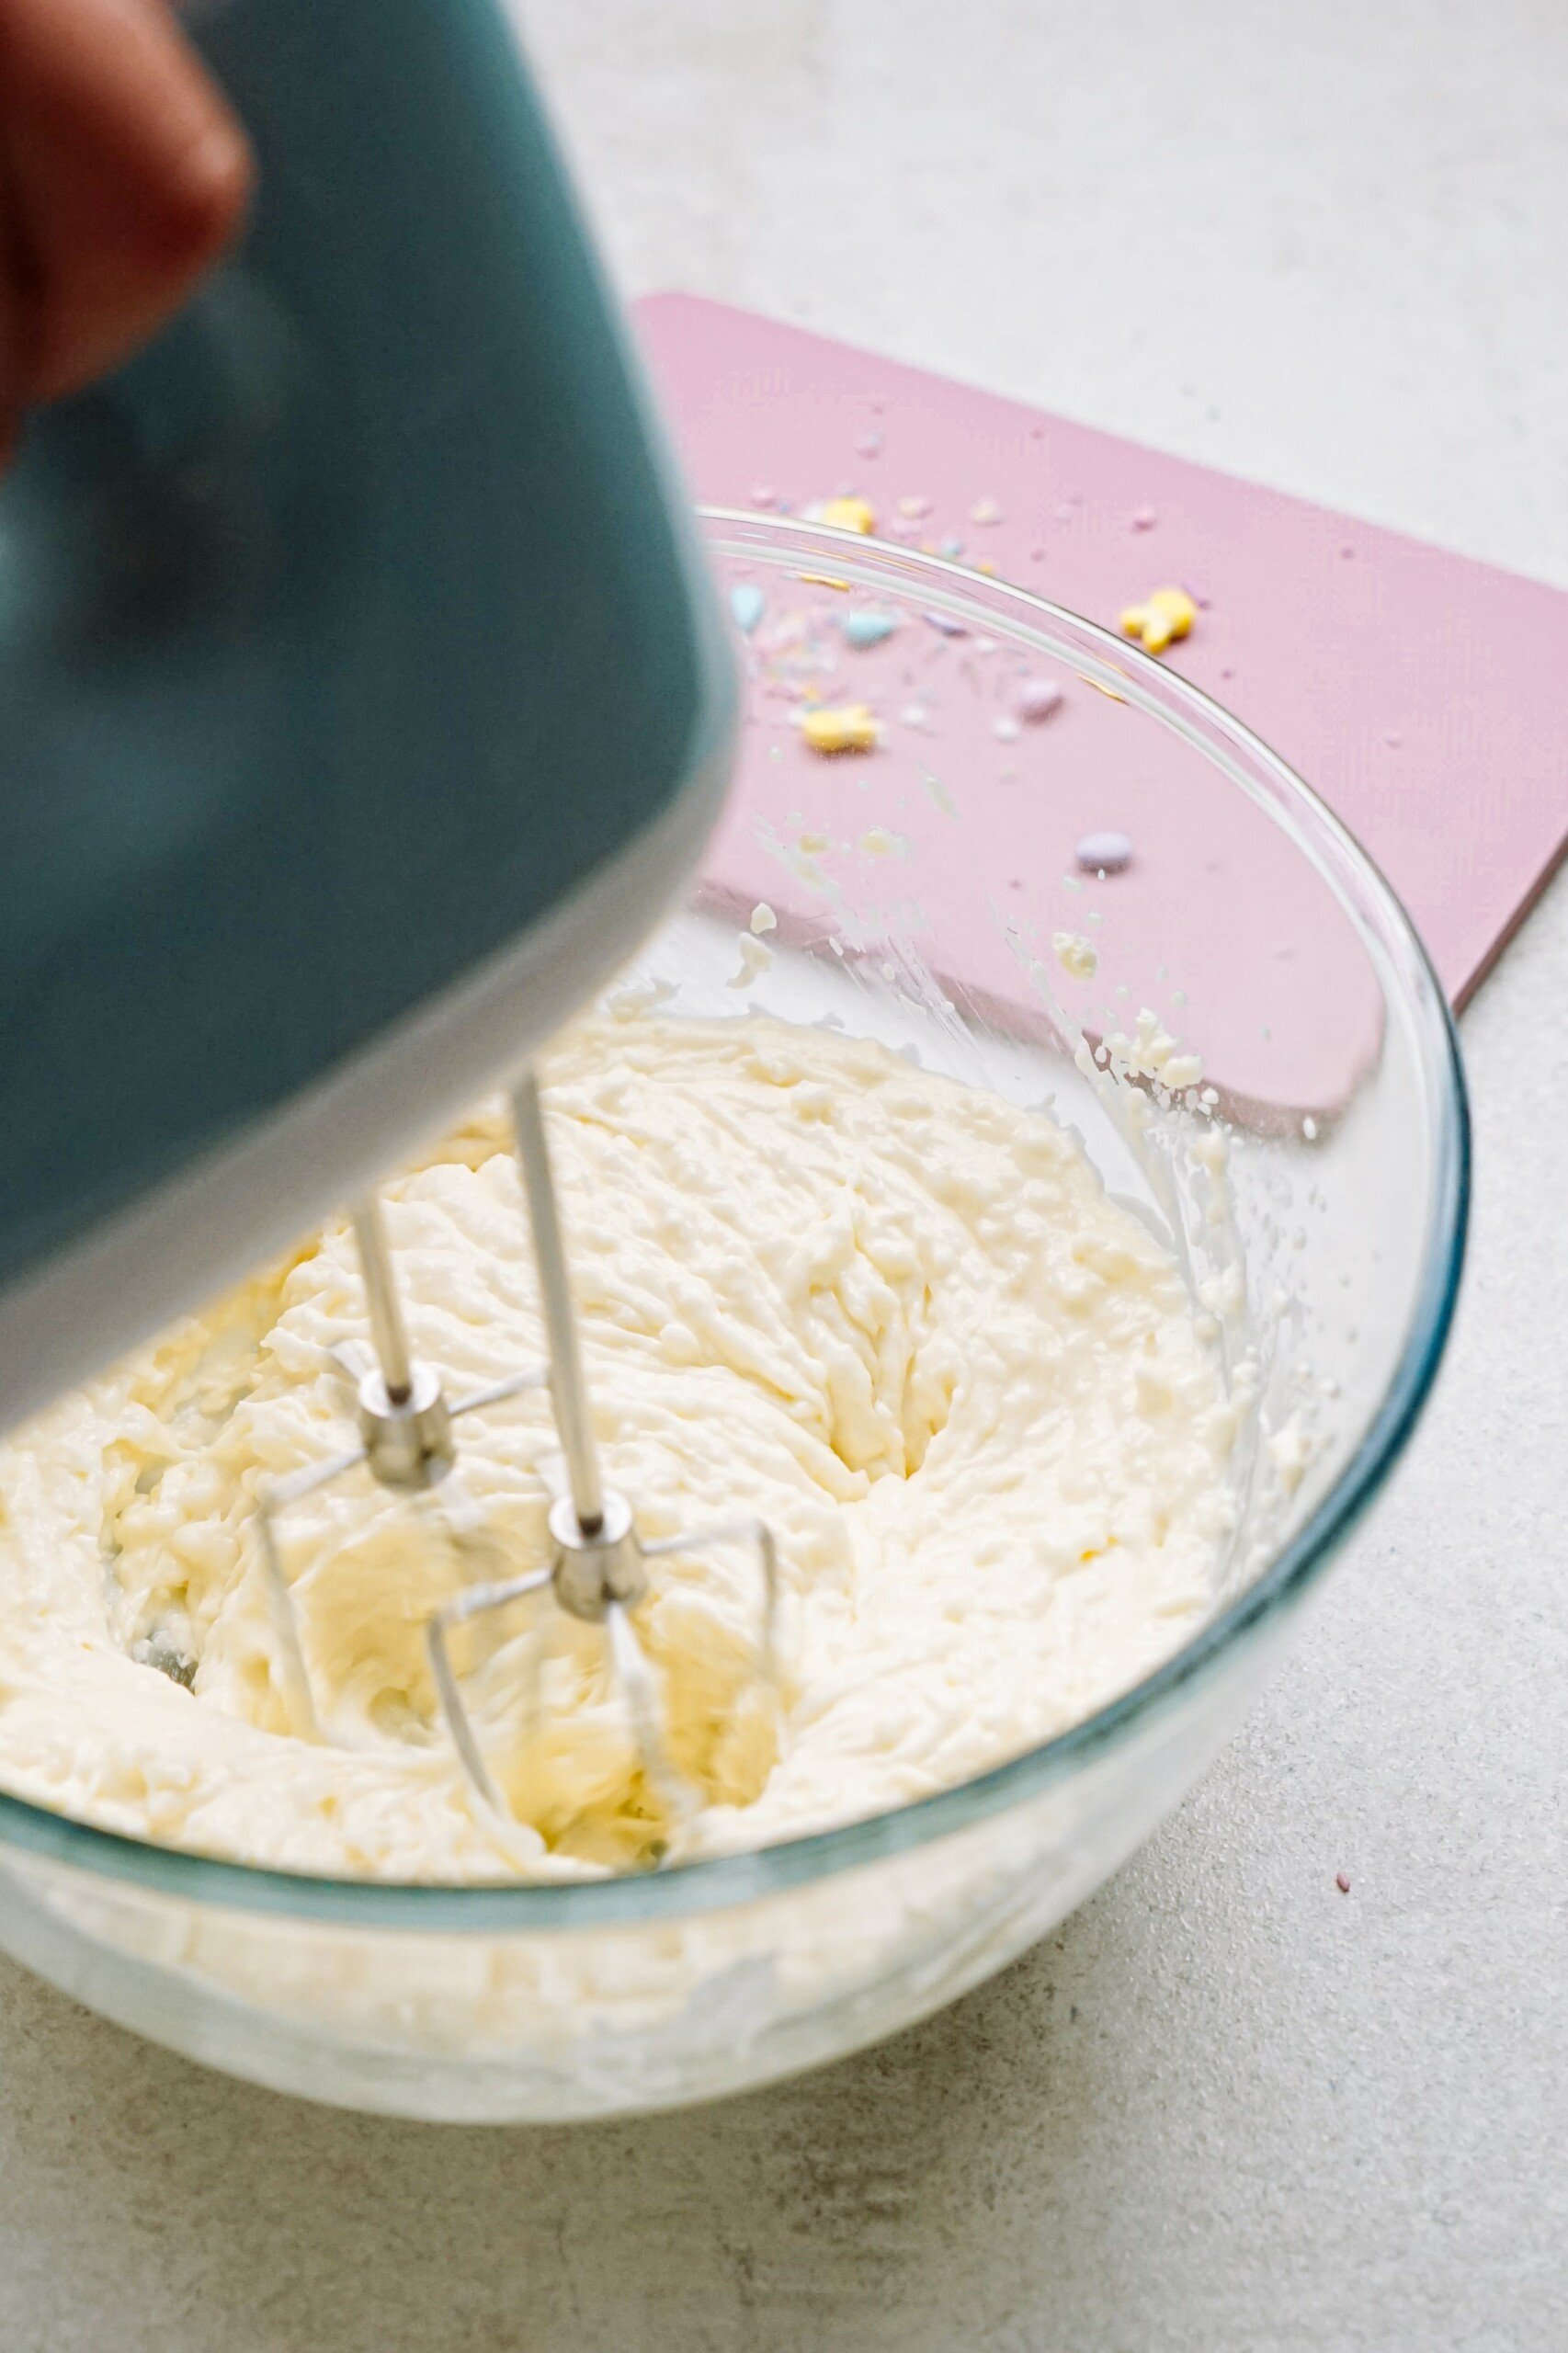
3. Make the Frosting (if using homemade)
While the cake is baking, make the frosting (if using homemade). I used my Cream Cheese Frosting Recipe, but feel free to use another frosting recipe or even store-bought is fine- no judgement here! Allow baked cake to cool completely.

4. Removed Cooled Cake From Pan
Remove cooled cake from the pans and using a large sharp knife, remove the dark outer hardened layer of the cake.
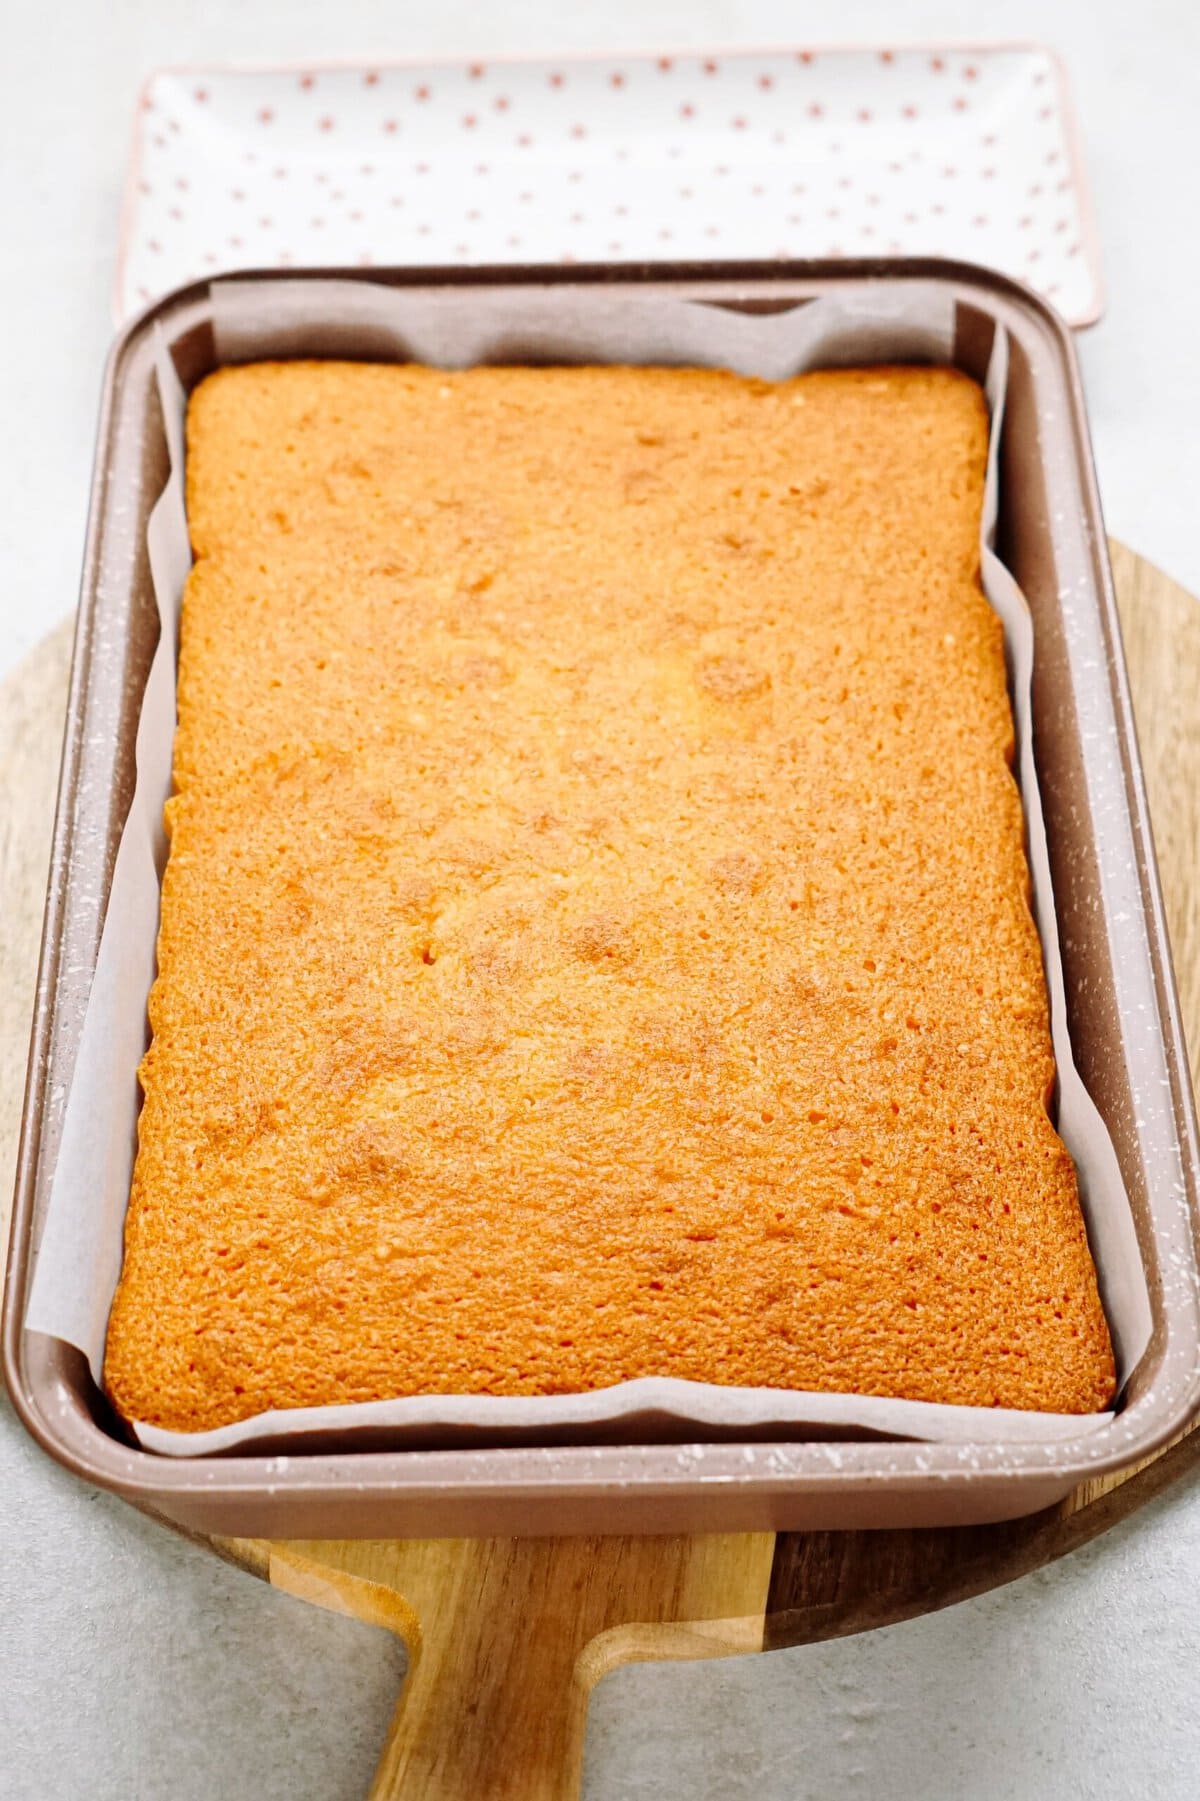
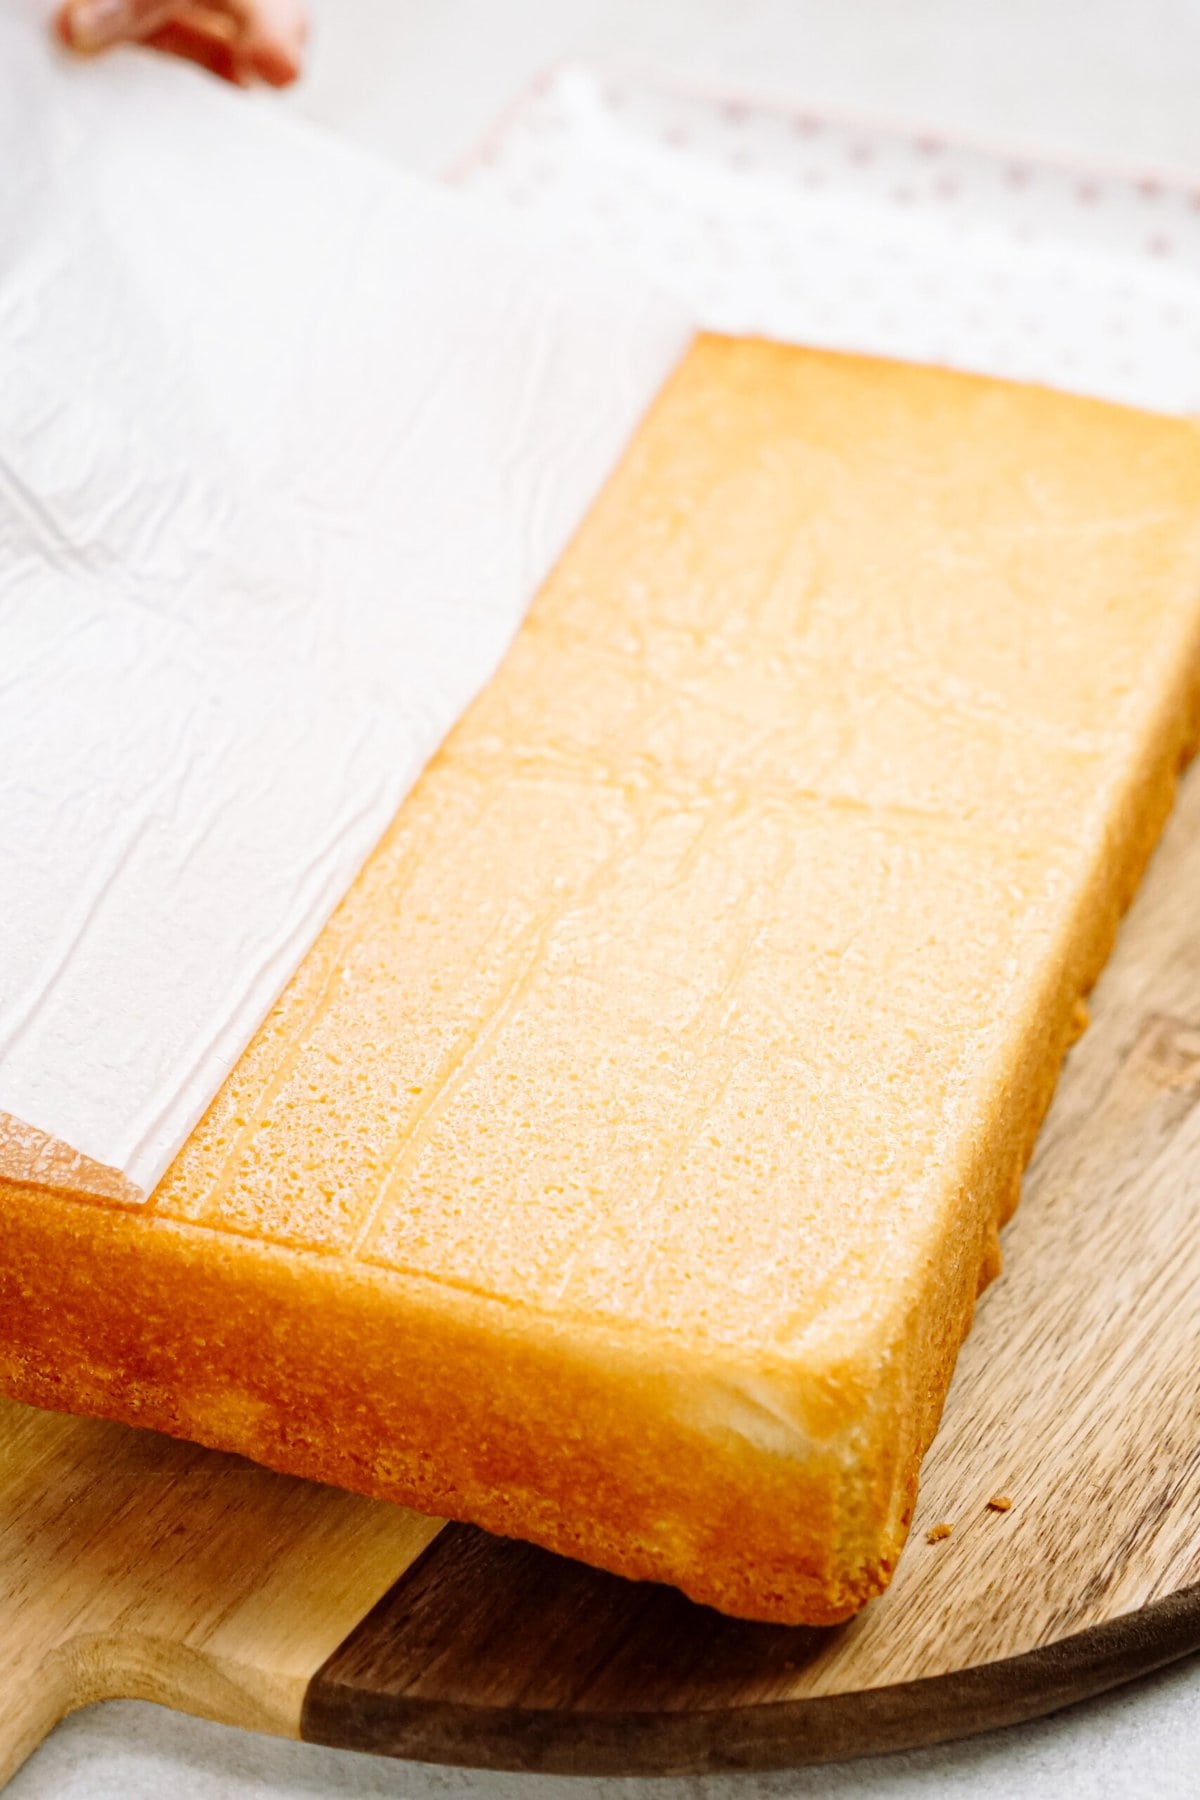
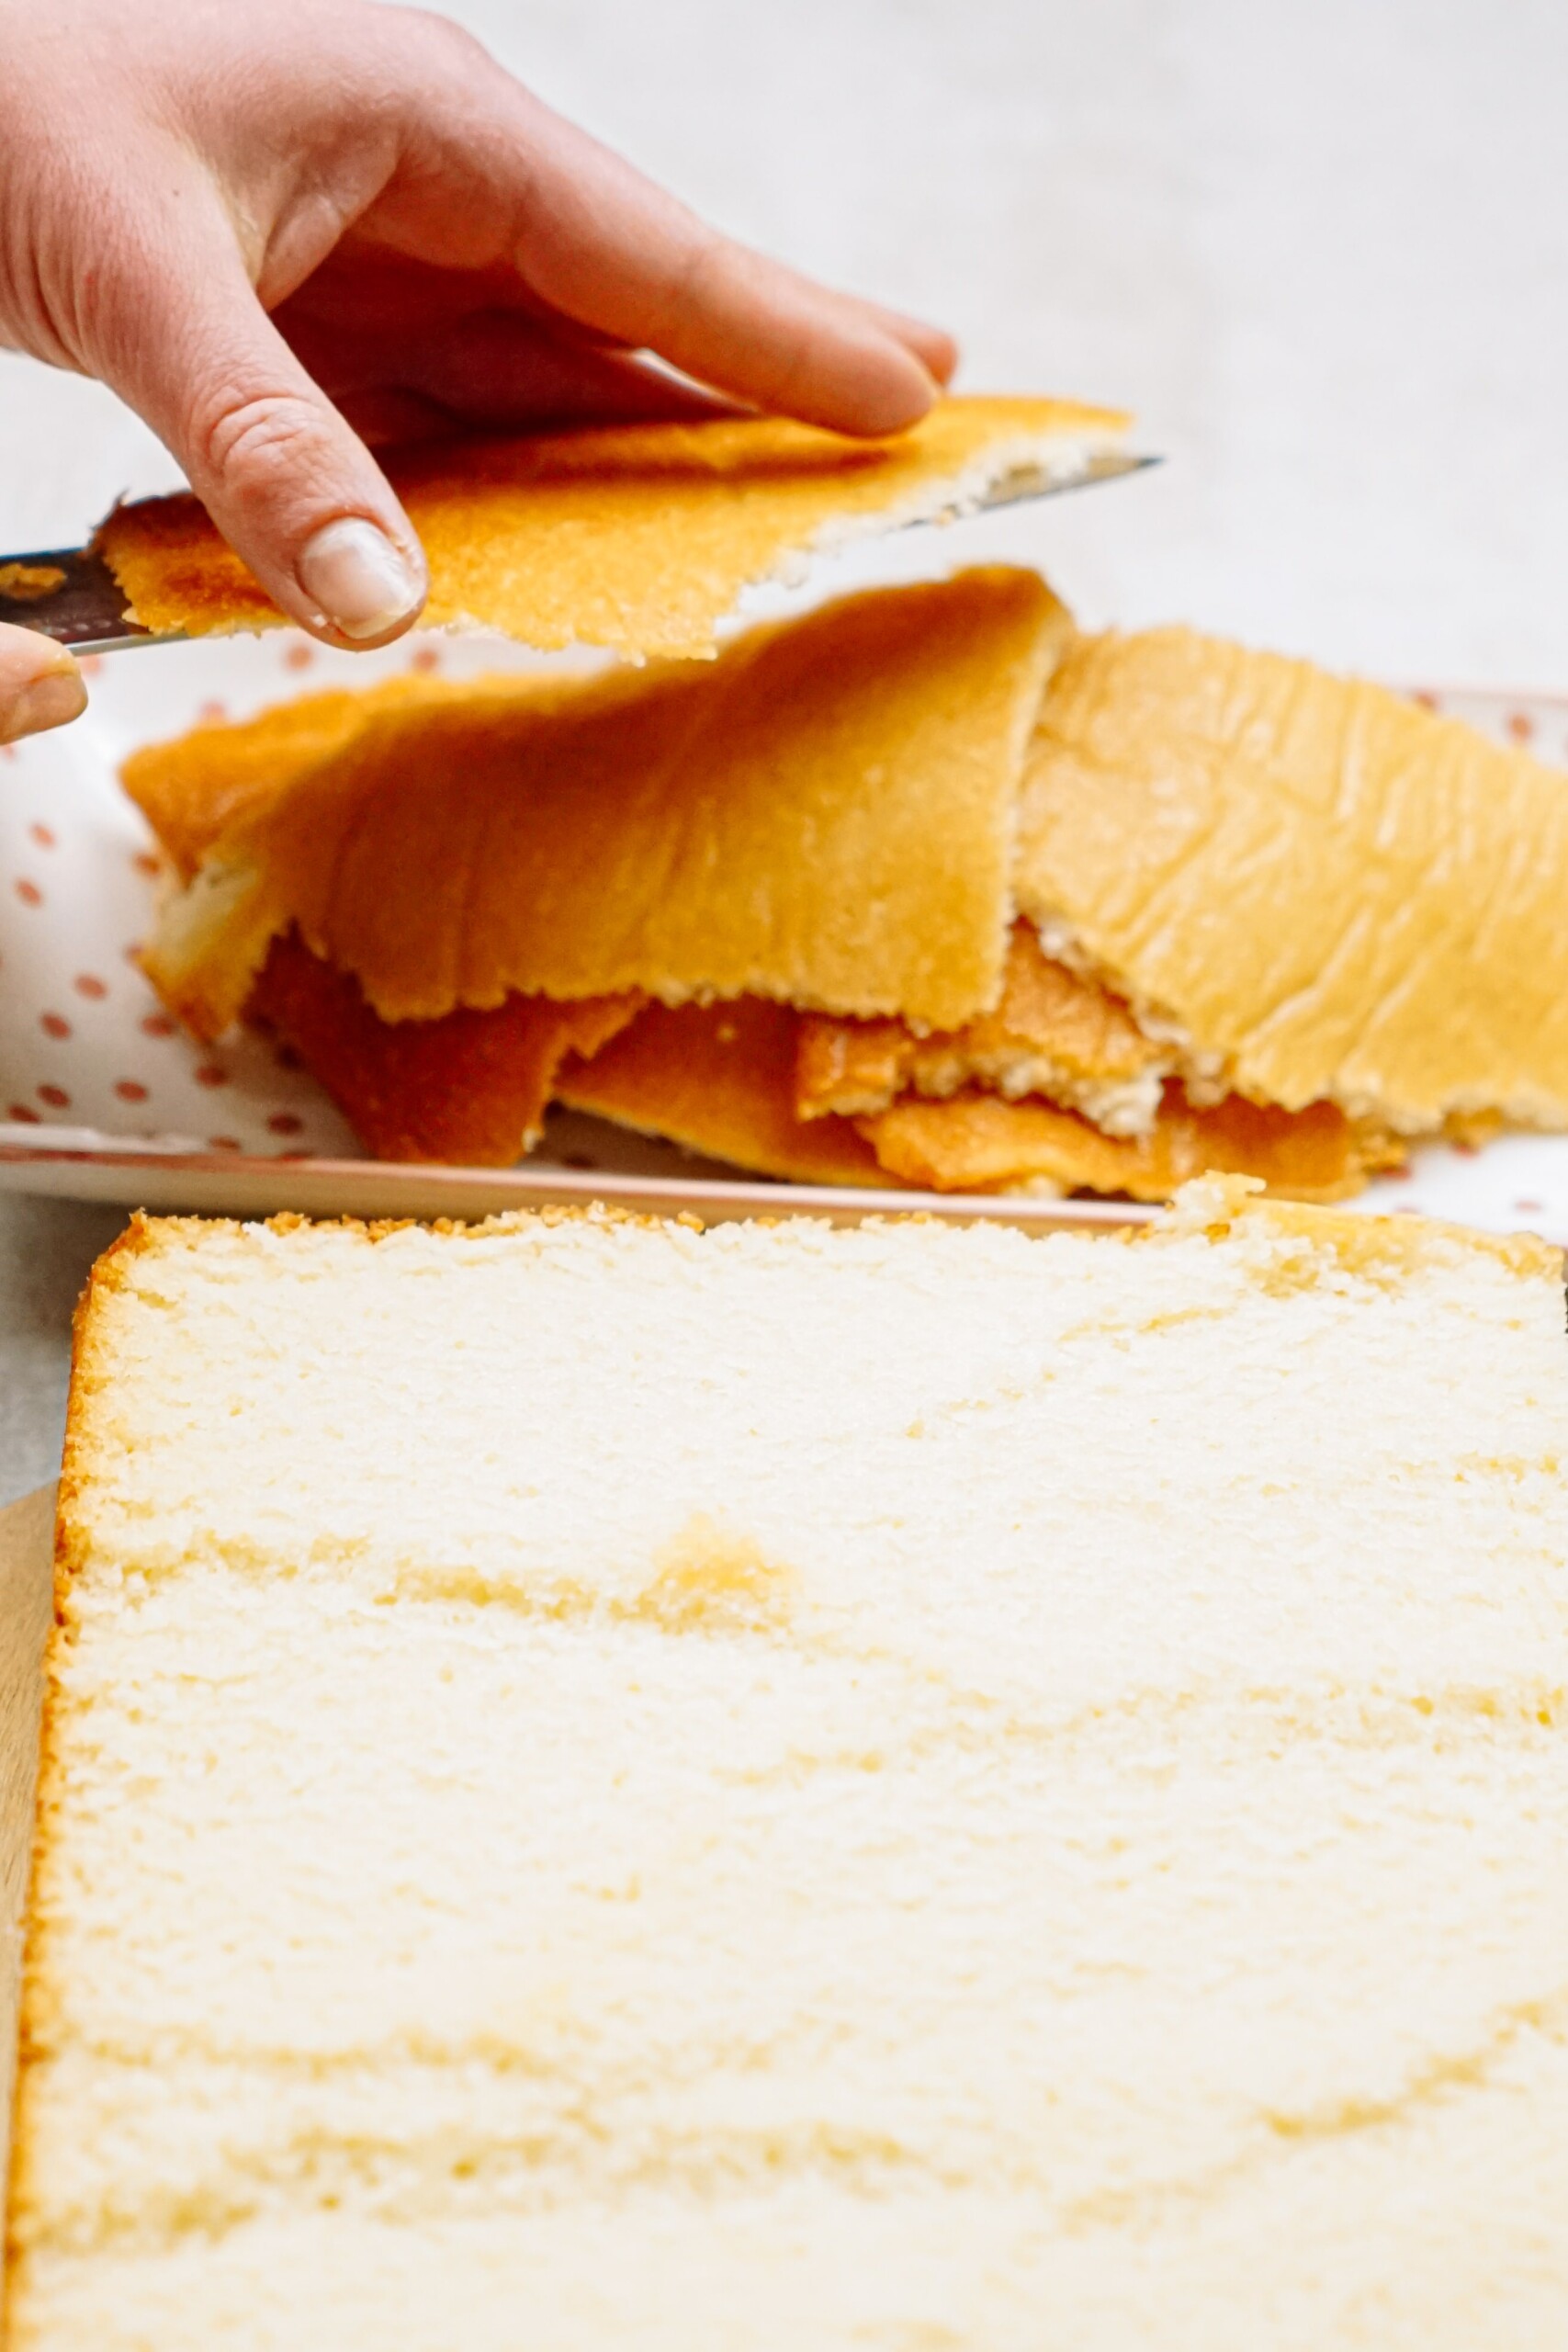
Pro Tip: I like to remove the dark outer hardened layer of the cake. Discard or save for snacking. This is an optional step but I think it makes for a better ball-rolling experience if the hard outer edges are removed.
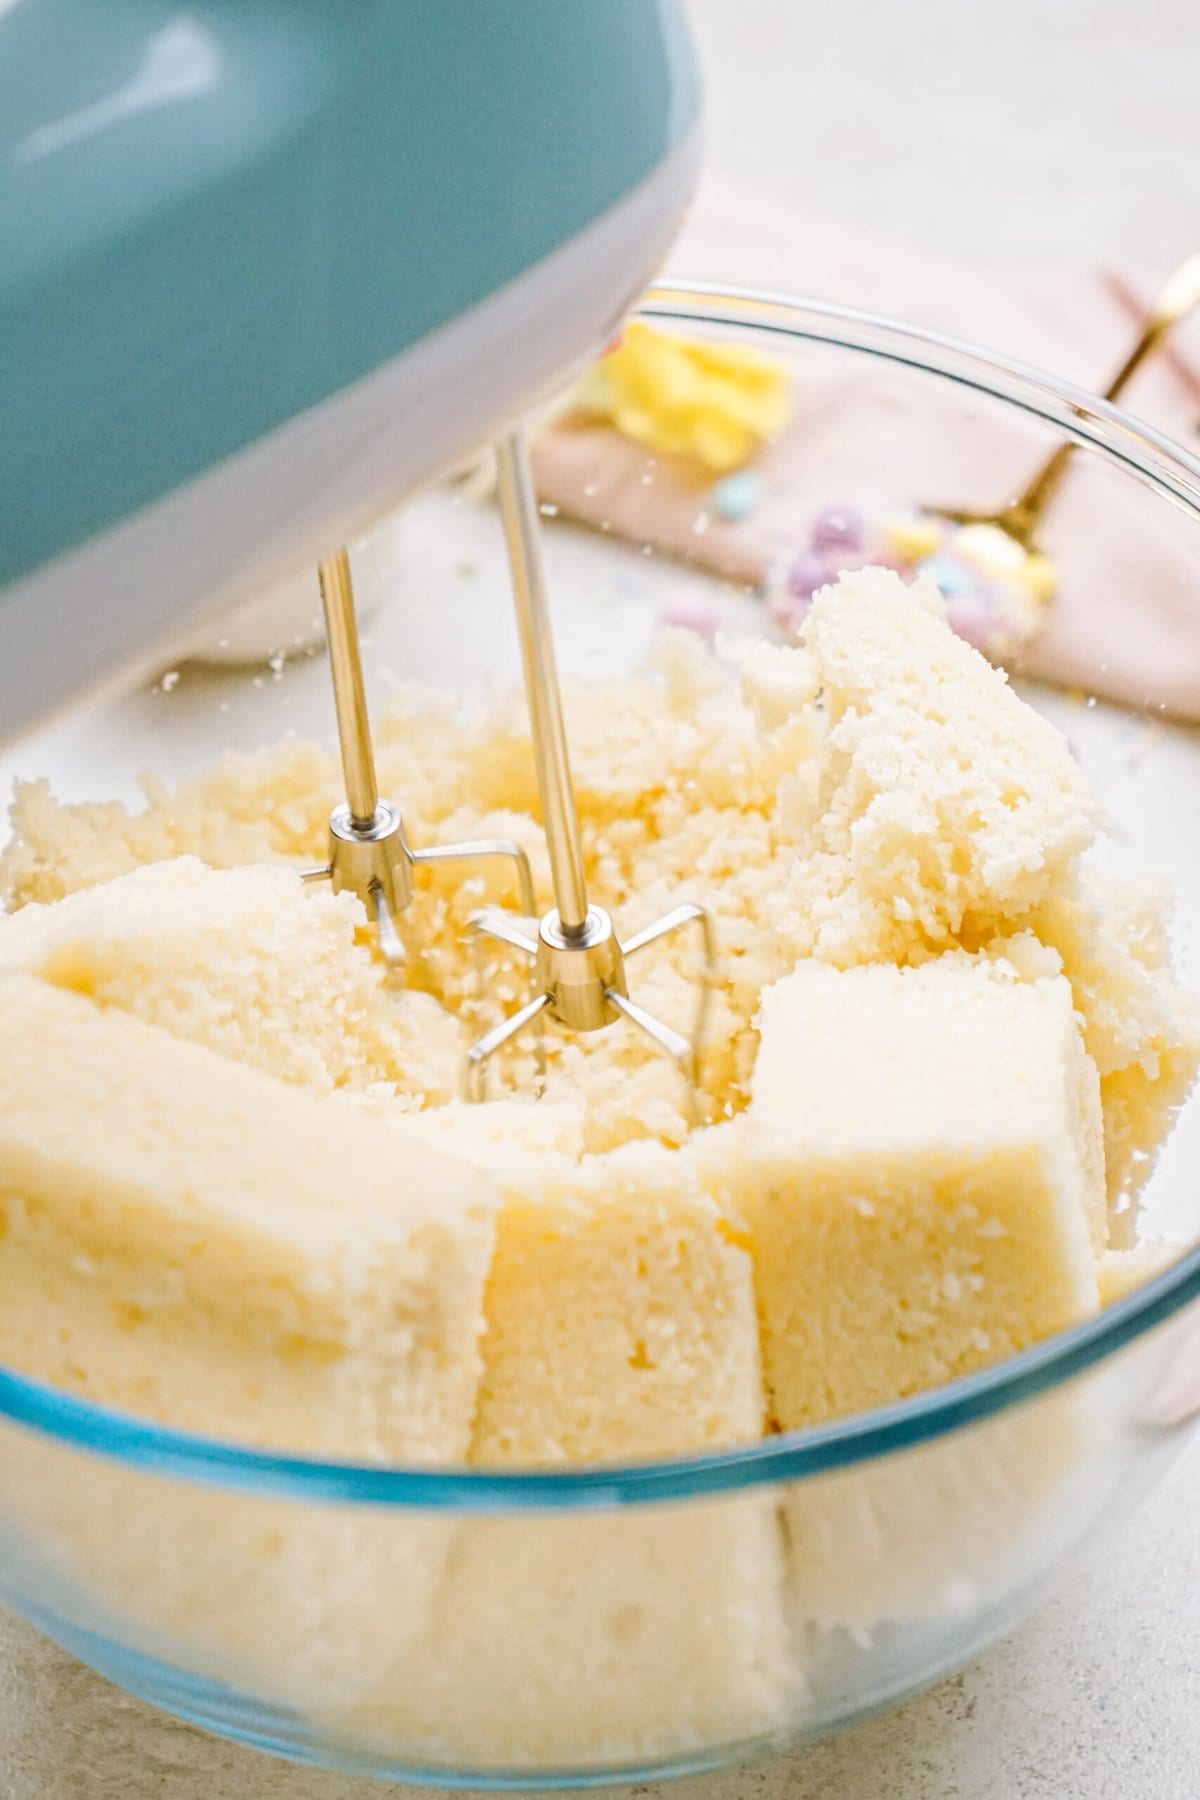
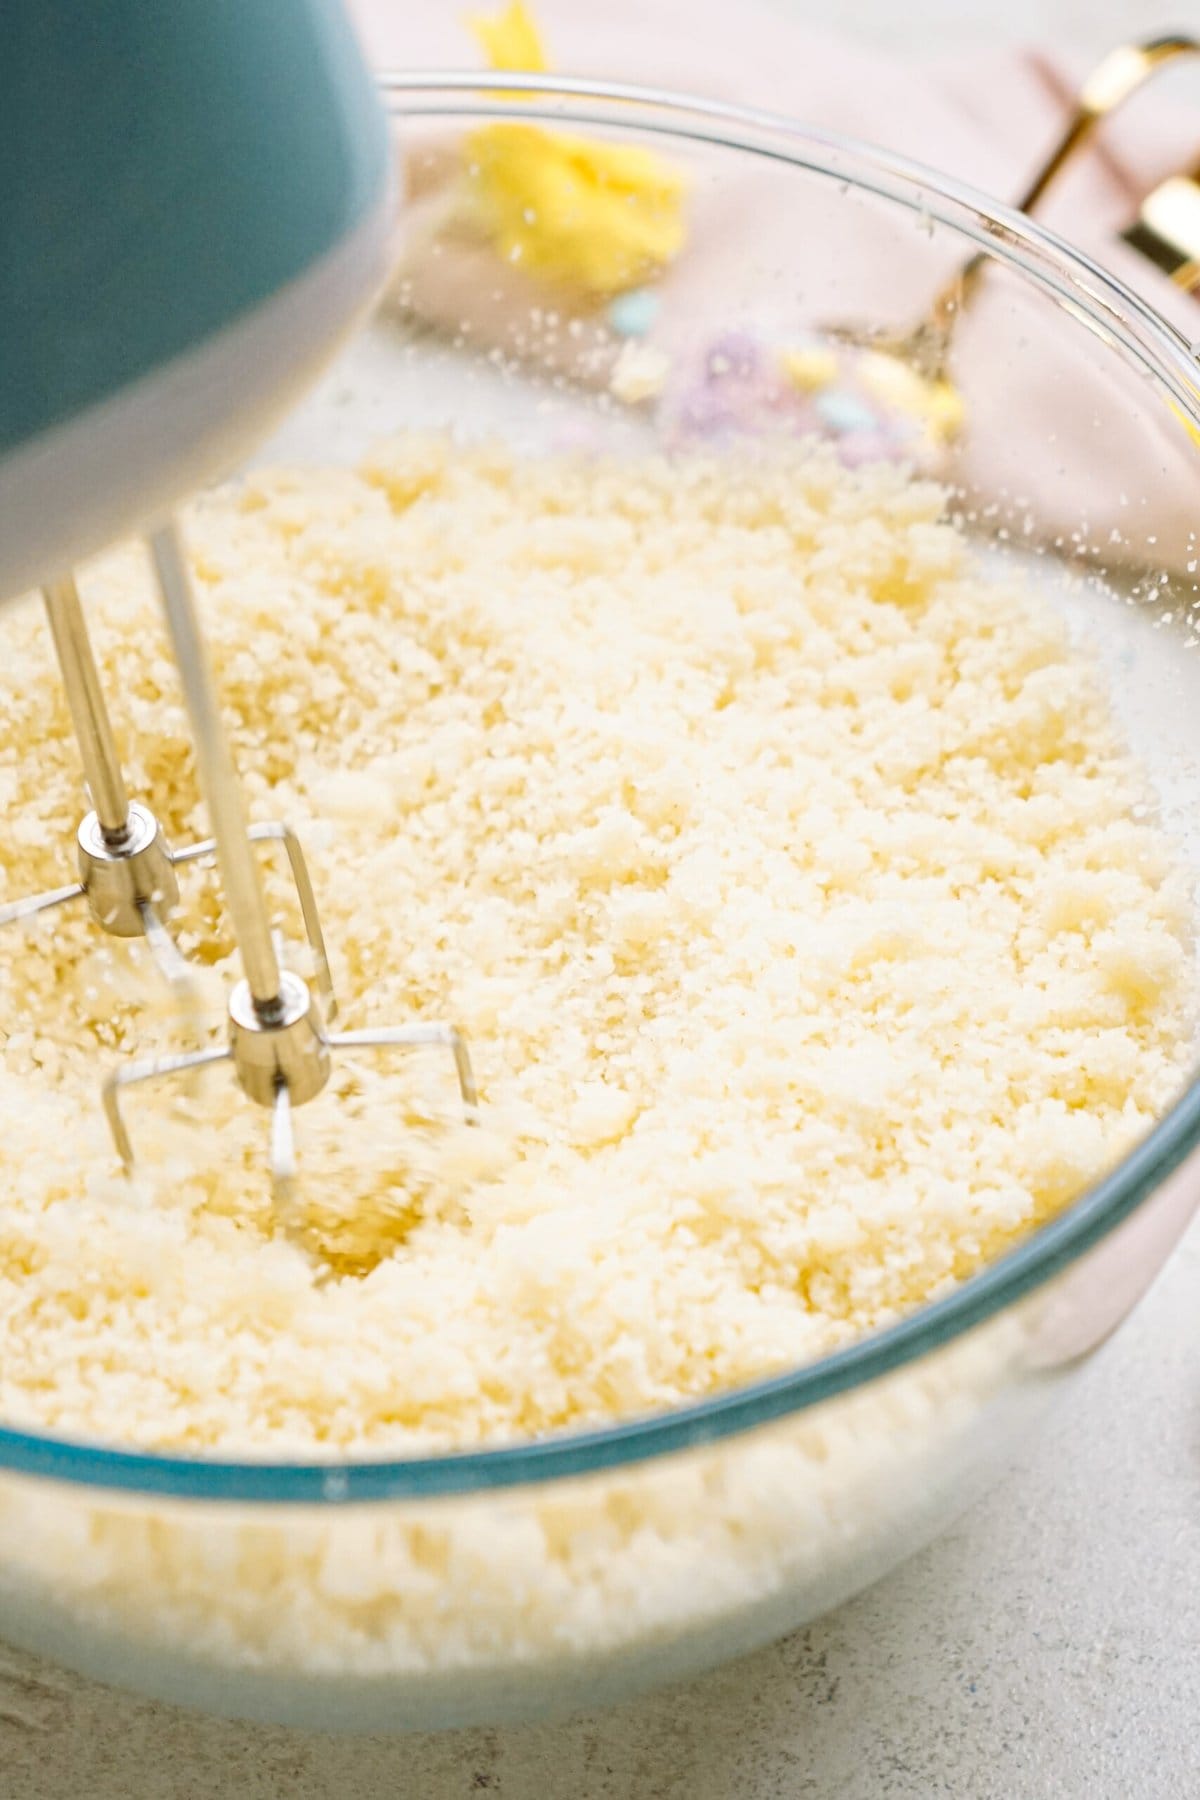
5. Combine Cake + Frosting
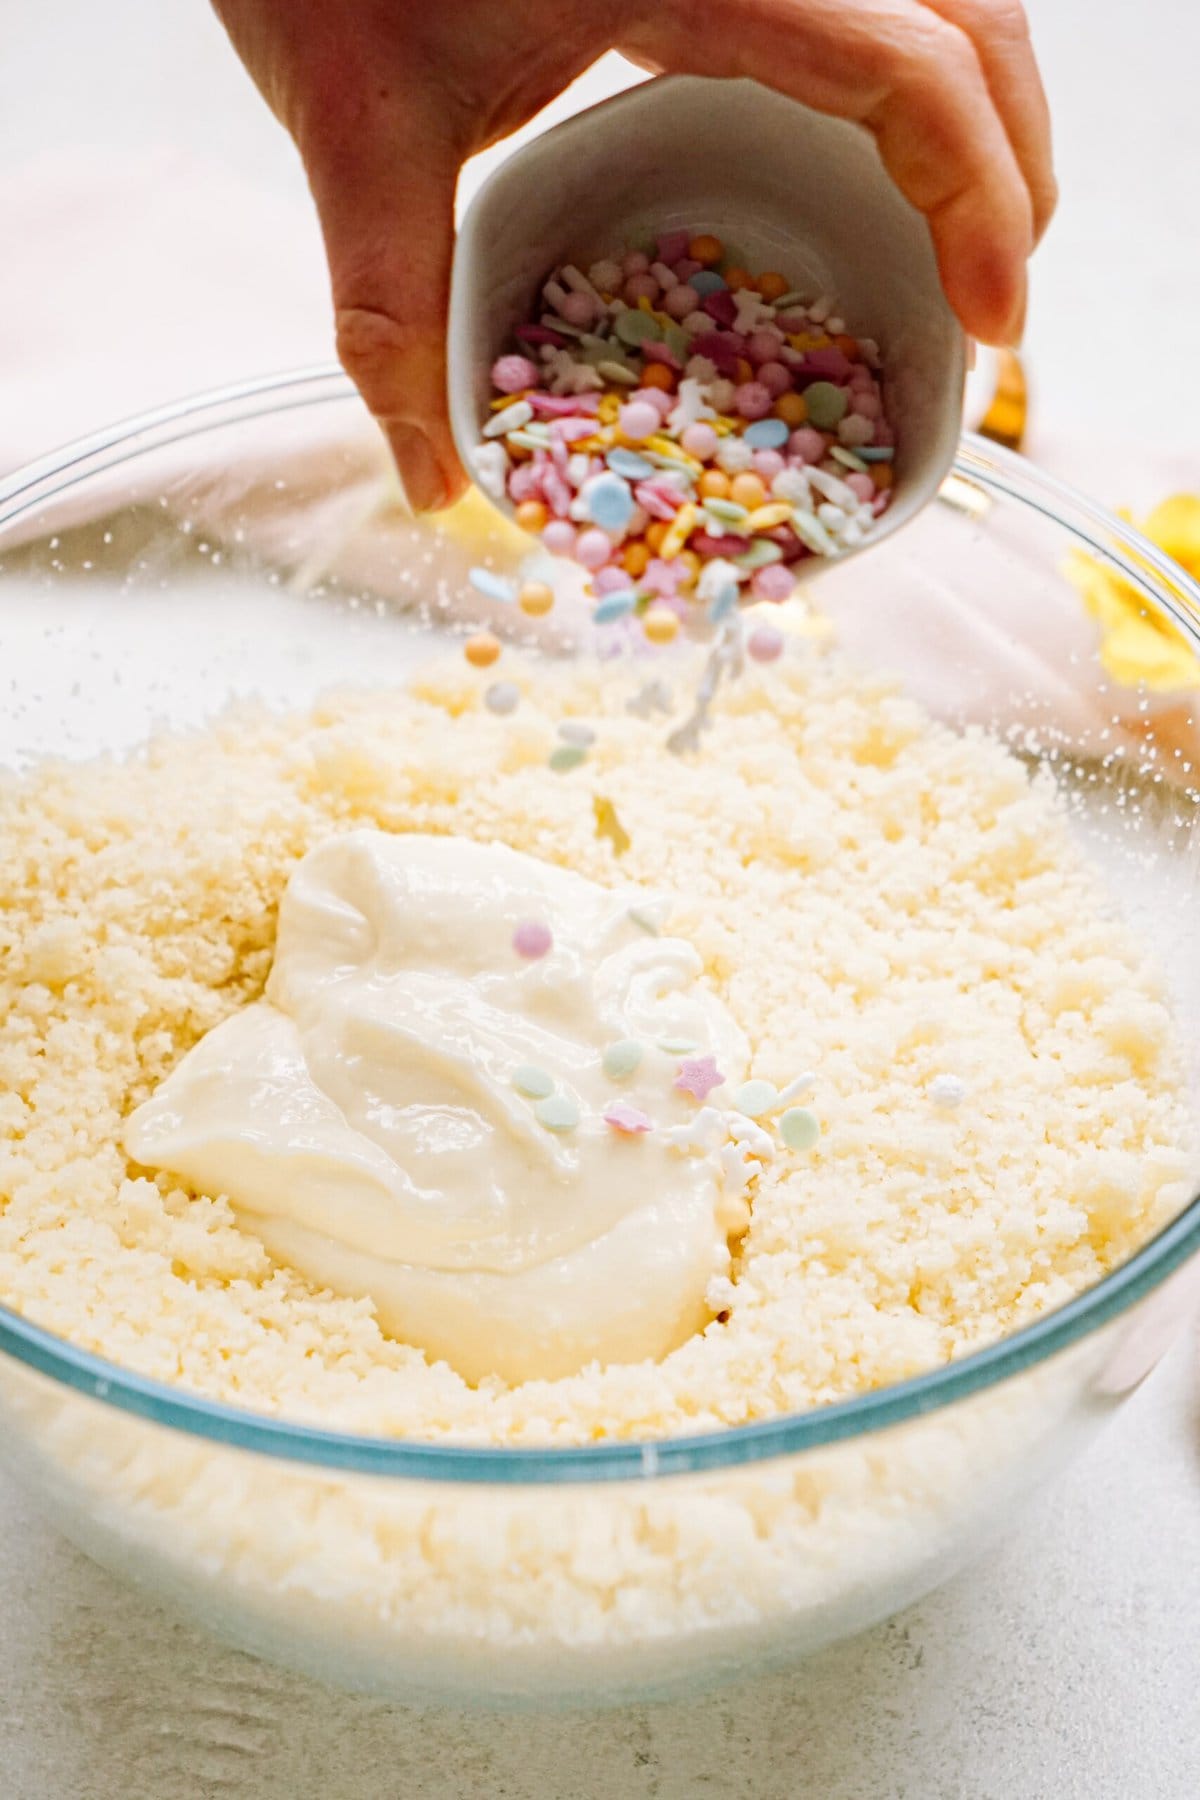
In a stand mixer bowl with the paddle attachment (or hand mixer), place cut up cake pieces into the bowl. With the mixer on low speed, crumble the cake to create fine crumbs. Next, mix 1 cup of cream cheese frosting to the cake crumbs. Mix on medium speed. At this point you can add in some Easter sprinkles (optional). The cake mixture should be moist and stick together easily by coming clean away from the side of the bowl. If the dough is too dry, add in a small amount of more frosting, a tablespoon at a time.
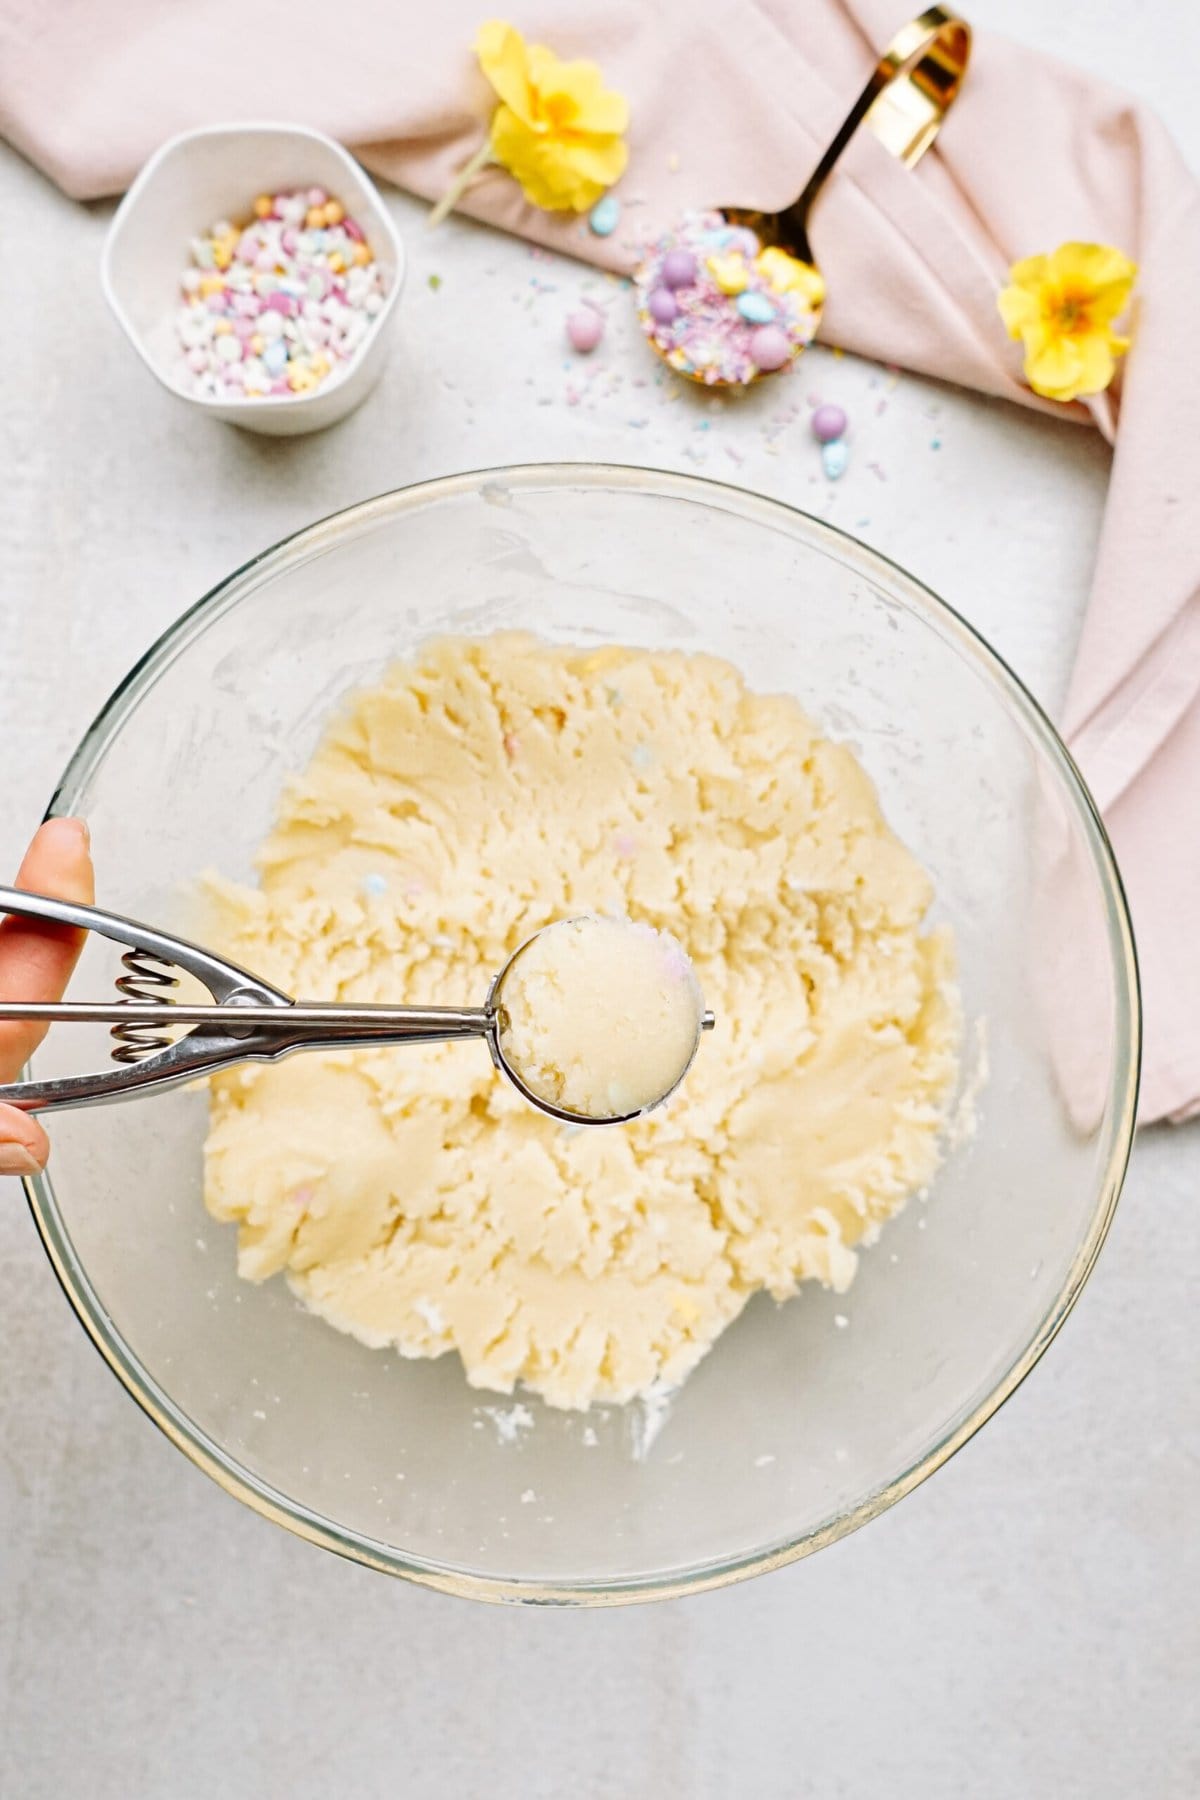
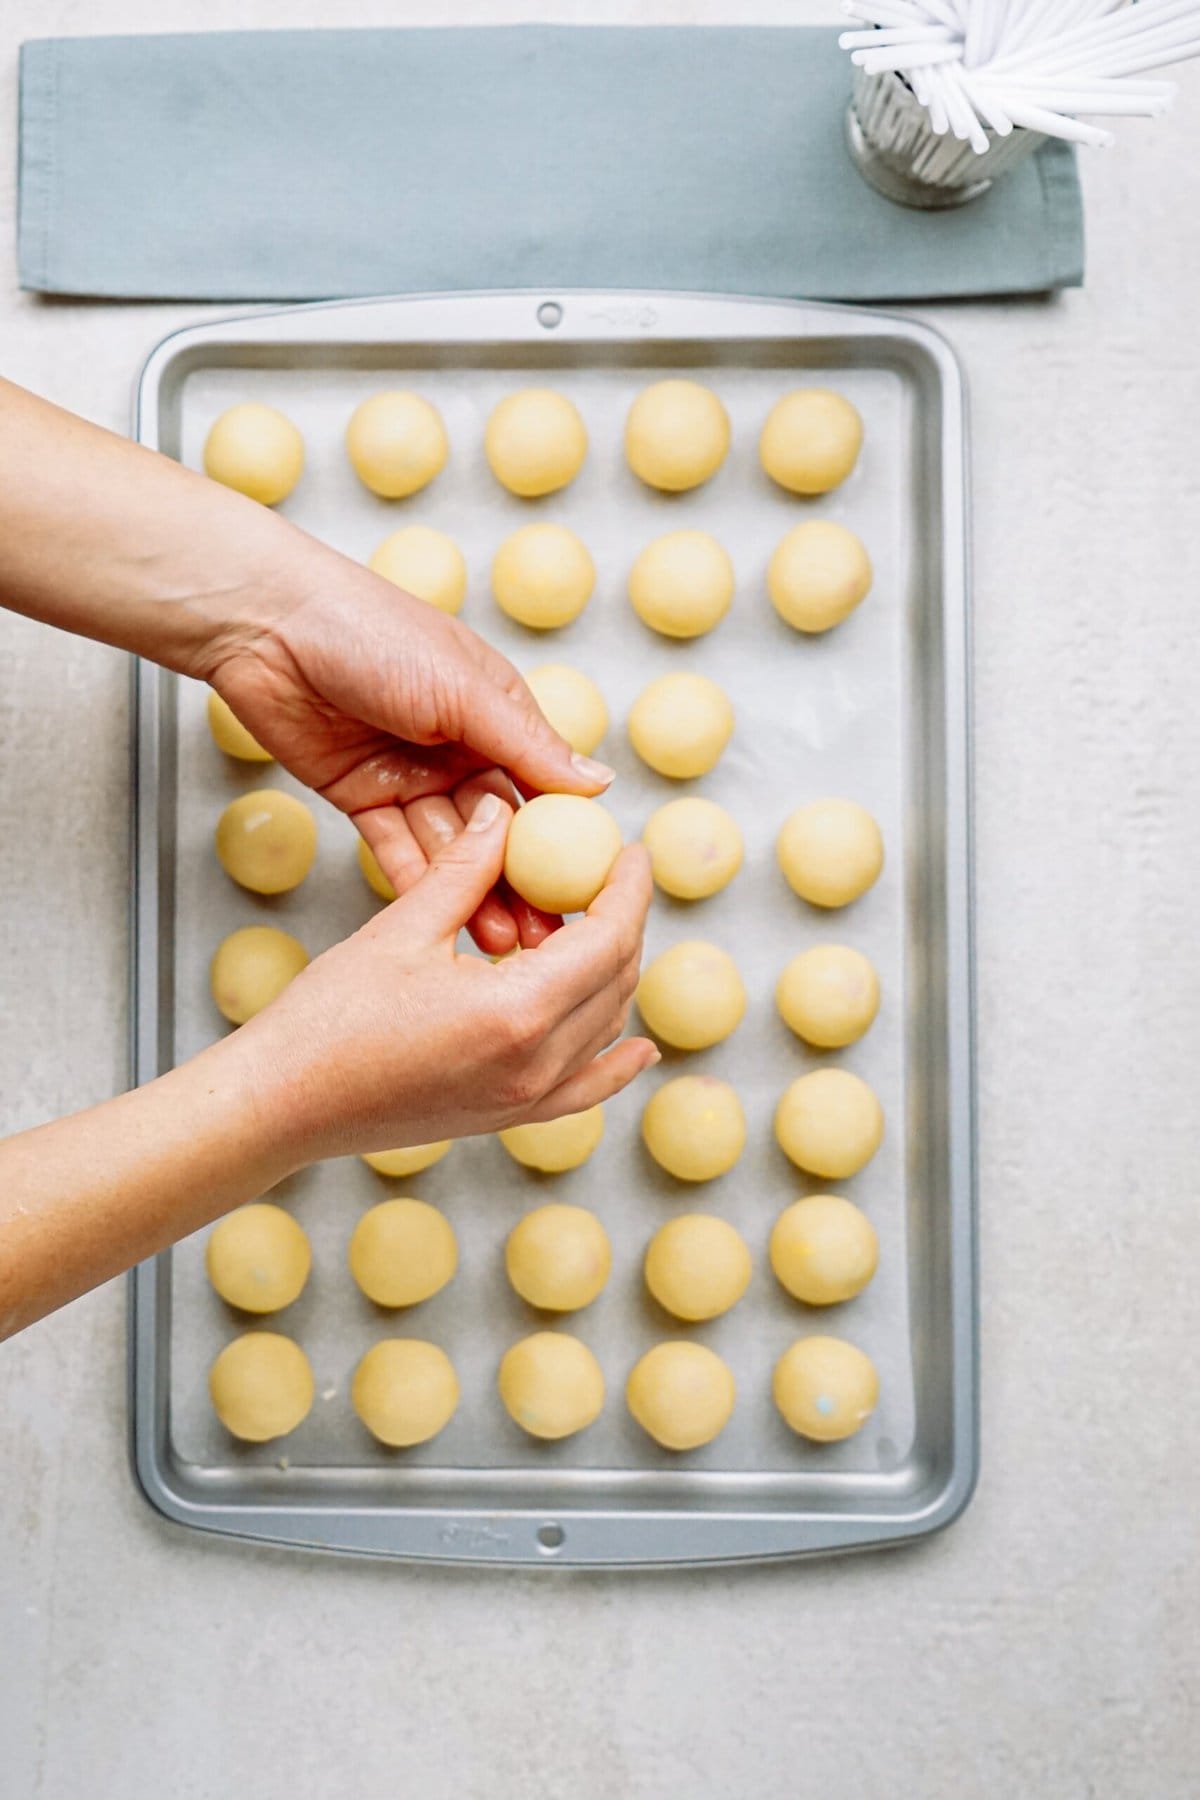
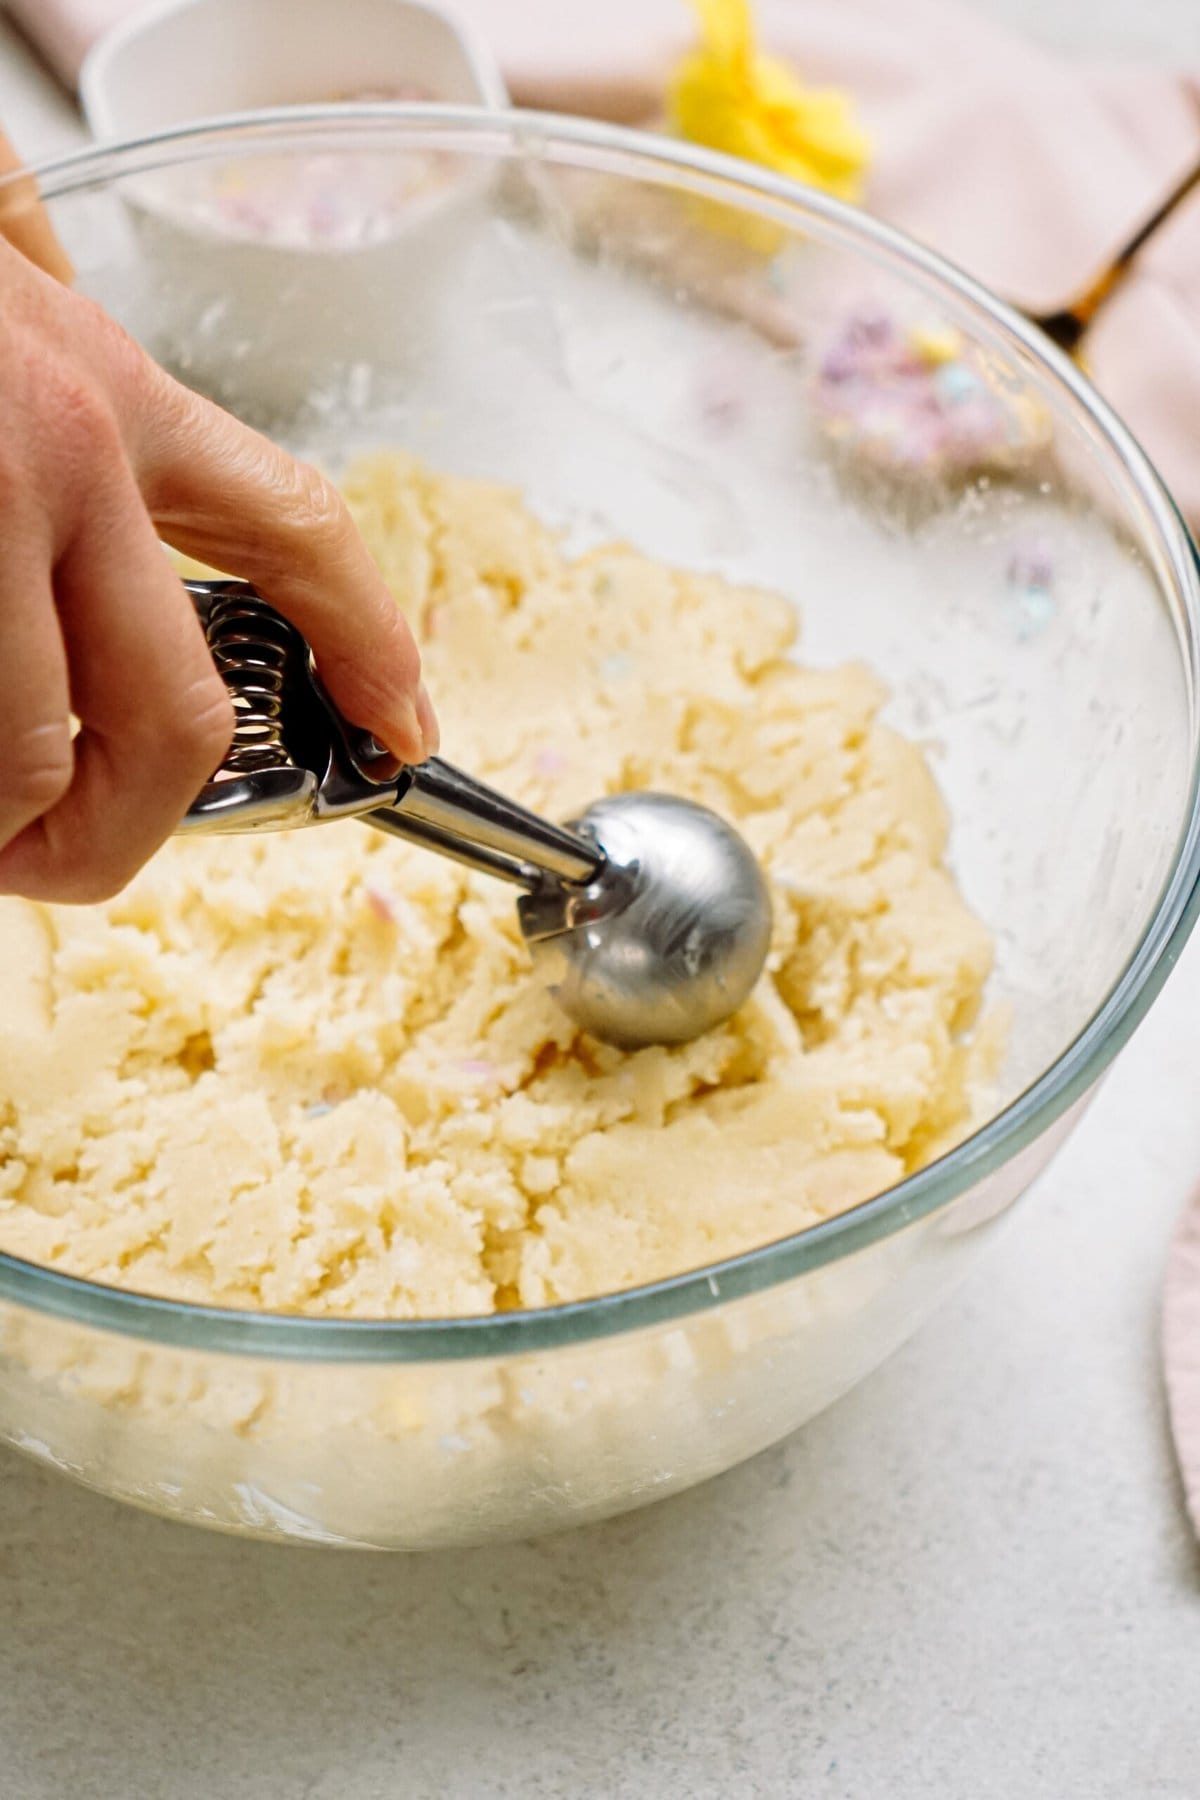
6. Form Cake Balls Using a Cookie Scoop
Using a small cookie scoop, scoop cake balls onto the baking sheet. Roll each ball with your hands. If the dough sticks to your hands, you’ll need to wash them occasionally.
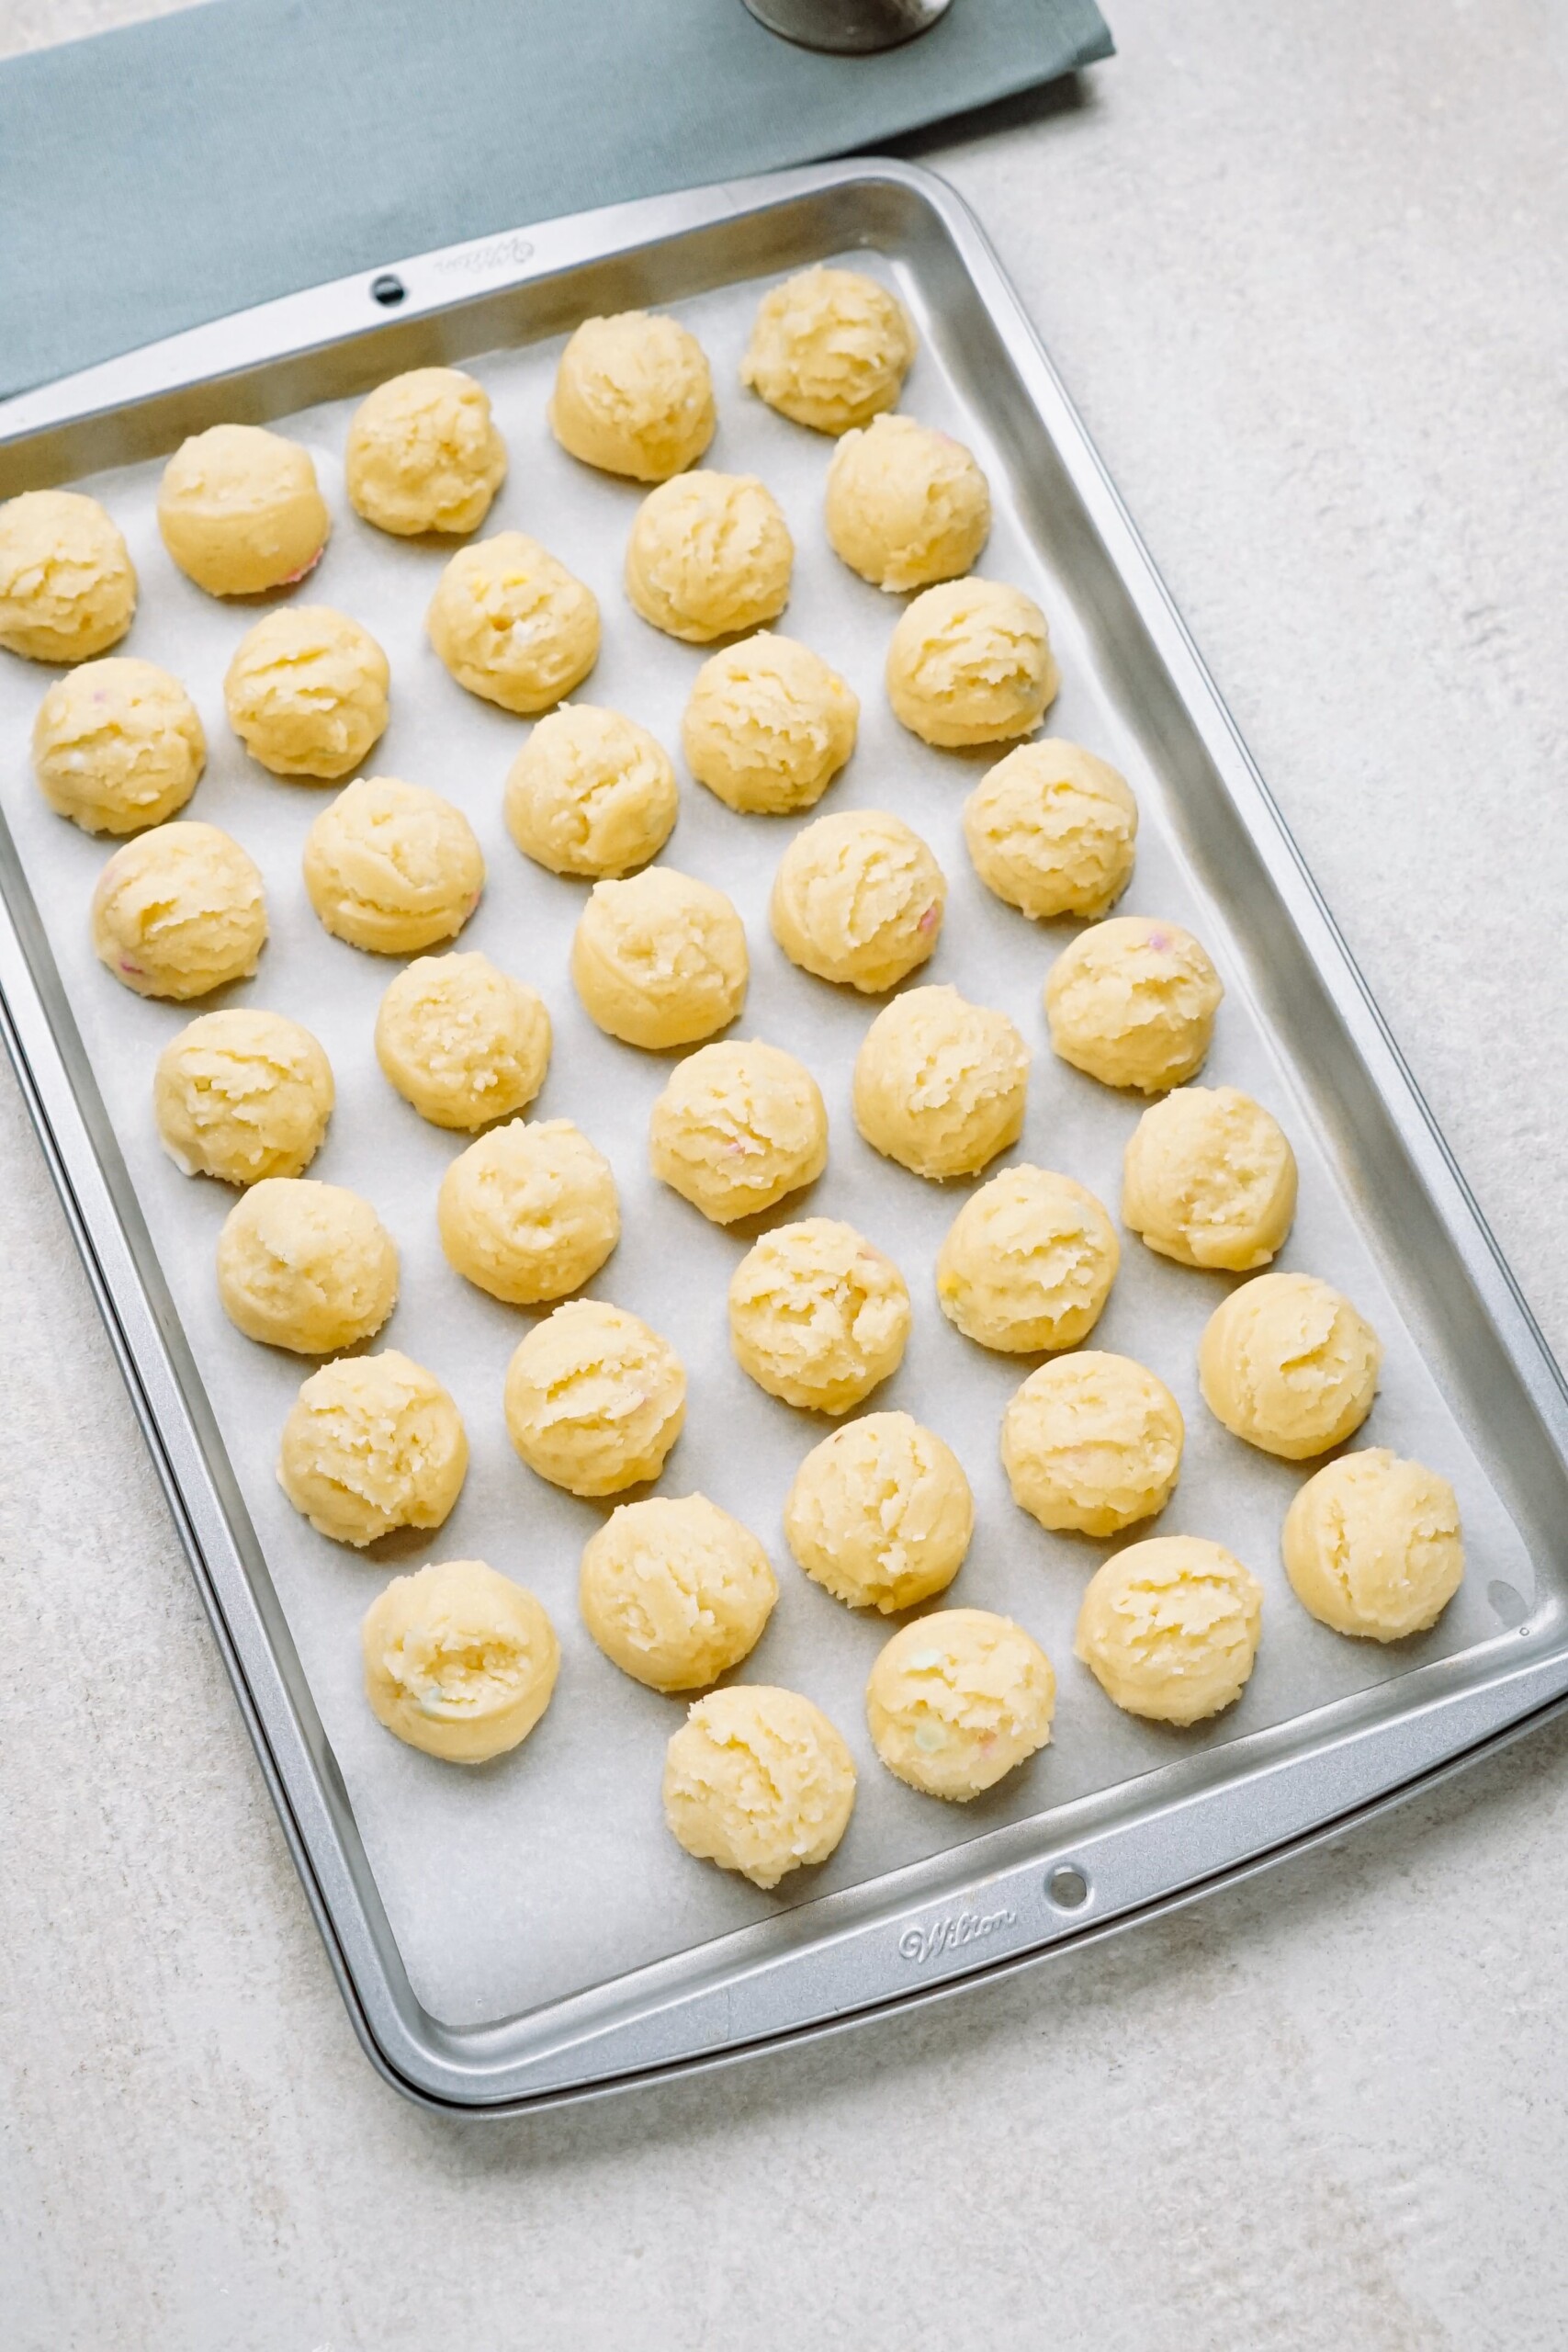
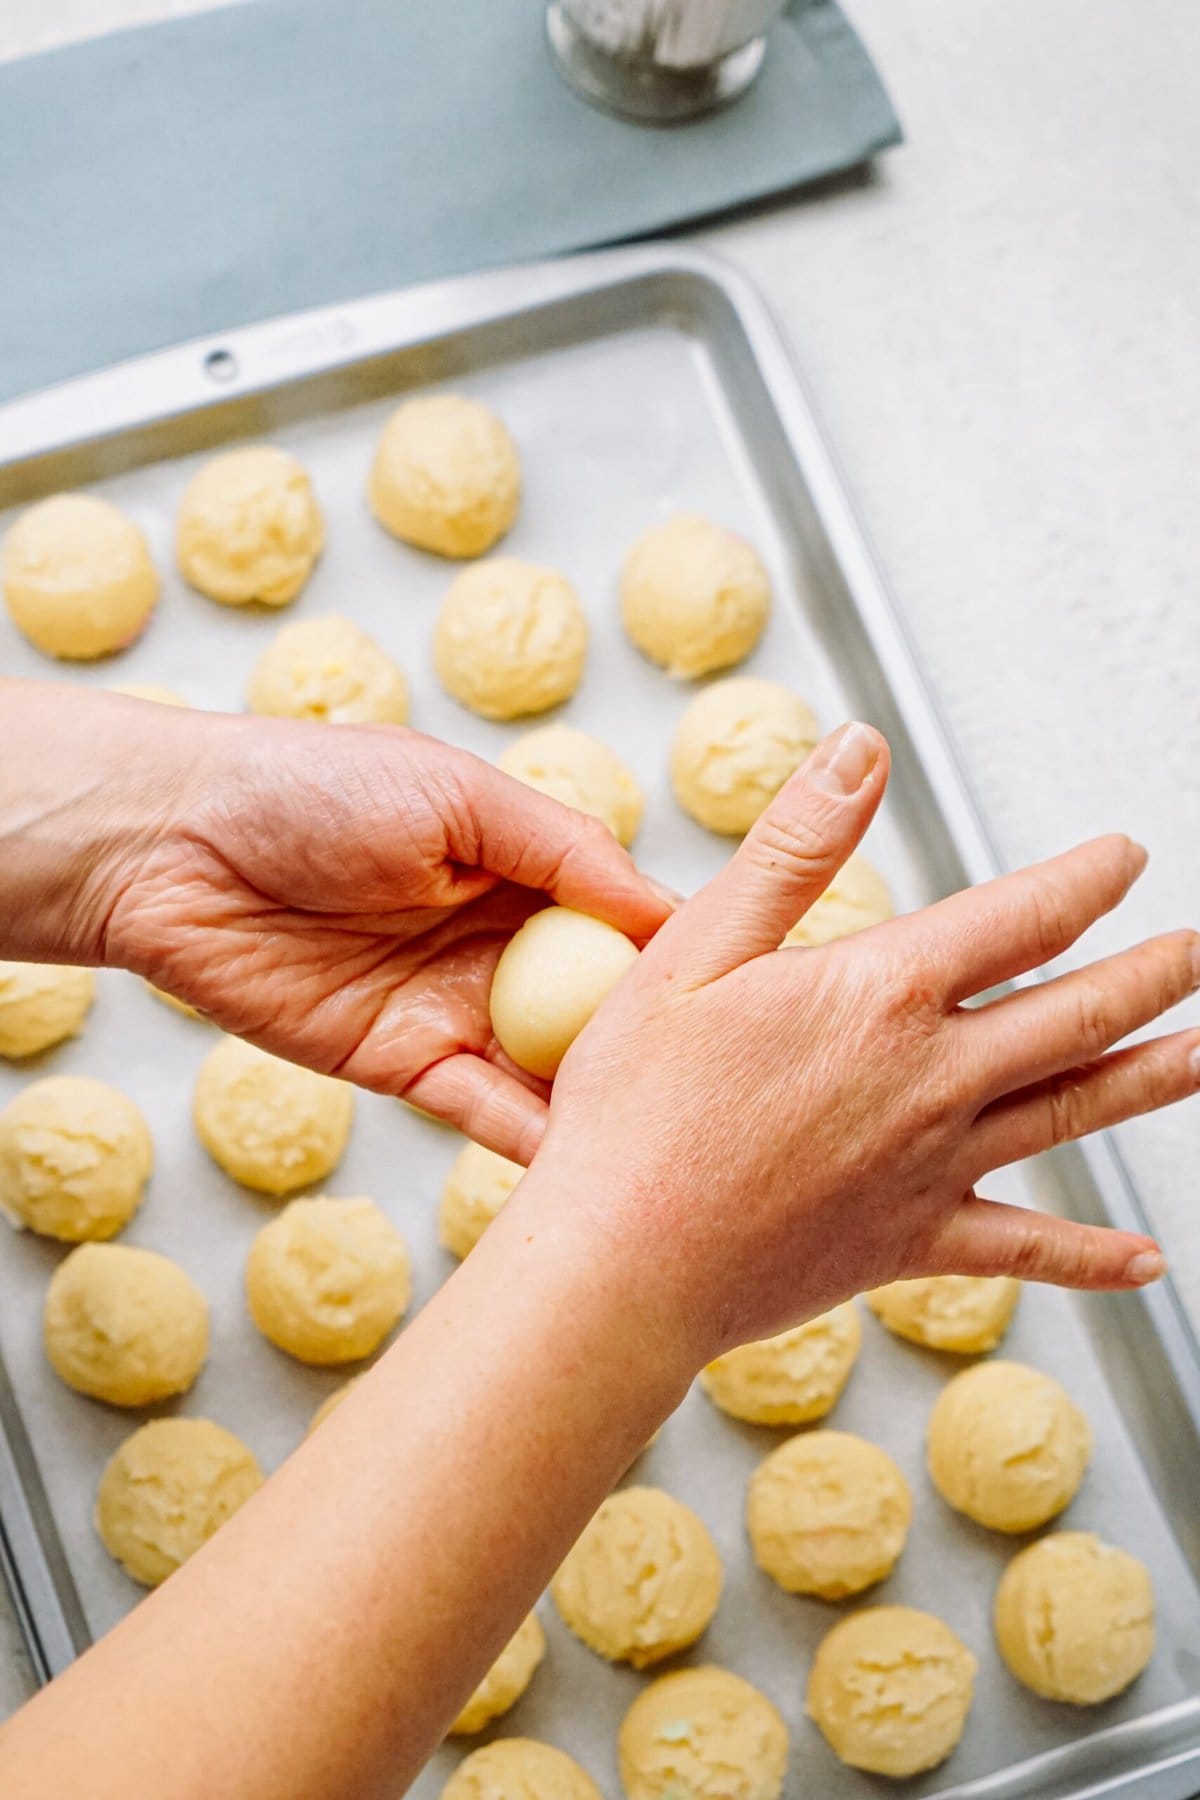
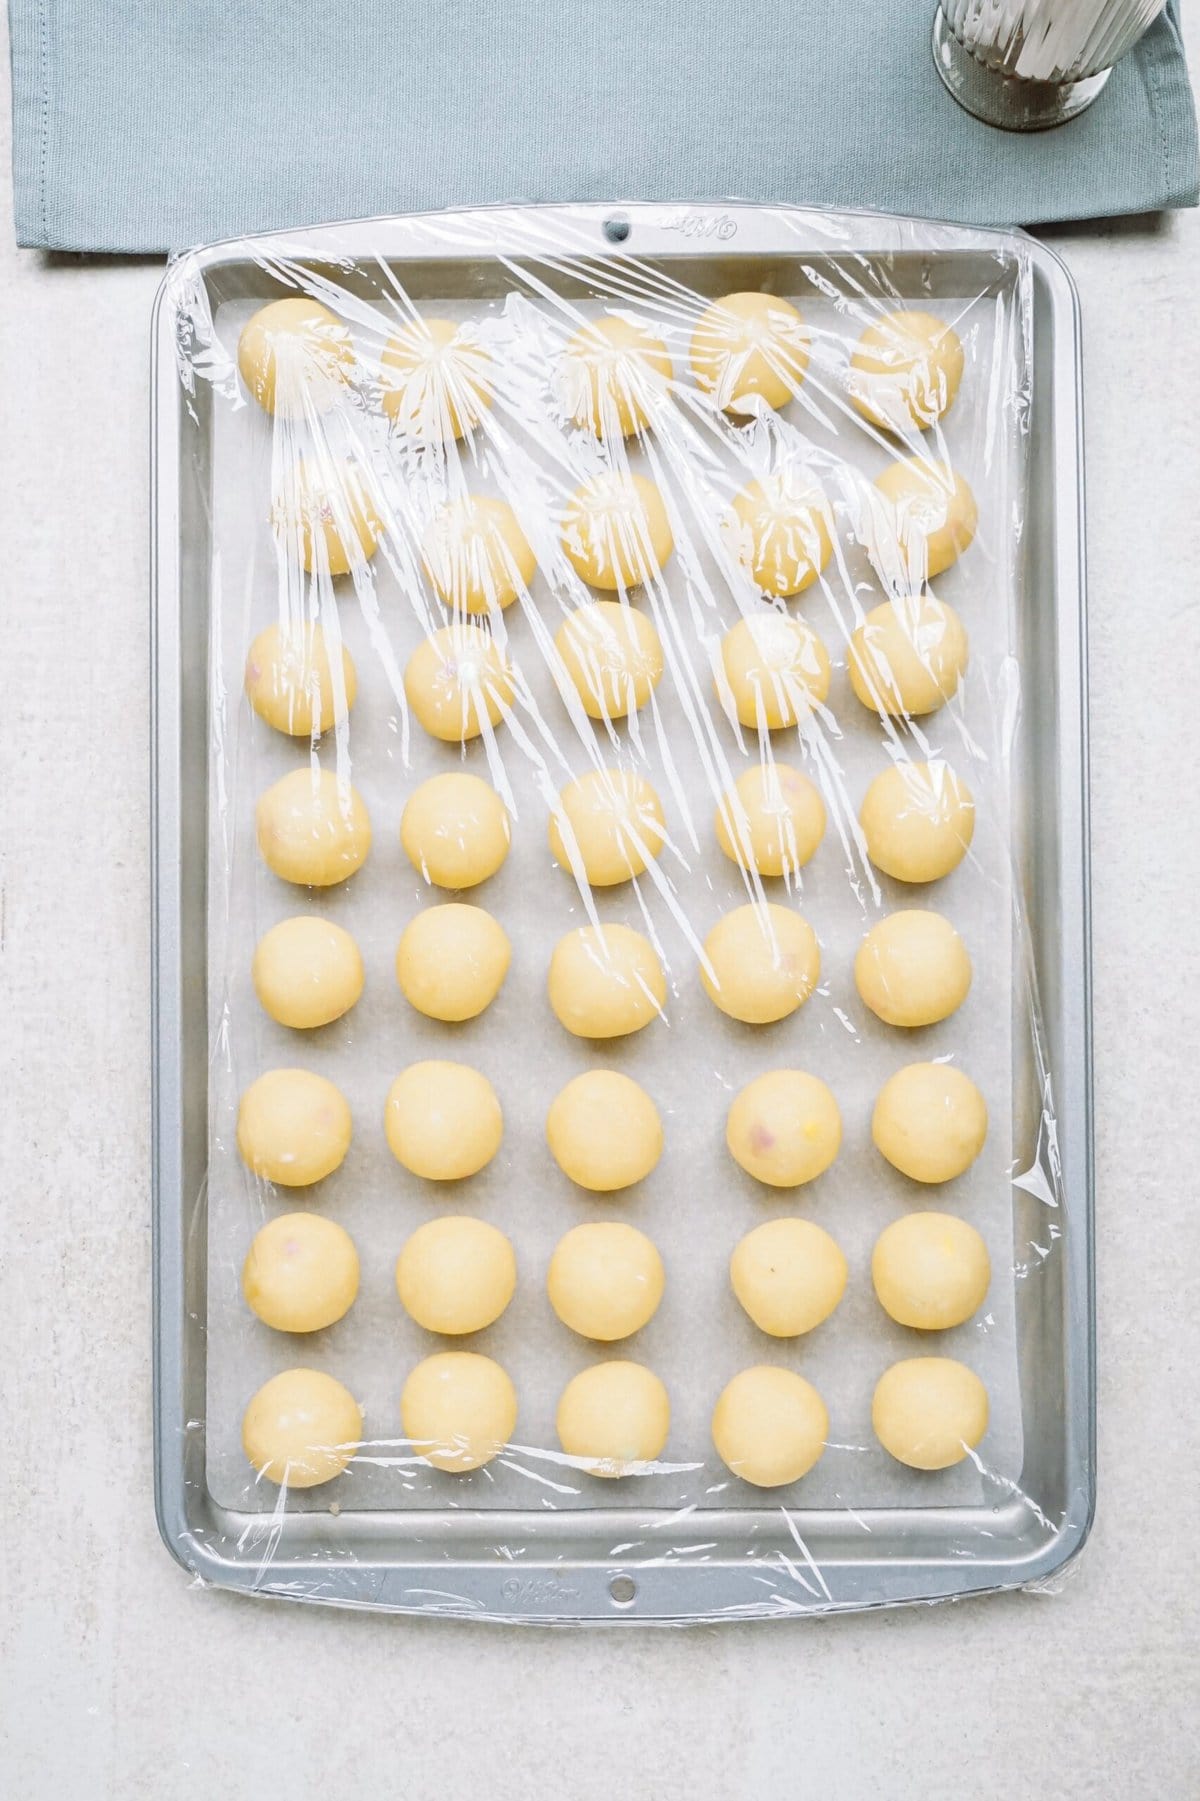
7. Cover + Freeze + Roll Again
Cover with plastic wrap and freeze cake balls for about 30 minutes. Remove from freezer and give each ball a second roll with the palm of your hands. This will ensure an evenly round ball. Cover and place back into freezer for 1 hour.
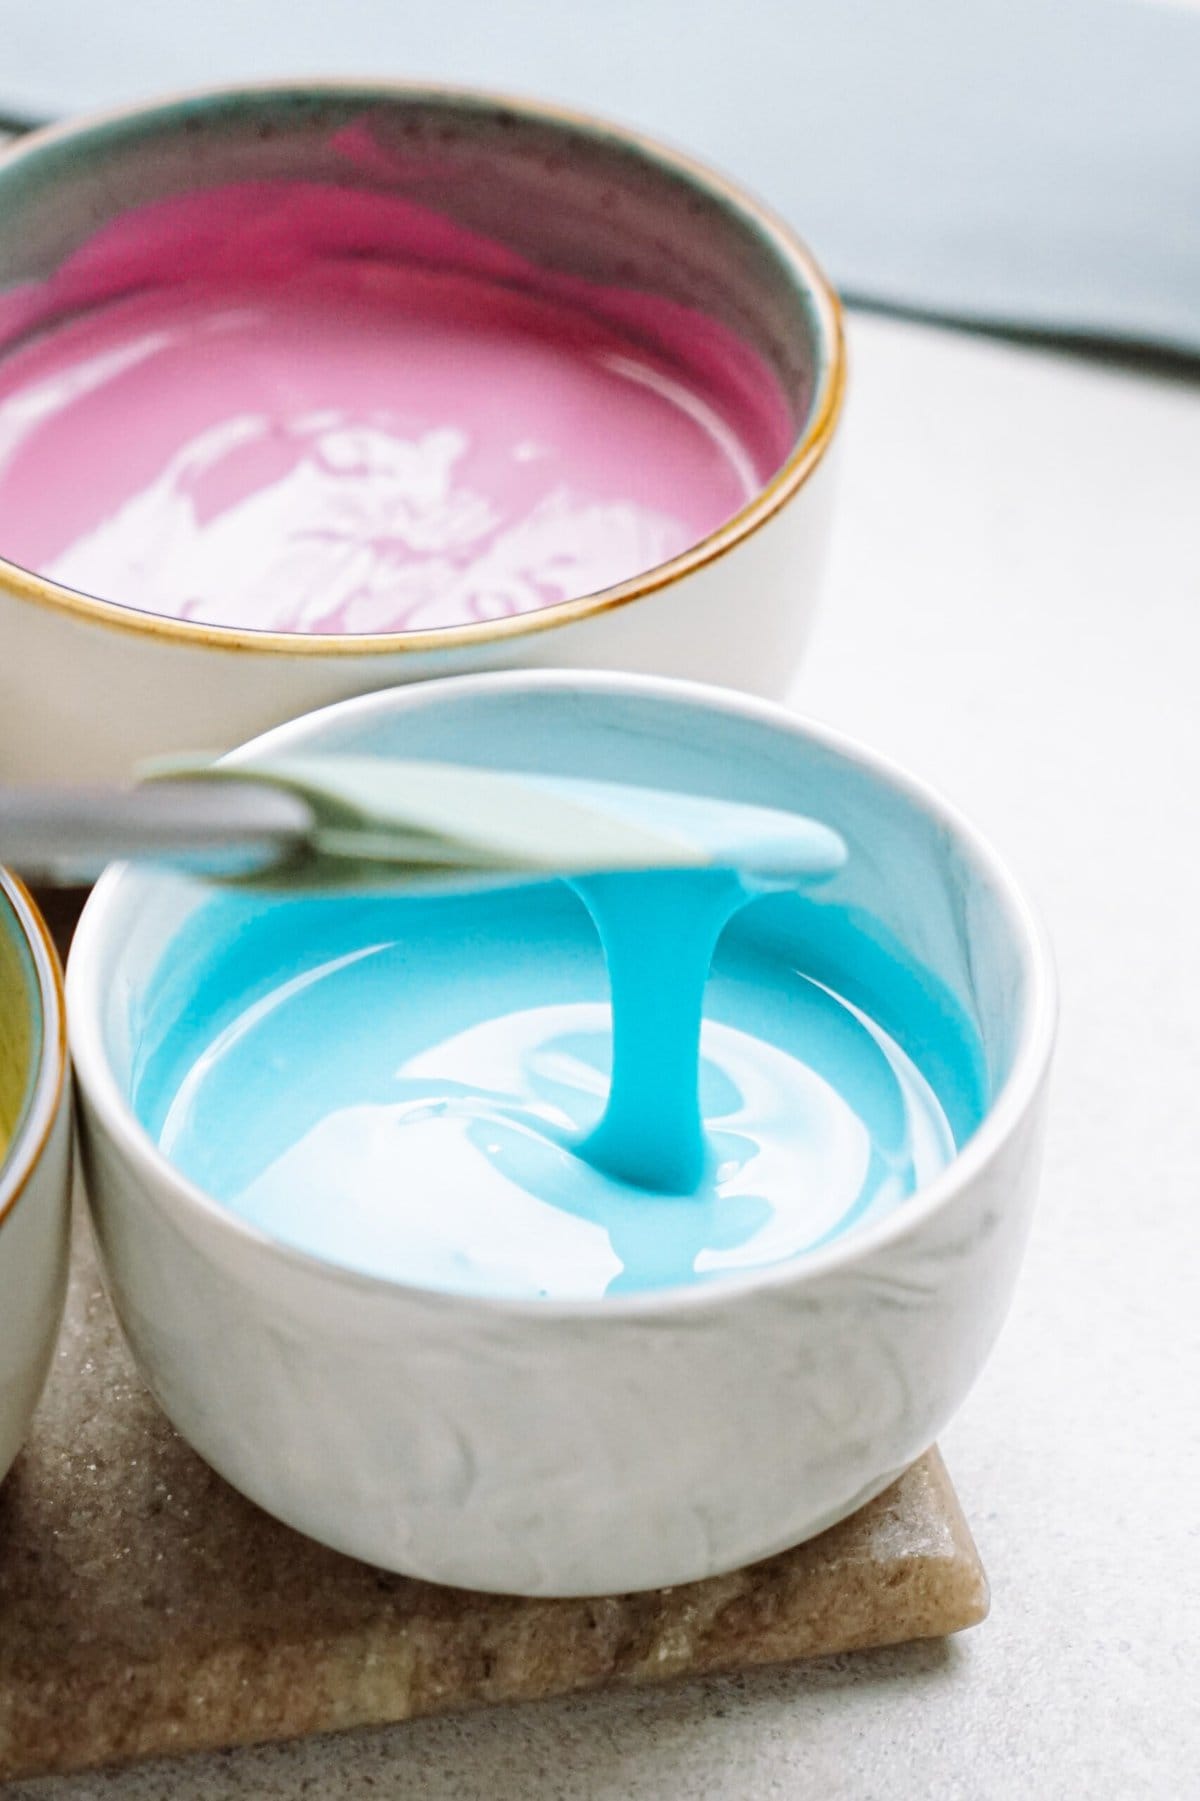
8. Melt Chocolate Wafers
Right before you’re ready to pull out your cake pops, melt chocolate. Microwave chocolate wafers in a microwave-safe bowl or cup (preferably a tall one that you can easily dip the cake pop in). Start out with 30 seconds, stir, and then melt at 20-second increments until melted. Be careful not to overcook the chocolate or it’ll seize up!
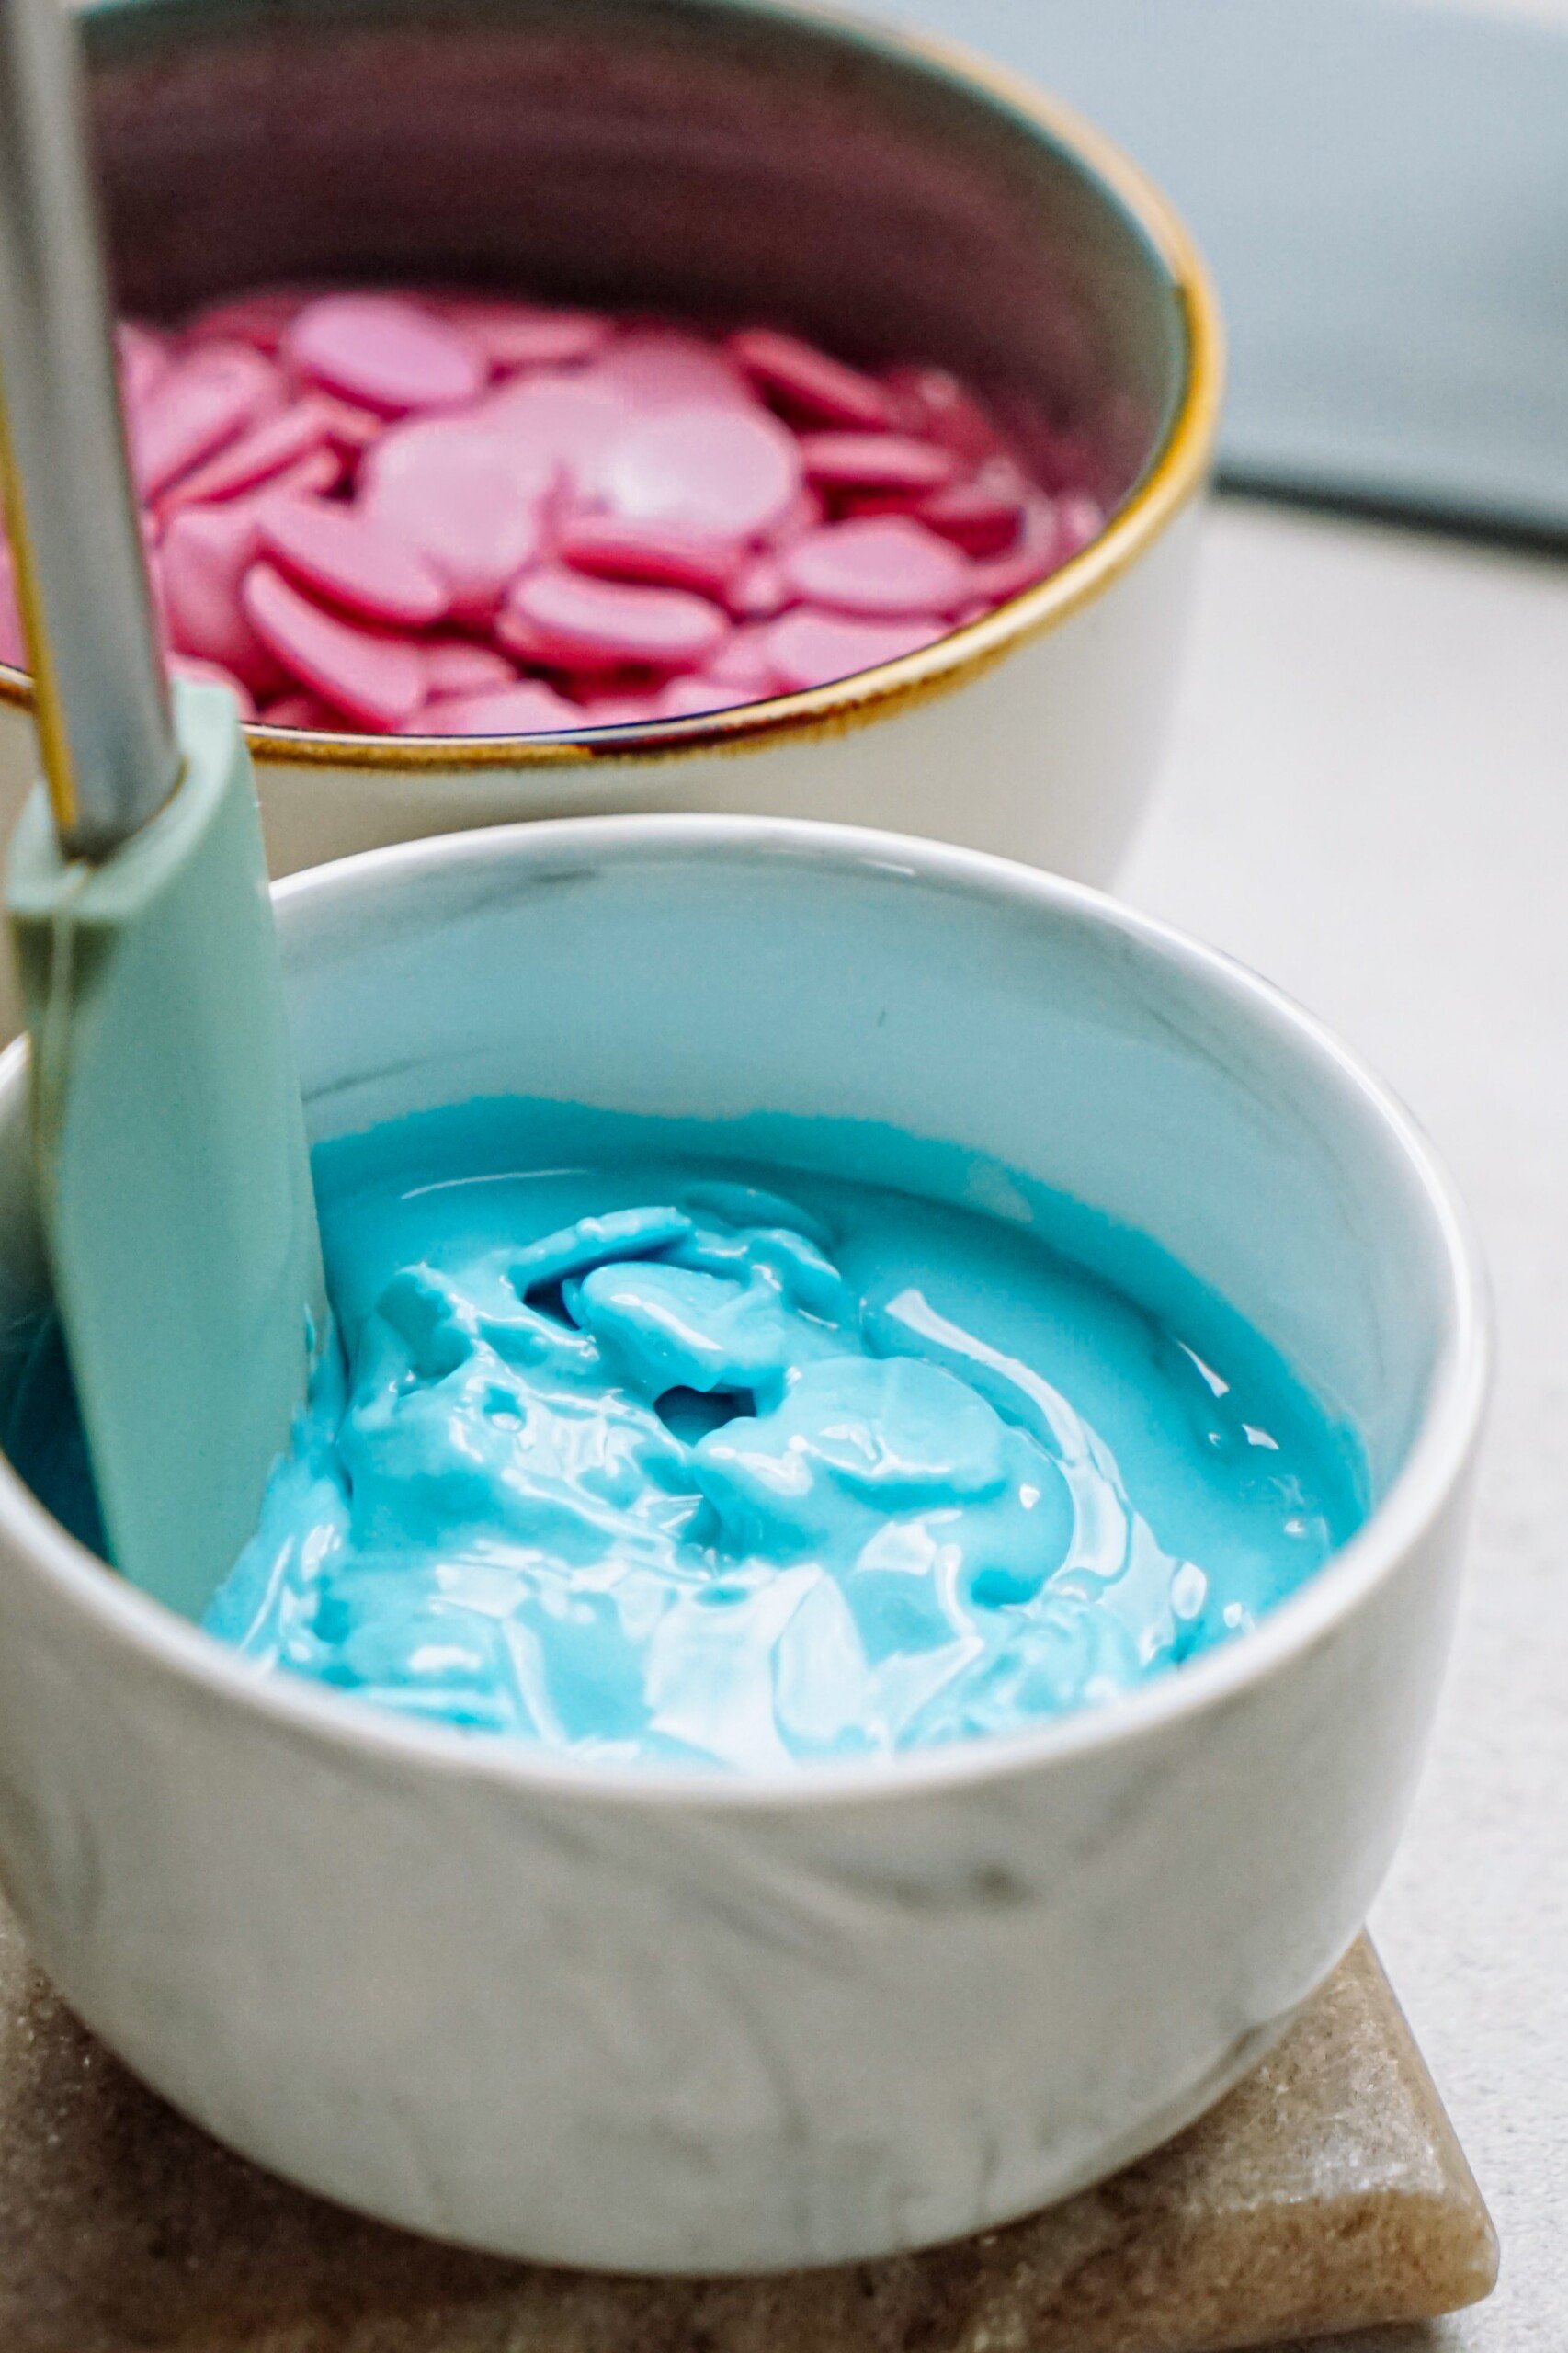
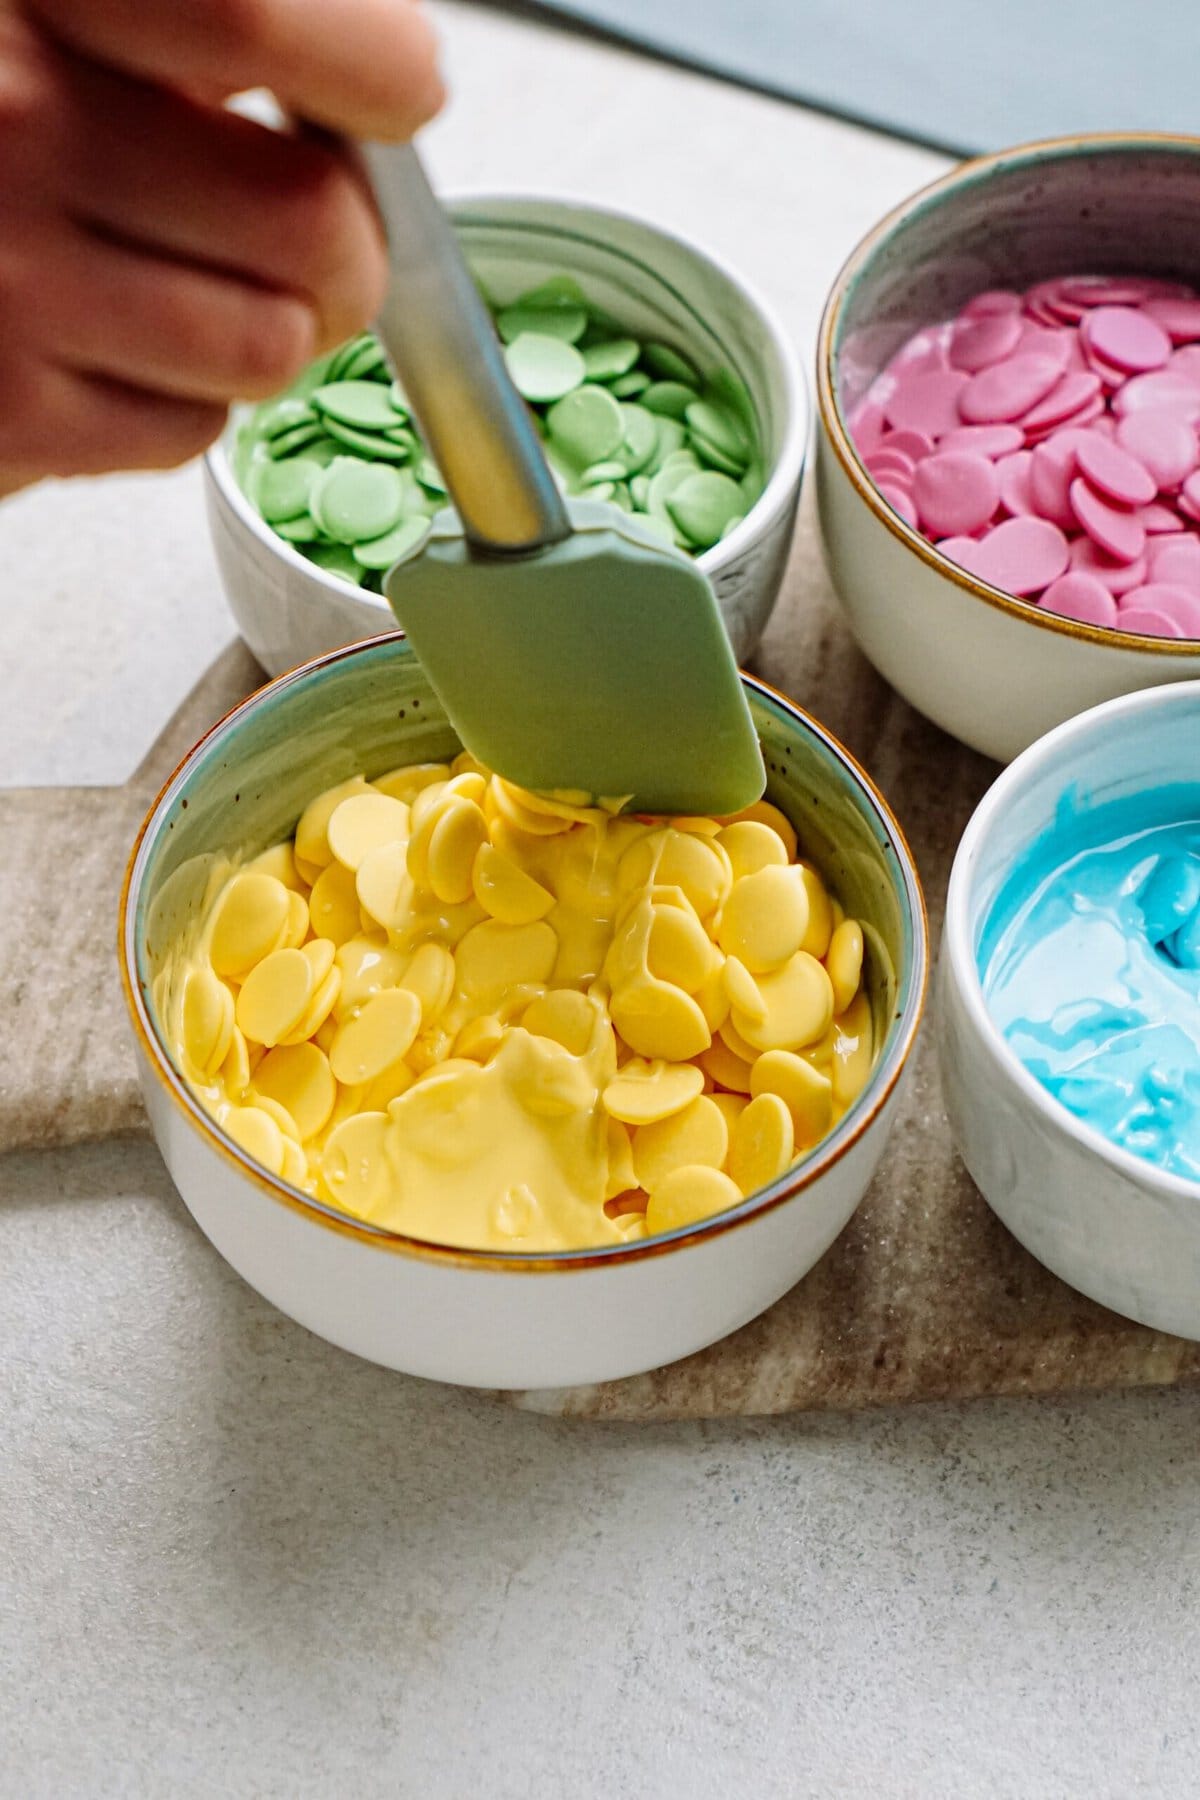
Pro Tip: Work in small batches! Pour ⅓ of the bag of chocolate in the bowl and then once it’s used up, melt another ⅓ of the bag, and so on.
9. Insert Cake Pop Sticks into Cake Balls
Remove cake pops from the freezer. Dip the tip of a cake pop stick into the melted chocolate and slide about two thirds the way through a cake pop ball. The chocolate will act as a glue for the stick. Do this with all 40 cake pop sticks, placing each one back on baking sheet as you go.

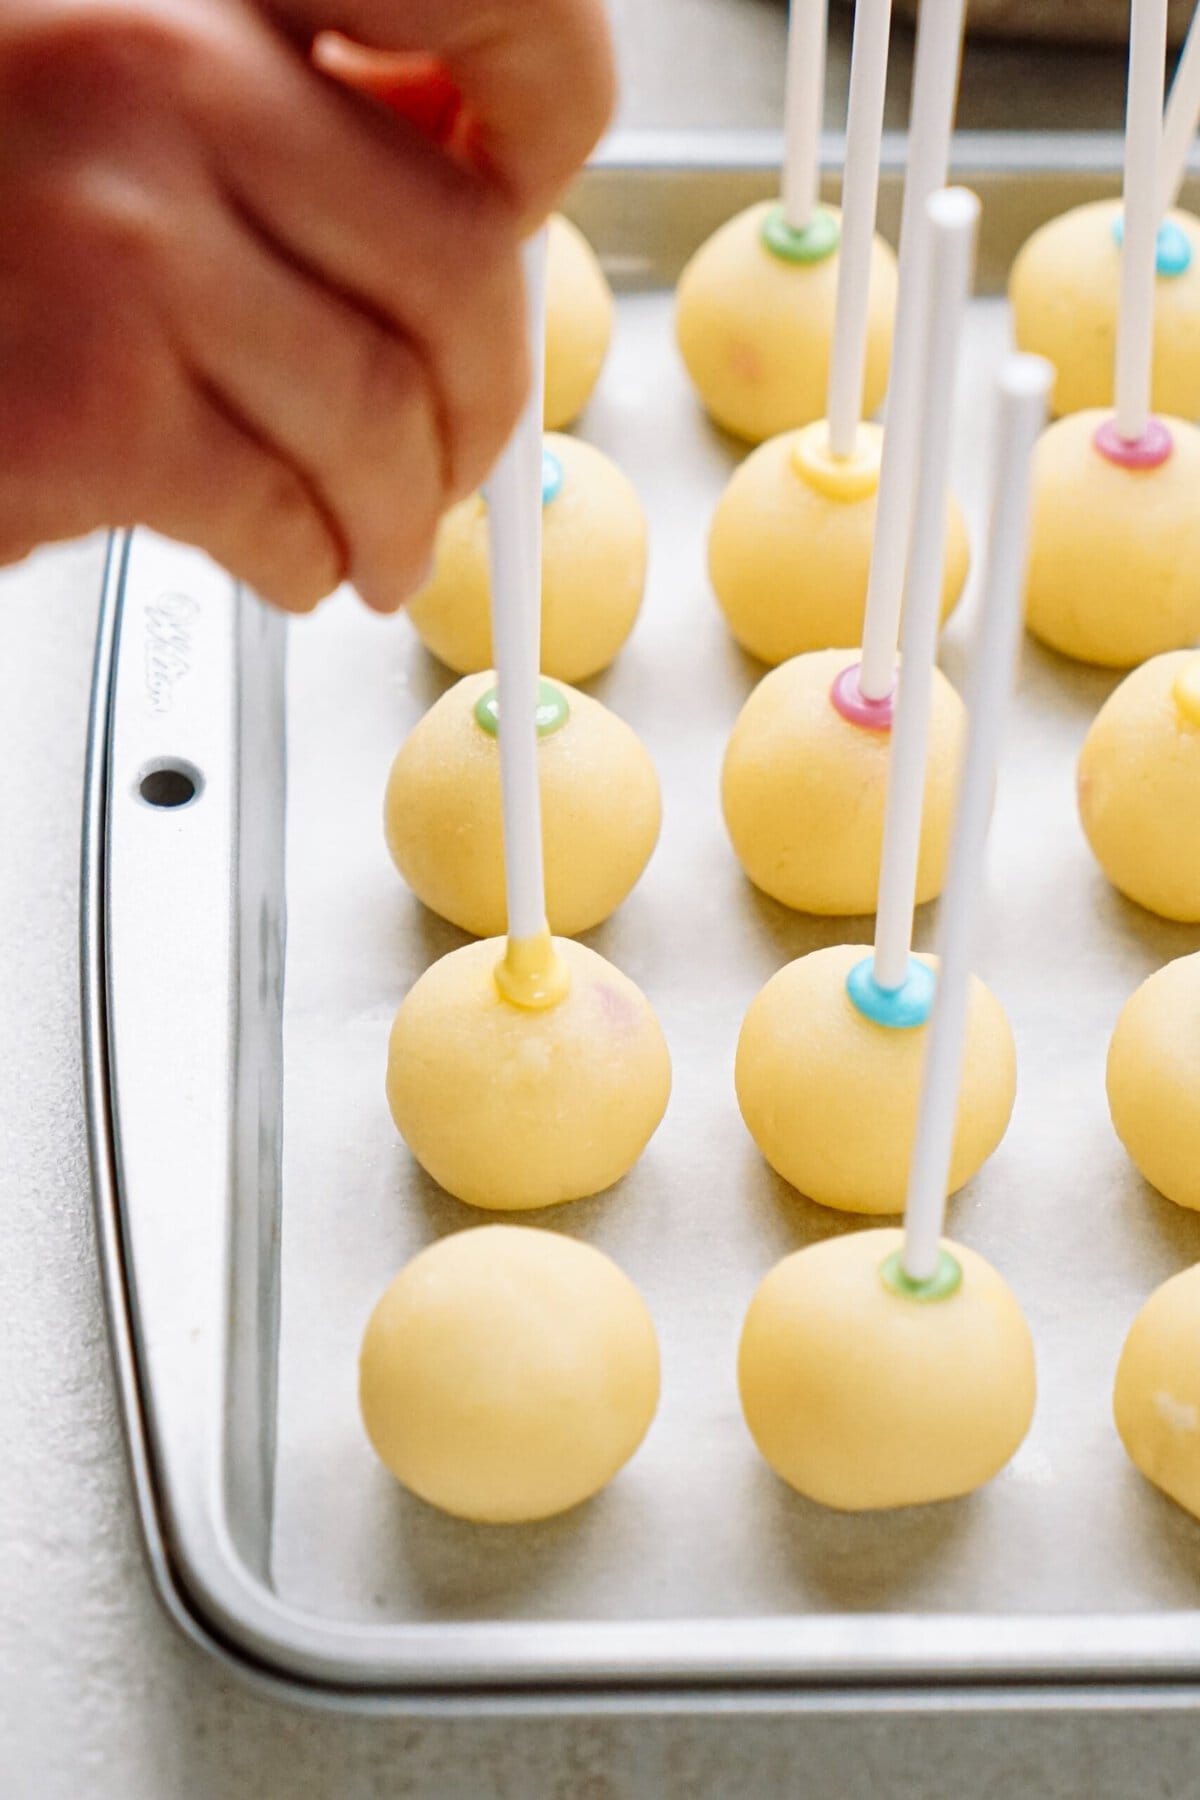
Pro Tip: If this step took you a long time to do, you may consider re-freezing your cake pops for 15 minutes or so and re-melting the chocolate. This is a general rule throughout this entire process.
10. Time to Dip Cake Pops!
Now you’re ready to dip! Holding the cake pop by the bottom of the stick, place upside down into the cup of melted chocolate, turning a bit to get every piece of the cake ball covered. Let as much chocolate drip off as possible, gently tapping on the side of the cup to remove any excess chocolate.
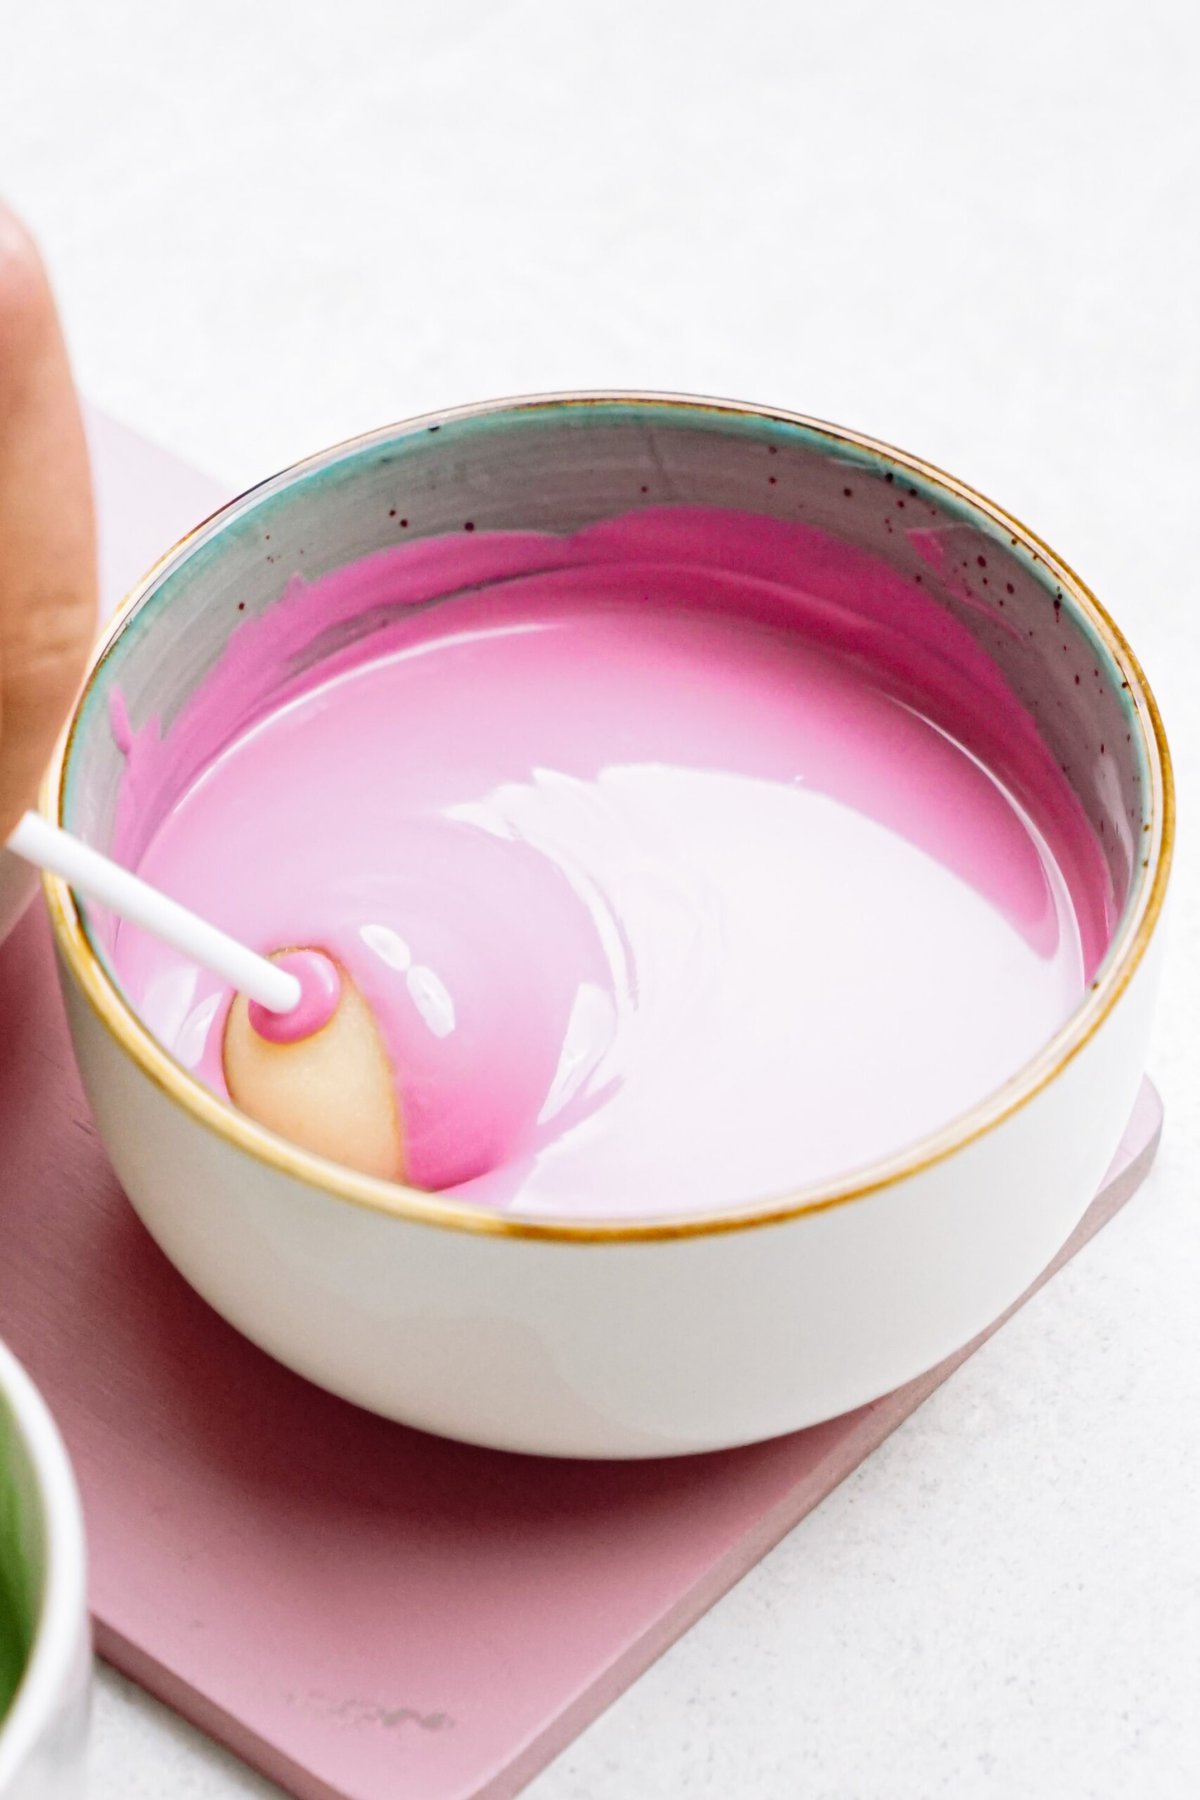
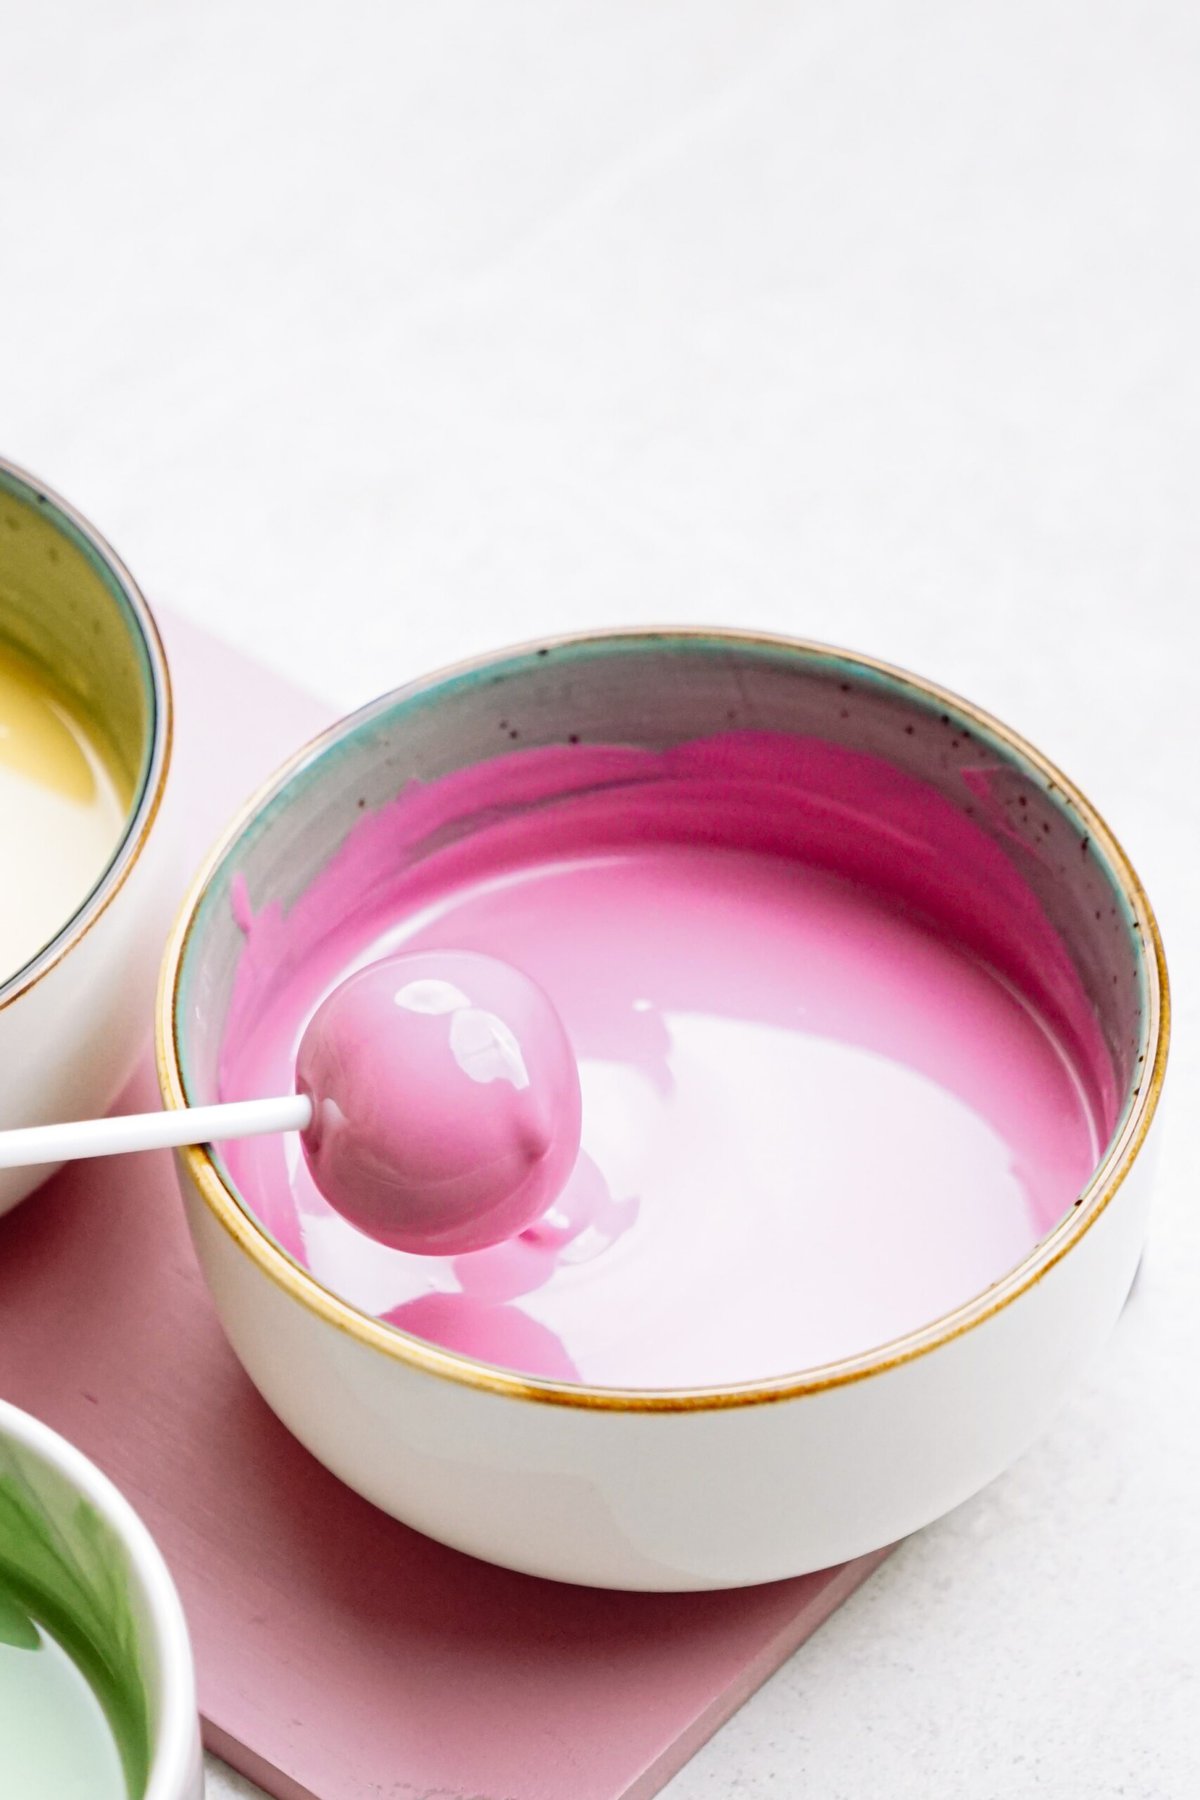
Pro Tip: If the chocolate is too thick, you can add a tiny amount of coconut oil to thin it out, just be careful not to add too much because the chocolate won’t set! You can also use Crisco shortening
11. Decorate! Here are some Easter Cake Pop Decorating Ideas
Moving quickly, decorate with Easter sprinkles and/or jimmies before the chocolate sets.
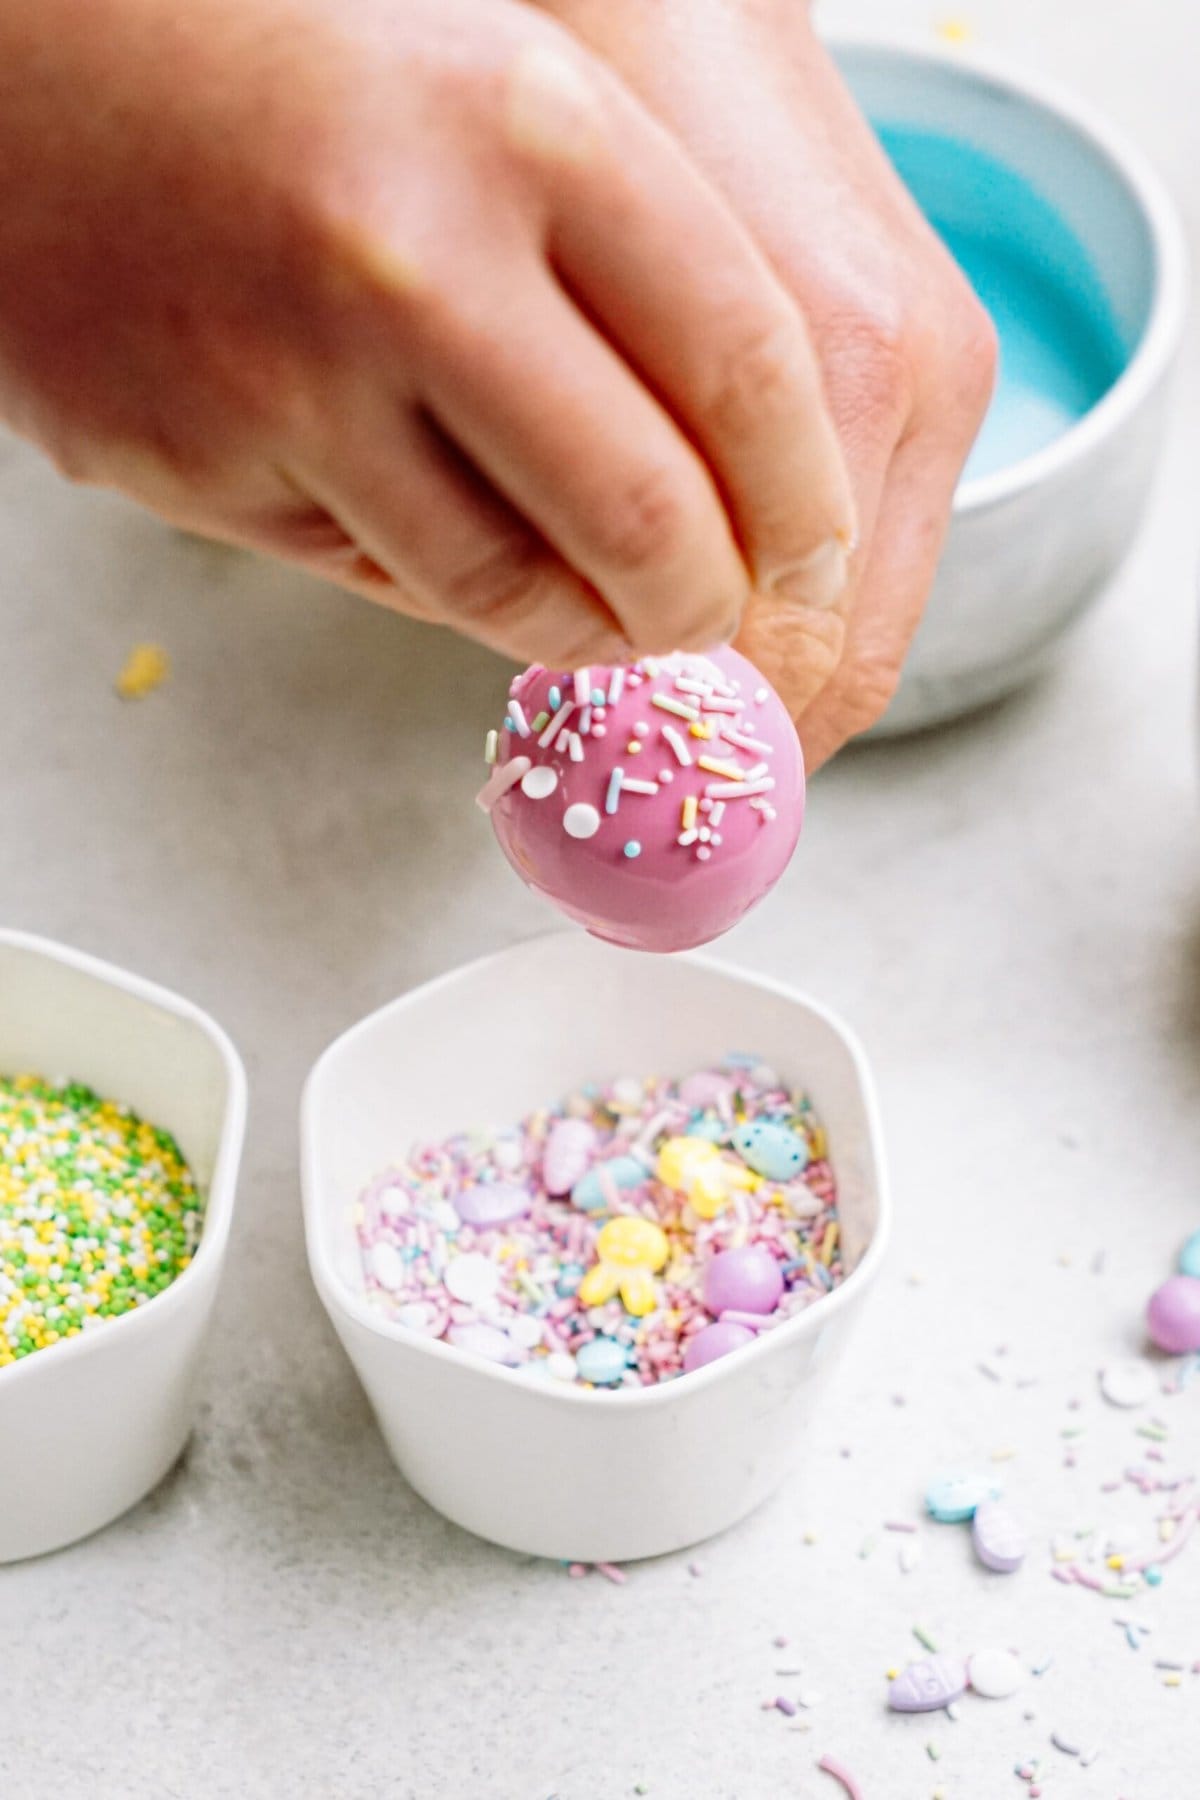
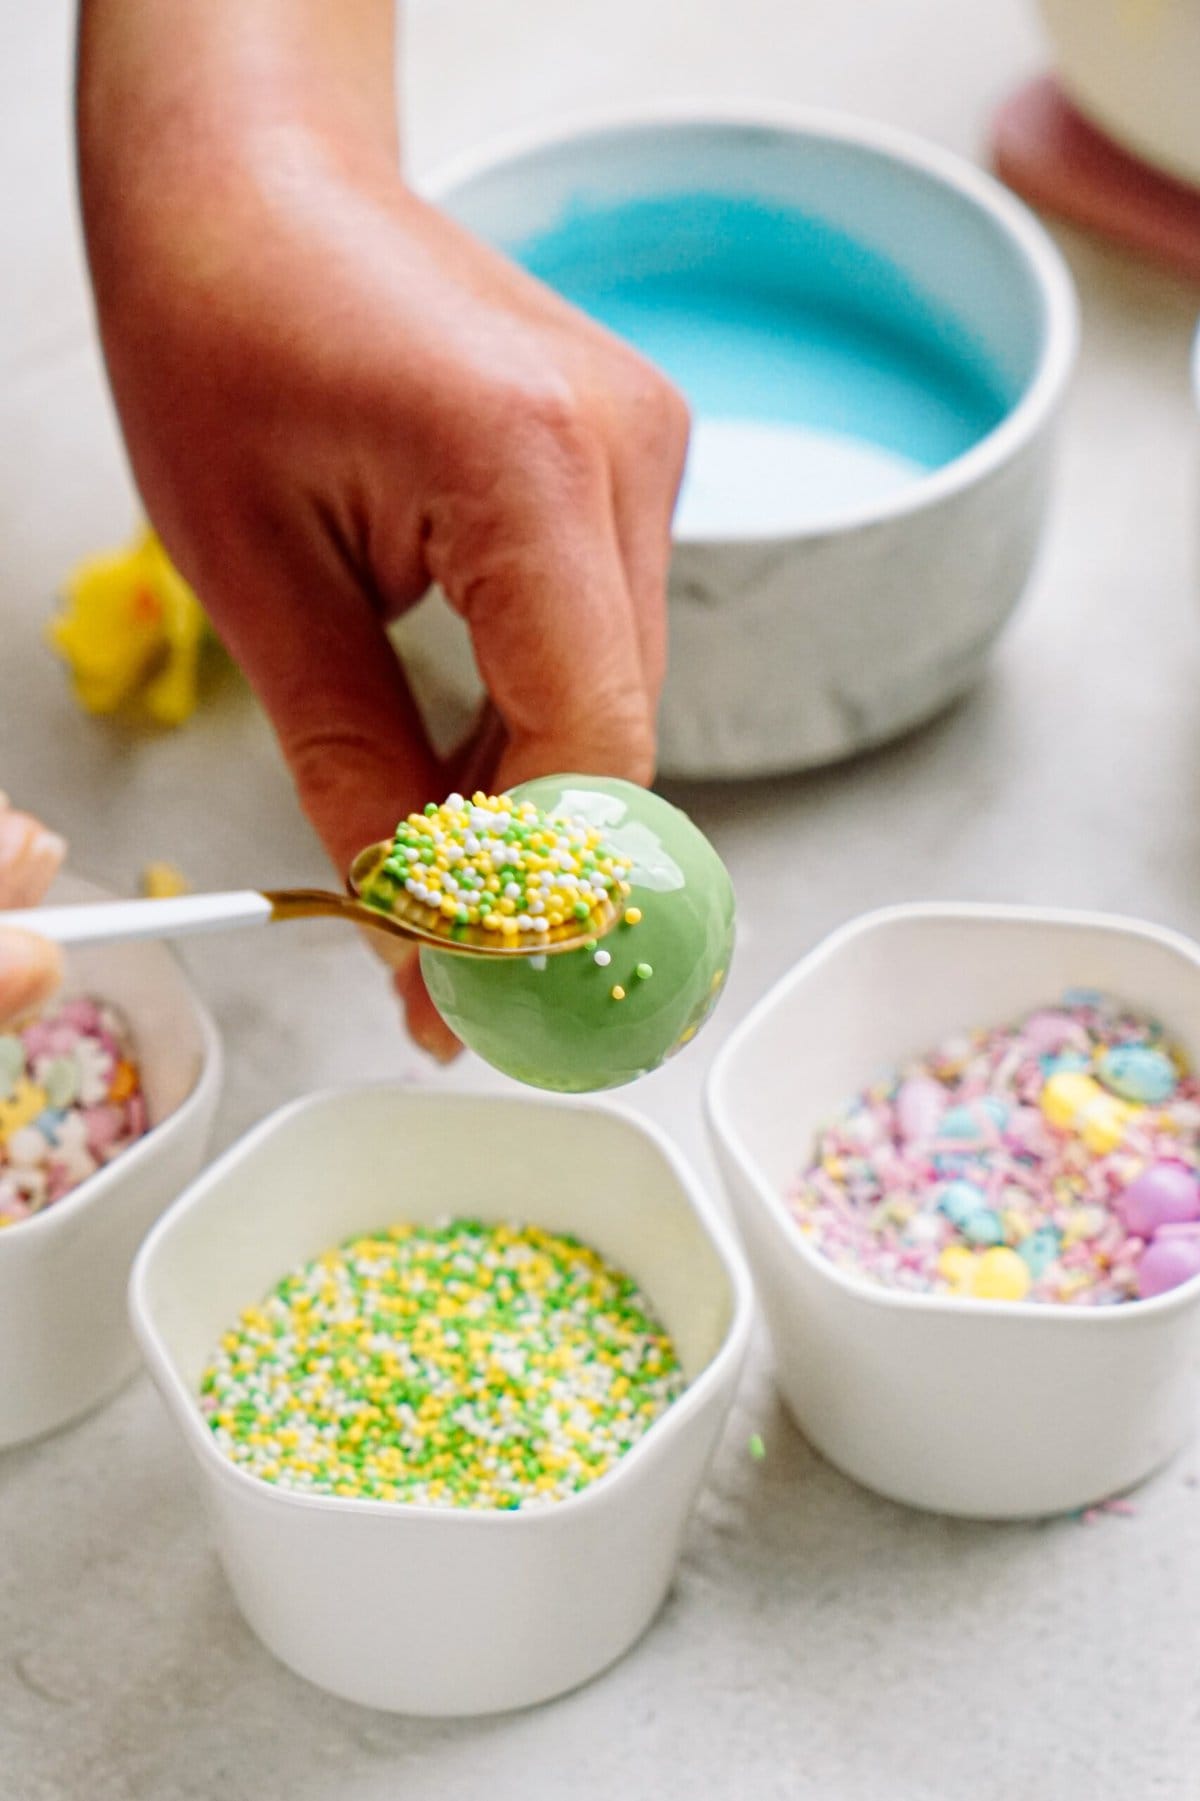
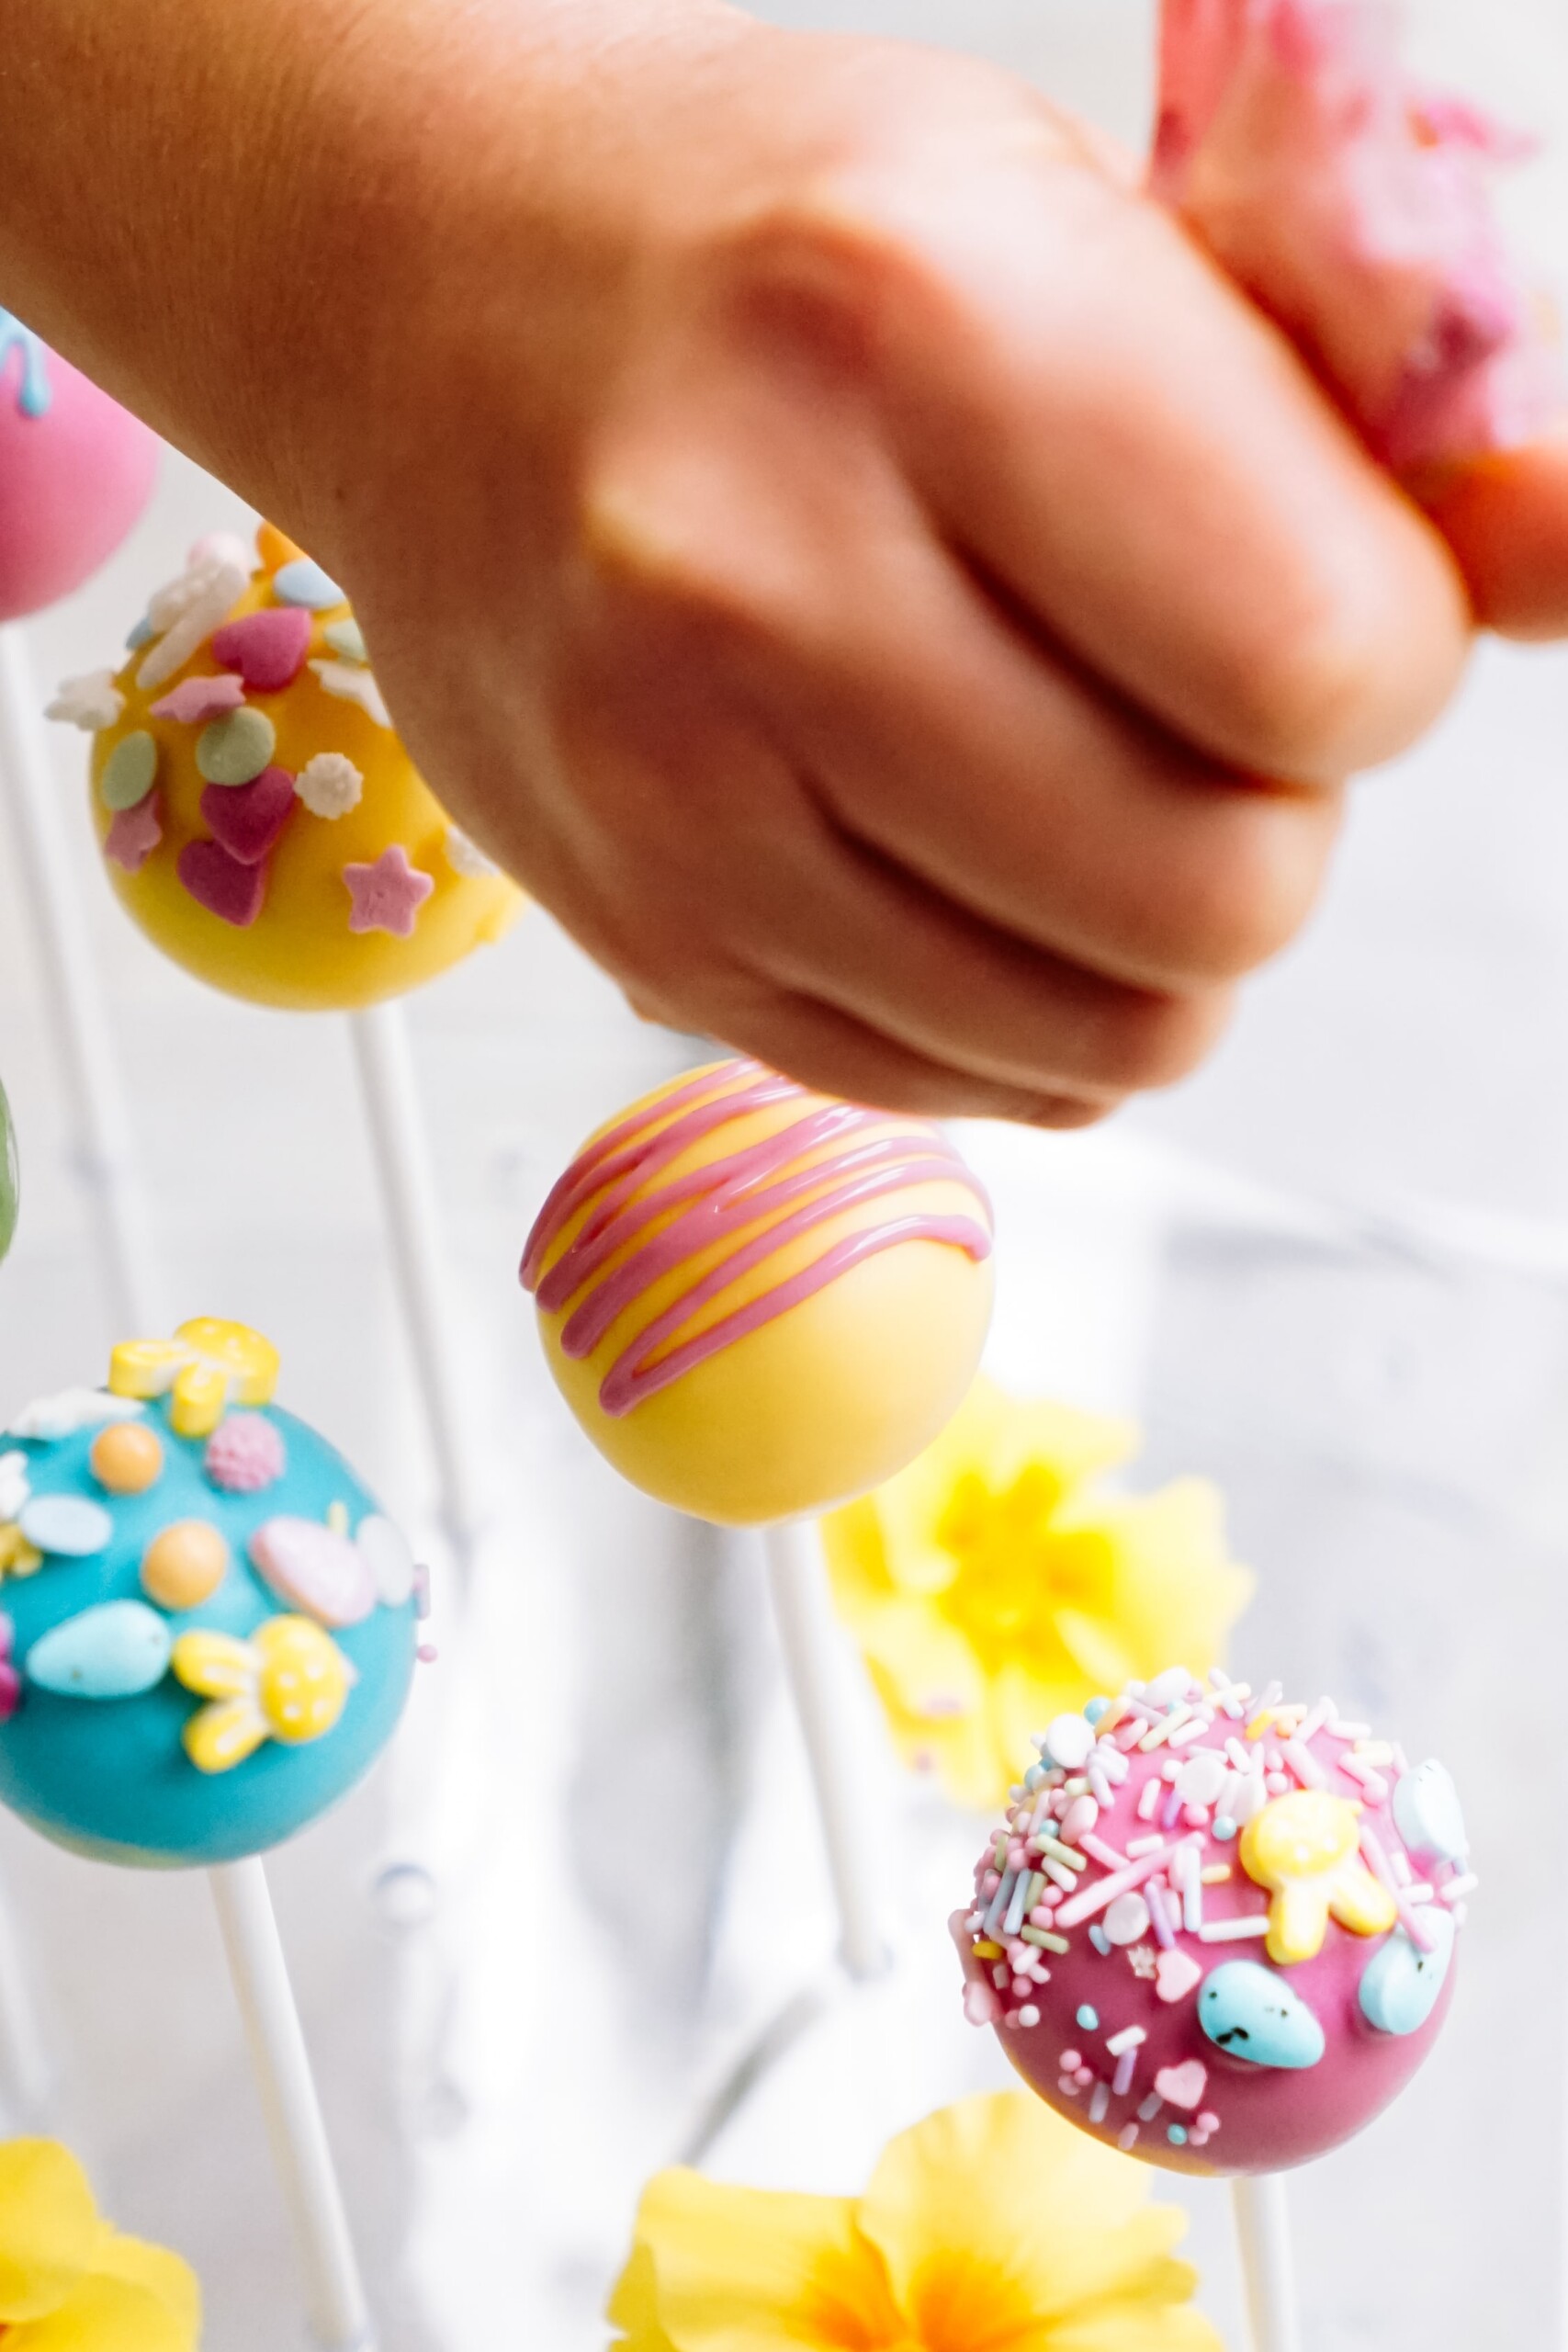
Instead of decorating with sprinkles, at this point, you could also melt a different color chocolate and drizzle over hardened solid colored chocolate on cake pop. Or do both!
12. Allow Cake Pops to Set
Place into a cake pop holder – cake pop up (a styrofoam block, a dish with rice to hold cake pops in place, or a box with holes, etc.). Allow to set completely (about 1 hour), serve and enjoy!
Storing Cake Pops
If you have leftover cake pops, store in an airtight plastic container in the fridge to keep them fresh and from drying out.
Make Ahead: These can be made 2-3 days in advance. For best results, keep your cake pops in the refrigerator until ready to serve.
To Freeze: If you want to store and use them later, after they have dried, place in a freezer safe, airtight container or bag for up to 1-2 months! Allow to thaw in the fridge overnight.
Tips For Success Making These Easy Easter Cake Pops
Use a small cookie scoop:
To help you shape uniform cake truffles, use a small cookie scoop then roll with your hands. Or even a round tablespoon would work.
Use the correct amount of frosting:
Mixing too much frosting with the cake can cause the cake balls to have too much moisture and become greasy and soggy.
Melting chocolate:
You don’t need to use the double boiler method to melt your chocolate wafers. Instead, just pop the wafers in the microwave and melt in 30-second intervals. If you notice the chocolate is a little thick, add 1 teaspoon of coconut oil to help thin it out.
Dipping:
Use a deeper cup, about the size of a tall drinking glass for dipping. If you use a shallow dish, make sure you have a spoon handy to scoop up the melted chocolate and pour it over to coat evenly.
Use a cake pop stand:
Whether you buy one or make one at home, it’ll really help keep them upright so they can dry. You can make one by poking holes in a box, using a styrofoam block or put rice in a glass or smaller mason jar.

More Easter Desserts to Try!
- Easter Rice Krispies Treats Eggs
- Easter Bunny Cake
- Peanut Butter Easter Eggs
- Marshmallow Potato Chip Easter Nests
- Easter Dirt Cake
More Cake Pop Recipes to Make!
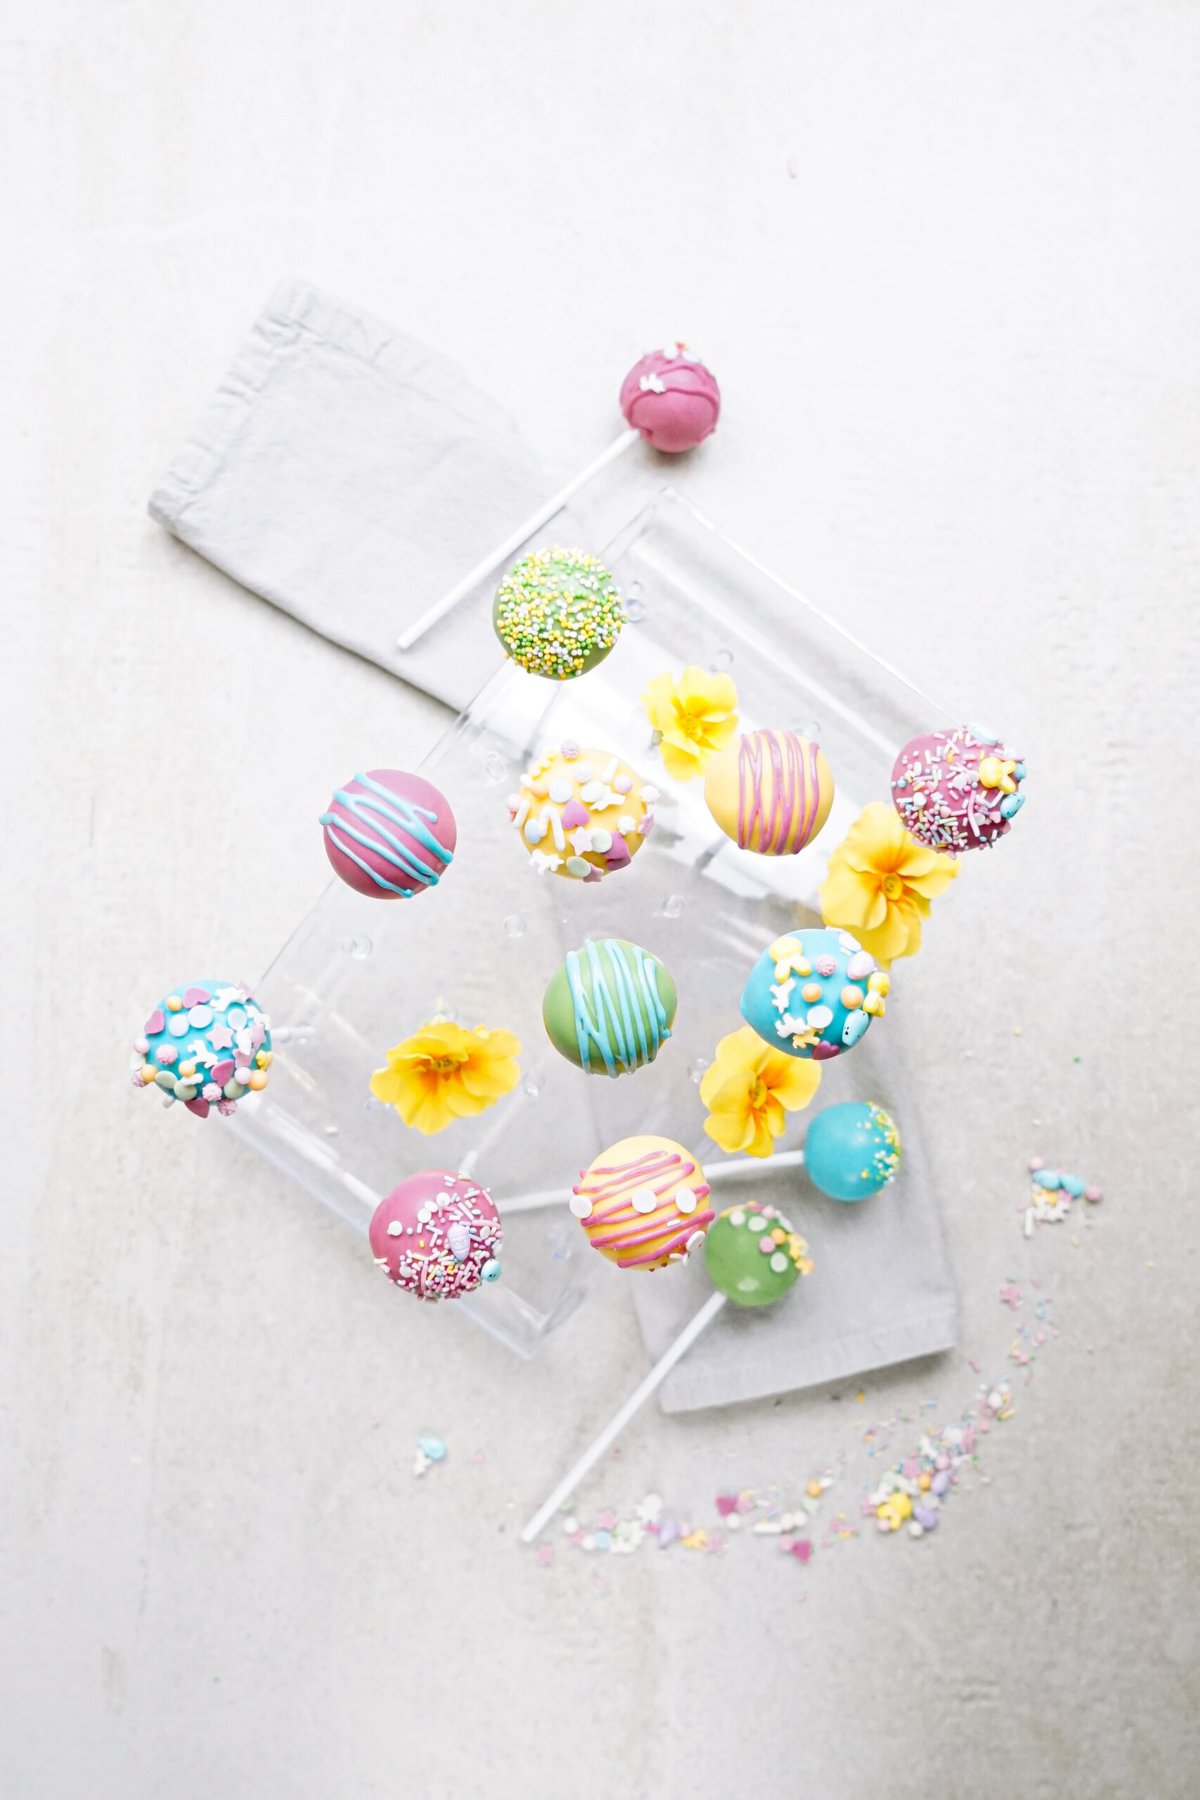
With these Easter cake pops, you’ll have a sweet and festive treat that’s sure to delight everyone at your Easter gathering. Get creative with your decorations and have fun making these adorable treats–they are so cute that they can easily be part of your Easter decor AND your Easter spread! The printable recipe card is below. Happy Easter, friends! 🙂
If you make this recipe, I would really appreciate it if you would give it a star rating and leave your review in the comments! If you have a picture of your finished dish, post it on Instagram using the hashtag #laurenslatest and tagging me @laurens_latest.

Easter Cake Pop Ideas
If you're looking to really impress your guests this year, you MUST make these festive Easter Cake Pops!! Don't be intimidated. They are way easier than you think and the decorations are ENDLESS!
Equipment
- 40 cake pop sticks
- cake pop holder optional
Ingredients
for the cake
- 15.25 oz White Cake Mix*
- 3 large eggs
- 1/2 cup vegetable oil
- 1 1/4 cups water
- 1 cup cream cheese frosting or frosting of choice, store-bought or homemade
- Easter sprinkles optional
for the decorations
- 10 oz pastel colors chocolate melting wafers pink, green, yellow (think Easter egg colors)
- Easter sprinkles and jimmies
Instructions
- Preheat oven to 350° F (or whatever your cake mix requires).
- Mix and bake cake mix according to package directions. Depending on which brand of cake mix you use, you may need to change the measurements for eggs, oil, and water listed.

- While the cake is baking, make the frosting (if using homemade). Allow baked cake to cool completely.
- Remove cooled cake from the pans and using a large sharp knife, remove the dark outer hardened layer of the cake. Discard or save for snacking. This is an optional step but I think it makes for a better ball-rolling experience if the hard outer edges are removed.
- In a stand mixer with the paddle attachment (or hand mixer), crumble cooled cake. Mix in cream cheese frosting. At this point you can add in some Easter sprinkles (optional). The mixture should be moist and stick together easily. If the dough is too dry, add in more frosting a tablespoon at a time.
- Line baking sheet with parchment paper and using a cookie scoop, scoop cake balls onto the baking sheet. Roll each ball with your hands. If the dough sticks to your hands, you’ll need to wash them occasionally.
- Cover with plastic wrap and freeze cake balls for about 30 minutes. Remove from freezer and give each ball a second roll with the palm of your hands. This will ensure an evenly round ball. Cover and place back into freezer for 1 hour.
- Right before you're ready to pull out your cake pops, melt chocolate. Microwave chocolate wafers in a microwave-safe bowl or cup (preferably a tall one that you can easily dip the cake pop in). Start out with 30 seconds, stir, and then melt at 20-second increments until melted. Be careful not to overcook the chocolate or it’ll seize up!**
- If the chocolate is too thick, you can add a tiny amount of coconut oil to thin it out, just be careful not to add too much because the chocolate won’t set! You can also use Crisco shortening.
- Remove cake pops from the freezer. Dip the tip of a cake pop stick into the melted chocolate and slide about two thirds the way through a cake pop ball. The chocolate will act as a glue for the stick. Do this with all 40 cake pop sticks, placing each one back on baking sheet as you go.
- If this step took you a long time to do, you may consider re-freezing your cake pops for 15 minutes or so and re-melting the chocolate. This is a general rule throughout this entire process.
- Now you're ready to dip! Holding the cake pop by the bottom of the stick, place upside down into the cup of melted chocolate, turning a bit to get every piece of the cake ball covered.
- Let as much chocolate drip off as possible, gently tapping on the side of the cup to remove excess.
- Moving quickly, decorate with sprinkles and/or jimmies before the chocolate sets.
- Instead of decorating with sprinkles, at this point, you could also melt a different color chocolate and drizzle over hardened solid colored chocolate on cake pop. Or do both!
- Place into a cake pop holder – cake pop up (a styrofoam block, a dish with rice to hold cake pops in place, or a box with holes, etc.).
- Allow to set completely, serve and enjoy!

Video
Notes
*The eggs, water and oil ingredients listed after the cake mix are what the cake mix requires according to package directions. They are NOT in addition to those ingredients. Depending on which brand of cake mix you use, these ingredients may vary.
**Work in small batches! Pour ⅓ of the bag of chocolate in the bowl and then once it’s used up, melt another ⅓ of the bag, and so on.
Nutrition
Calories: 143kcalCarbohydrates: 19gProtein: 1gFat: 7gSaturated Fat: 3gPolyunsaturated Fat: 2gMonounsaturated Fat: 2gTrans Fat: 0.1gCholesterol: 15mgSodium: 103mgPotassium: 35mgFiber: 0.1gSugar: 14gVitamin A: 22IUVitamin C: 0.04mgCalcium: 40mgIron: 0.3mg
Rate This RecipePlease consider Leaving a 5-Star Review!