You have 0 items in your cart
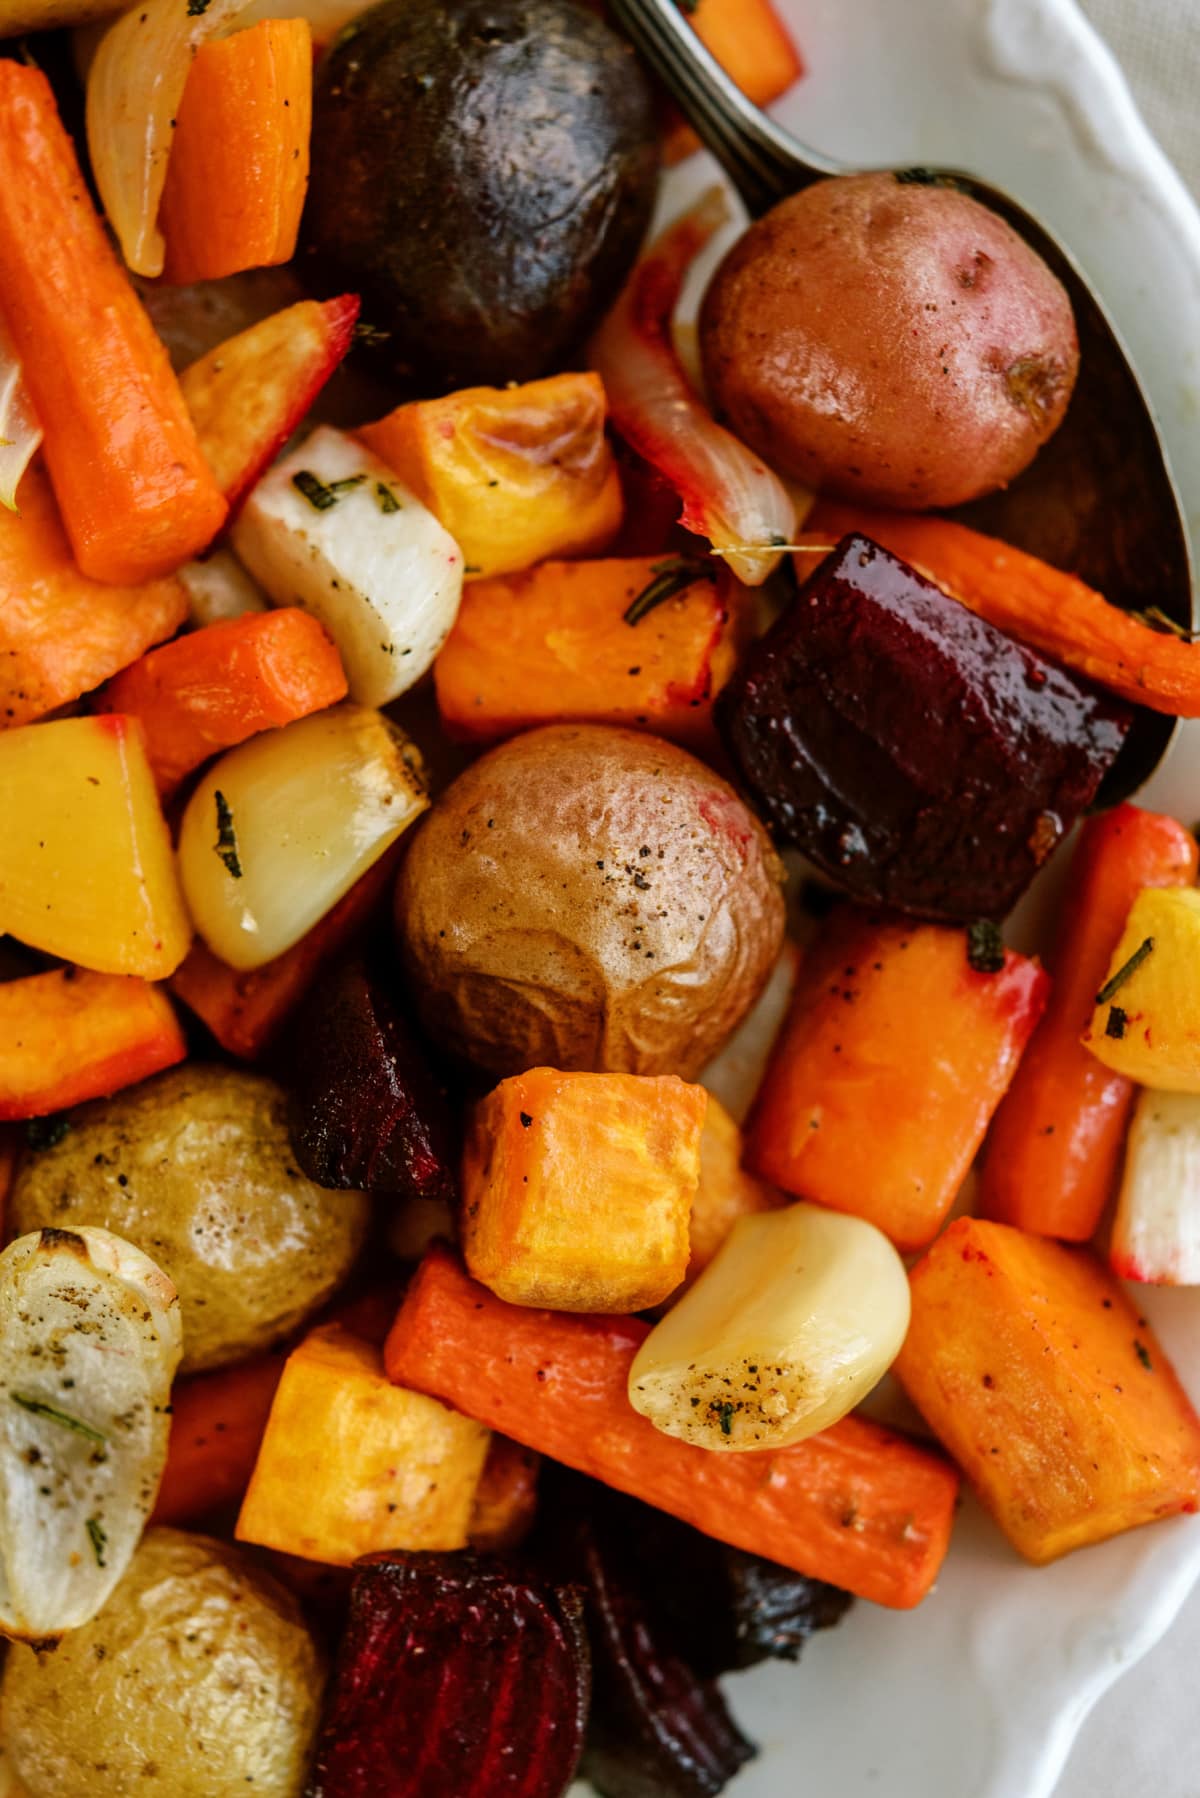
Roasted Root Vegetables
May 25, 2026
Leave a comment!
This post may contain affiliate links. View my privacy policy and disclosure policy for more details.
Roasted Root Vegetables are one of the easiest ways to make vegetables feel a little more exciting. You toss everything onto a sheet pan, roast the vegetables until the edges turn golden and caramelized, then finish them with buttery roasted garlic and fresh herbs. Every bite is packed with savory flavor, soft centers, and crispy roasted edges.
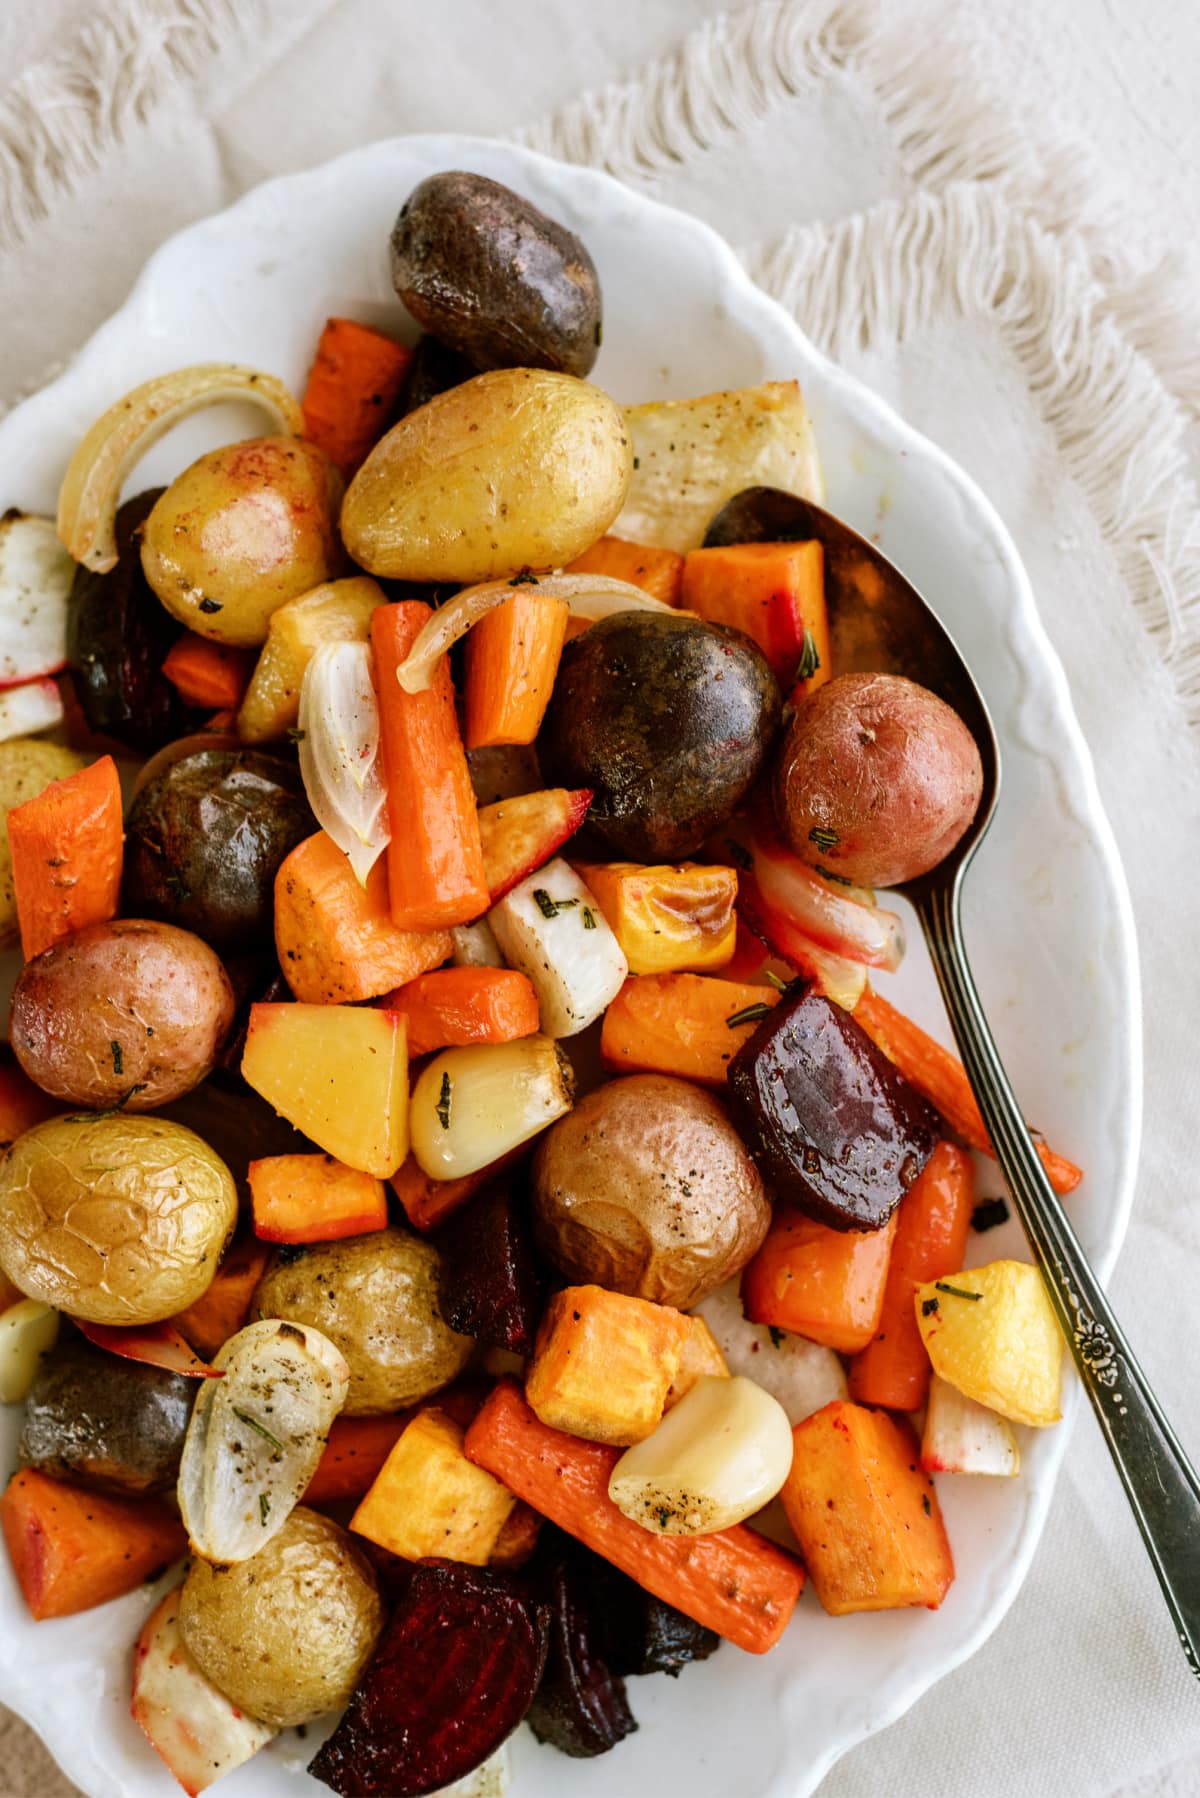
Table of Contents
What are Root Vegetables?
Root Vegetables are grown underground. Unlike your usual vegetable, the harvested part of this plant is the root, rather than the leafy or colorful portion seen above ground. Root vegetables are fairly easy to grow, with harvest ready in the Fall.
The most common root vegetables are:
- onions
- shallots
- potatoes
- sweet potatoes
- carrots
- beets
- turnips
- parsnips
- radishes
- rutabaga
- daikon
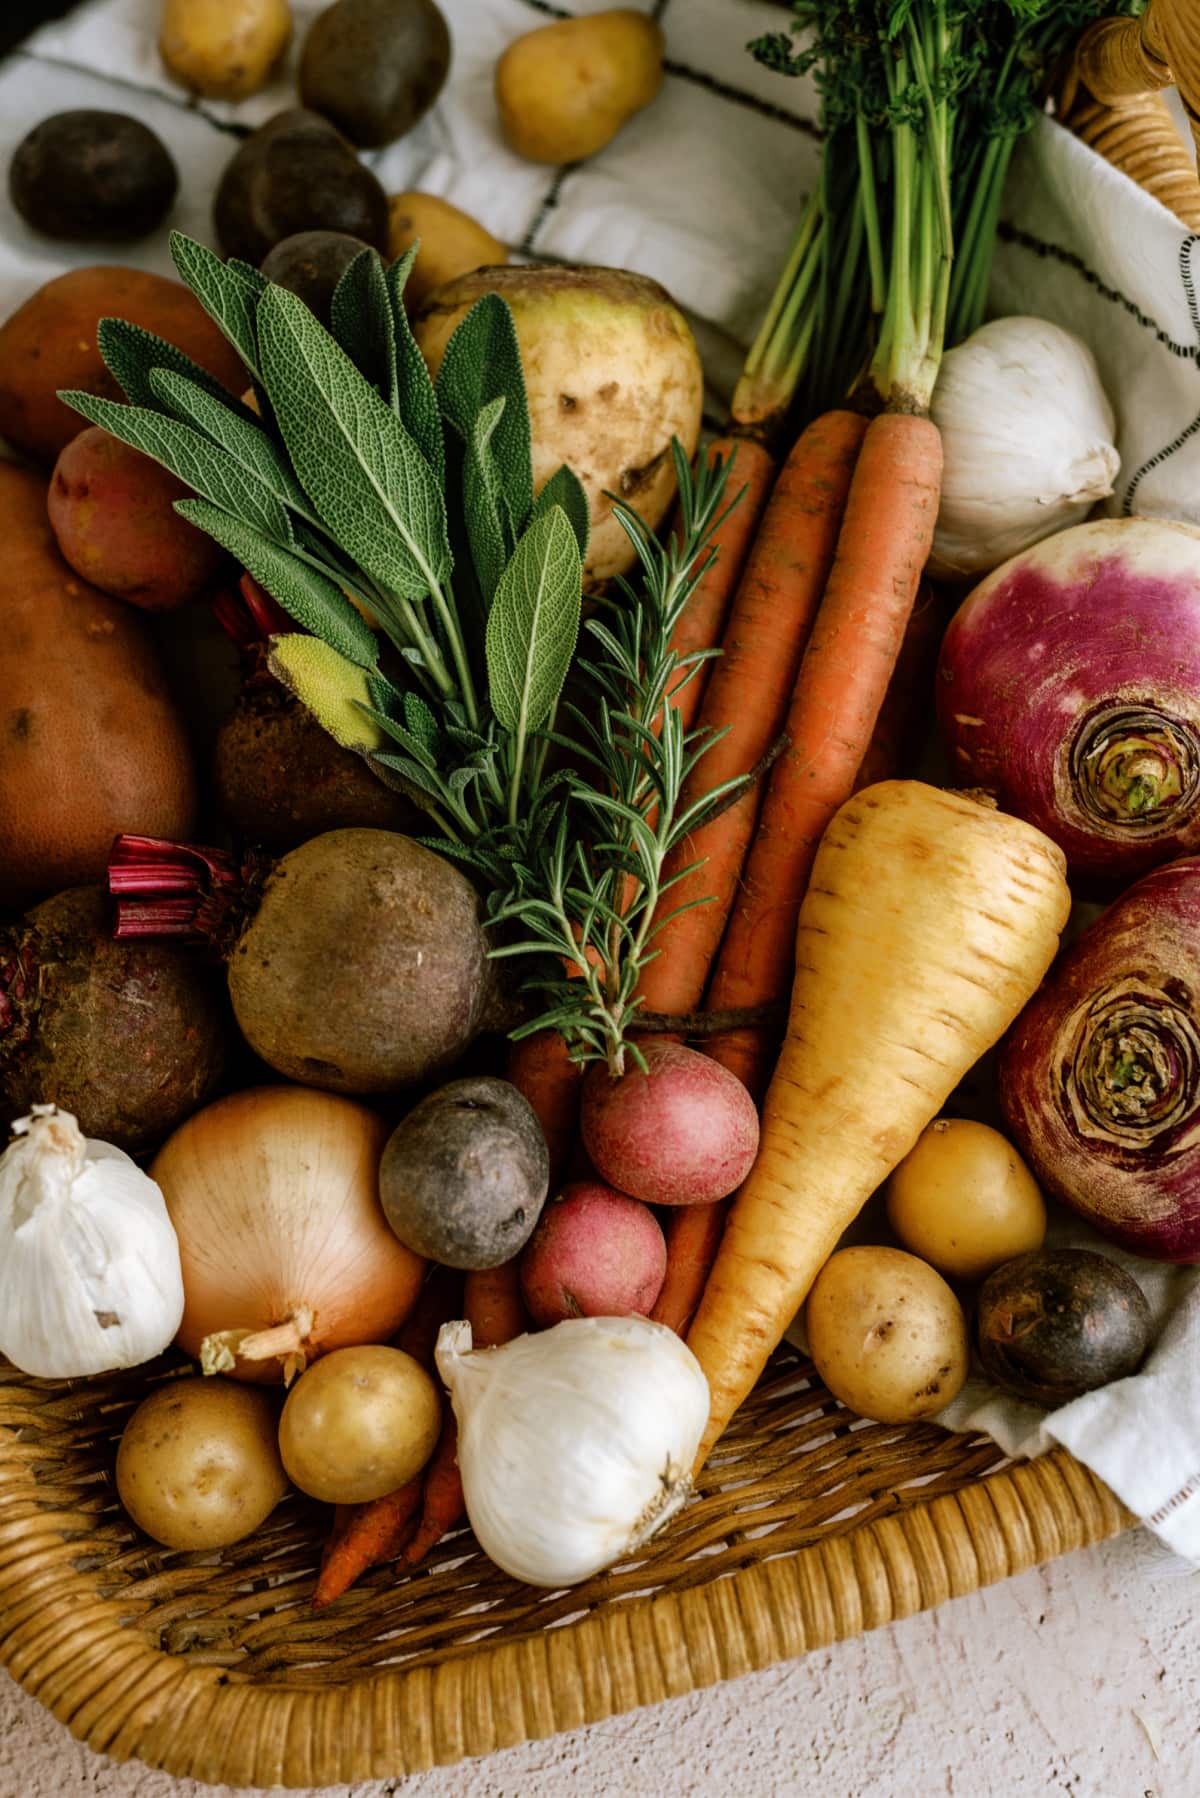
Ingredient Notes
- Olive oil– Helps the vegetables roast evenly and keeps them from drying out in the oven. It also helps everything achieve those golden, caramelized edges.
- Garlic bulbs– Add heartiness and texture to the mix. Gold potatoes get especially creamy inside, while red and white potatoes hold their shape nicely.
- Potatoes– White, gold, or red potatoes all work beautifully. Gold potatoes get especially creamy inside.
- Sweet potatoes– Bring a little natural sweetness and roast up beautifully with caramelized edges.
- Beets– Use red, golden, or striped. Golden beets keep everything from turning bright pink, if that matters to your aesthetic.
- Parsnips– Slightly sweet with a mild nutty flavor that gets even better after roasting. They fit right in with the potatoes and carrots.
- Turnip + rutabaga– These add that classic roasted root vegetable flavor and make the mix feel extra hearty and savory.
- Fresh rosemary, thyme, and sage– Fresh herbs matter here. They crisp up beautifully in the oven.
How to Roast Root Vegetables
Roasting root vegetables is about as easy as it gets. You chop everything up, toss the vegetables with oil and seasonings, then let the oven work its magic. The vegetables roast up tender, caramelized, and full of flavor. For exact measurements and full instructions, check the printable recipe card below. Here’s a step-by-step look at the process:
Step 1: Preheat Oven + Prep Pan
Preheat your oven to 400° F and generously coat a large sheet pan with olive oil. This helps the vegetables roast evenly and caramelize instead of sticking to the pan, especially the sweet potatoes.
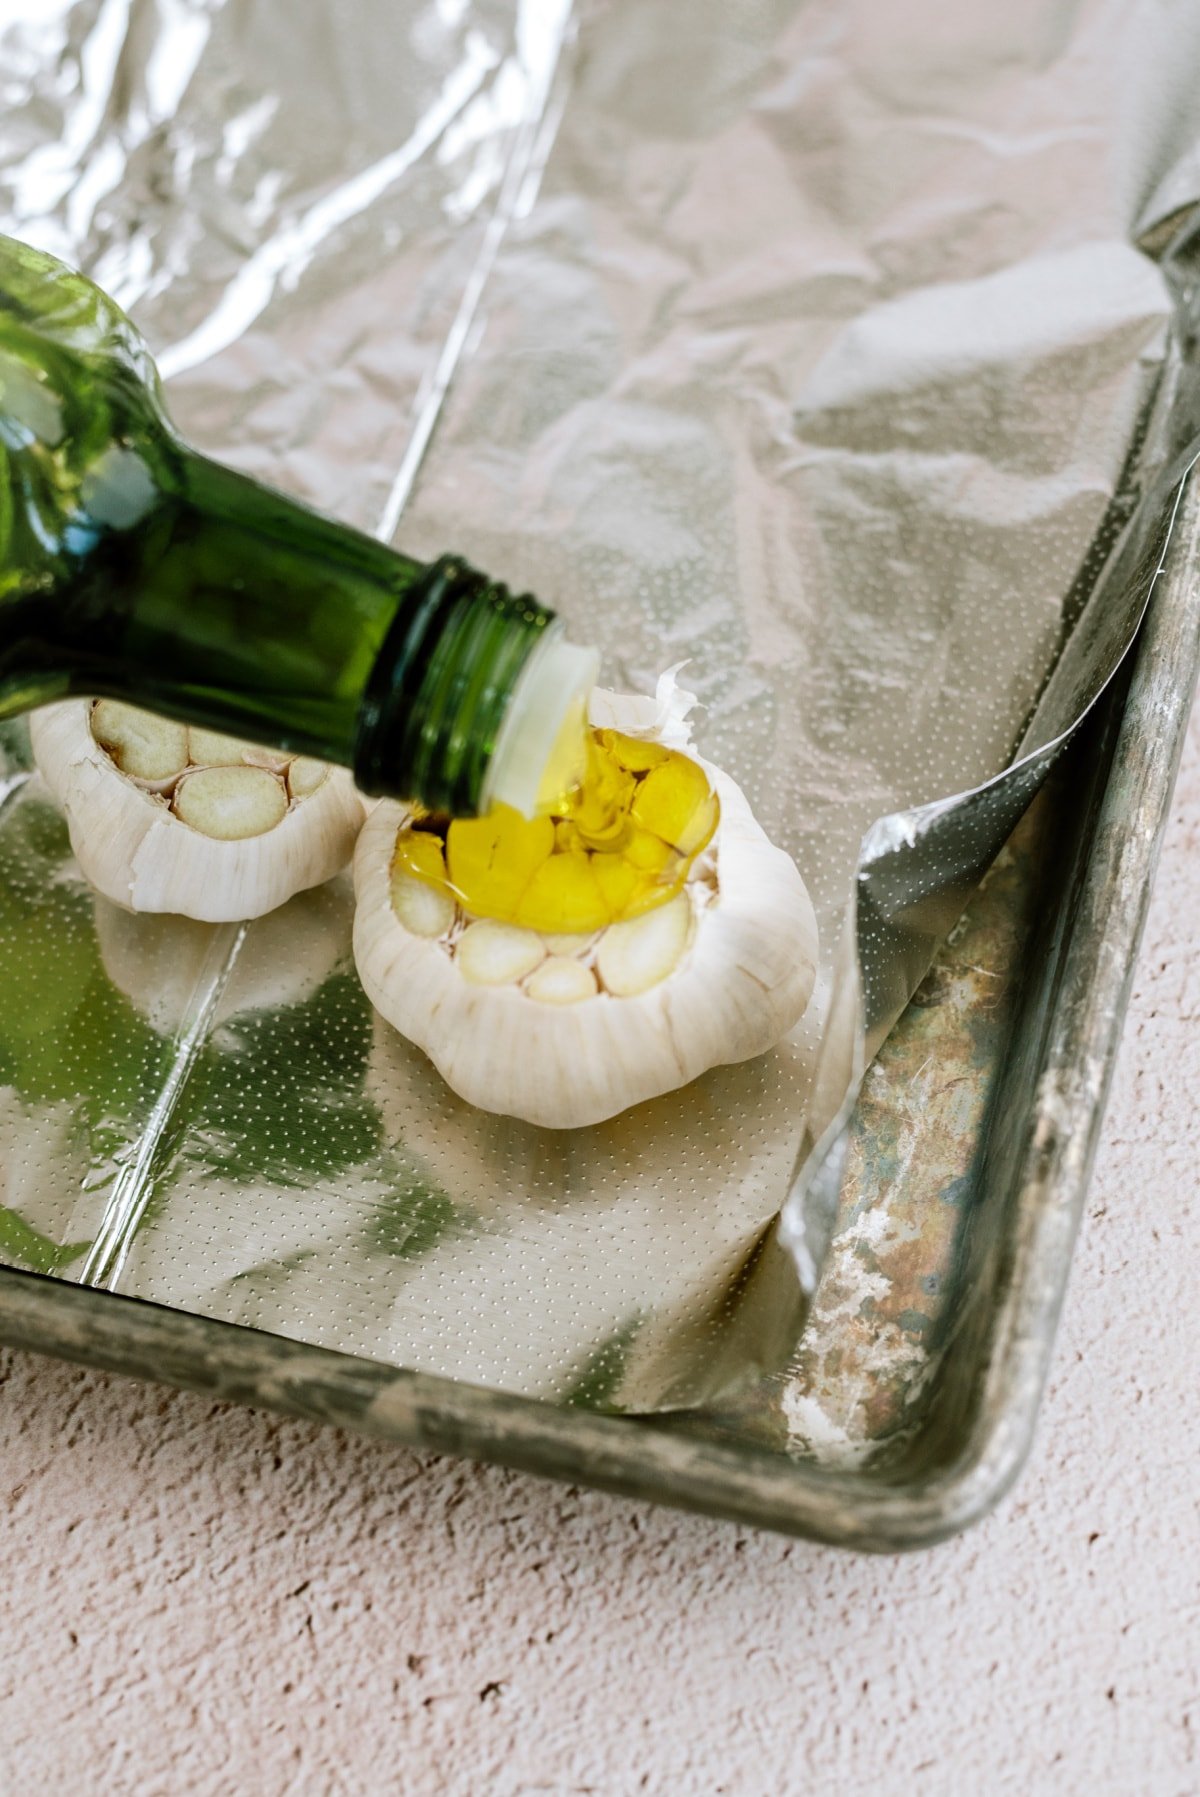
Step 2: Start the Garlic
Slice the tops off the garlic bulbs to expose the cloves. Place them in an aluminum foil tent on the sheet pan, drizzle with olive oil, then season with salt and pepper.
Bake for 15 to 20 minutes.
Step 3: Chop the Vegetables
Cut all vegetables into similar-sized pieces. This matters more than people think. Even sizing means even roasting, which means nobody ends up with crunchy carrots and mushy potatoes.
Step 4: Season Everything
Add chopped vegetables to a large mixing bowl, drizzle with olive oil, and toss with salt and pepper.
Step 5: Roast
Remove the sheet pan, add vegetables in a single layer, and roast for 20 minutes.
Step 6: Add Herbs + Finish Roasting
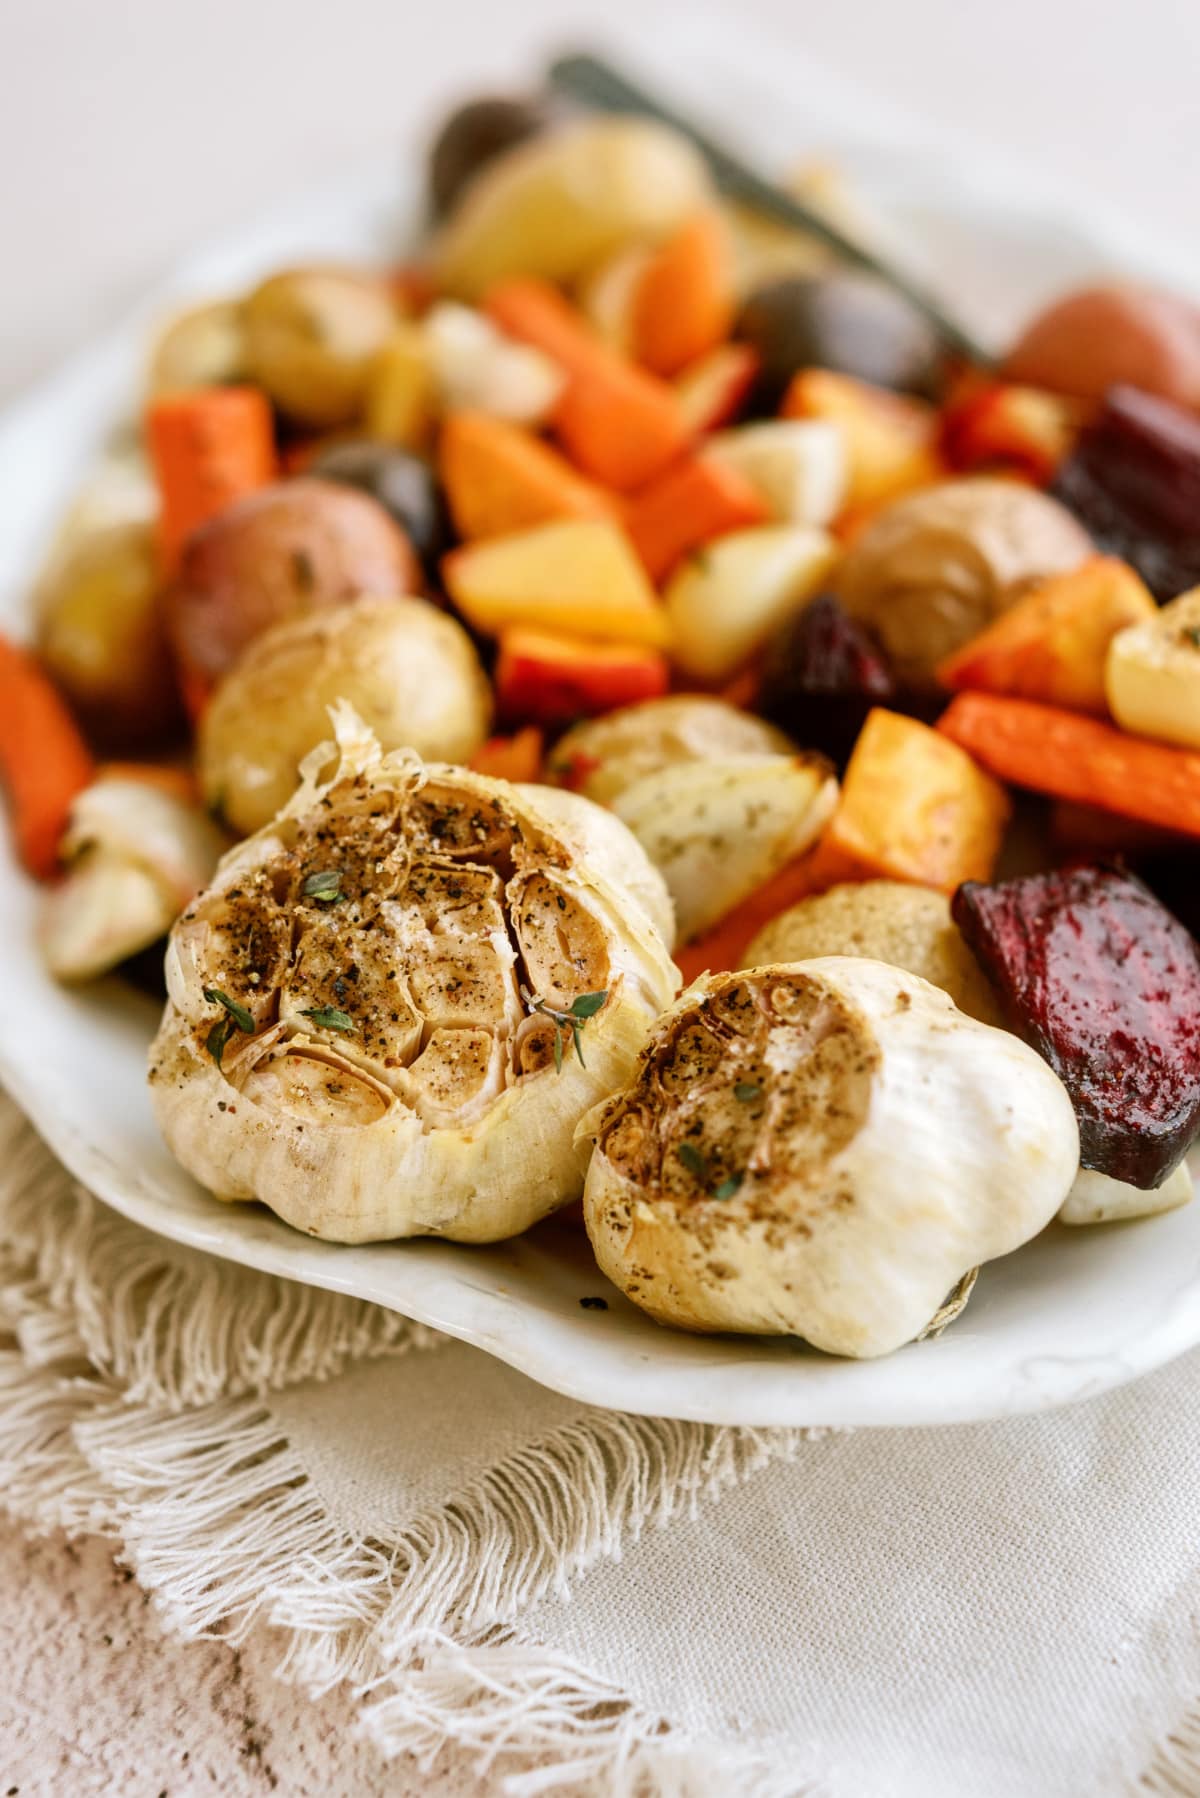
Uncover the garlic so the tops can brown. Toss herbs with olive oil and scatter them over the vegetables.
Roast another 20 to 25 minutes until everything is fork-tender and beautifully caramelized.

Step 7: Serve
You can spread the roasted garlic onto bread or rolls, or squeeze the soft cloves right over the vegetables for even more flavor.
Tools You’ll Need
Roasted root vegetables are pretty simple to make, especially with the right tools. A few dependable kitchen basics will help everything roast evenly and keep prep moving without a lot of extra mess.
- Rimmed Baking Sheet– A sturdy sheet pan gives the vegetables enough room to roast properly. Crowding causes steaming, and steamed root vegetables just don’t have the same charm.
- Large Mixing Bowls– You’ll need a roomy mixing bowl for tossing everything evenly with oil and seasoning.
- Sharp Chef’s Knife– There’s a decent amount of chopping here, so a reliable knife makes prep much smoother.
- Aluminum Foil– Essential for creating that little garlic roasting tent.
Tips for Success
- Taste and adjust salt right before serving.
- Cut vegetables into similar sizes for even cooking.
- Spread vegetables in a single layer.
- Use two sheet pans if needed.
- Don’t skip uncovering the garlic halfway through.
- Toss herbs in oil before adding so they crisp instead of burning.
What to Serve with Roasted Root Vegetables
Here are a few protein ideas to serve with roasted veggies.
- Grilled Flank Steak
- Sous Vide Steak
- Chicken Kabobs
- Instant Pot Pork Chops
- Couscous Salad with Shrimp
- Smothered Pork Chops
Storage + Reheating
Store leftover roasted root vegetables in an airtight container in the refrigerator for up to 4 days. When you’re ready to reheat, spread them out on a sheet pan and warm at 375° F for about 10 minutes to bring back those golden, crisp edges. The air fryer or microwave works too, though the texture will be softer in the microwave.
These also freeze well for up to 2 months in a sealed freezer-safe container. Once thawed, they’re especially good tossed into soups, breakfast hash, or grain bowls.
For make-ahead prep, chop all the vegetables up to 2 days in advance and store them in the fridge. You can also roast the garlic ahead of time and keep it refrigerated until you’re ready to finish the dish.
FAQs
Why are my roasted root vegetables soggy?
The pan is likely overcrowded. Give the vegetables space so moisture can escape.
Do I need to peel all the vegetables?
Not necessarily. Potatoes and carrots can be scrubbed well and left unpeeled. Rutabaga and turnip are better peeled.
What temperature is best for roasted root vegetables?
400° F gives the perfect balance of tender centers and caramelized edges.
Can I use dried herbs?
Fresh herbs give the best flavor here, but dried herbs work in a pinch. Use about one-third the amount.
Root Vegetable Variations
- Add Brussels sprouts for extra crispiness.
- Toss in red onion for a sweeter roasted flavor.
- Sprinkle with parmesan before serving.
- Finish with balsamic glaze for a little tang.
- Add a pinch of smoked paprika for warmth.
More Vegetable-Related Recipes to Try
- Hummus Veggie Wrap
- Vegetable Beef Soup
- Corn, Tomato & Avocado Salad
- Roasted Green Beans
- Roasted Acorn Squash
These roasted root vegetables bring big cozy dinner energy with very little effort. I hope this how-to was helpful and detailed enough to get you the best roasted root vegetables you’ve ever had! The printable recipe card is below. Enjoy!

Roasted Root Vegetables
Roasted Root Vegetables are the kind of side dish I keep coming back to again and again. Forget the salad and make room for earthy, hearty vegetables with caramelized edges and tons of savory flavor. This recipe is flexible too, so you can mix and match vegetables based on what you have on hand.
Ingredients
- 4 bulbs garlic slice top of bulb off lengthwise to reveal cloves
- 1 lb potatoes any white, gold or red variety
- 1 lb sweet potatoes
- 1/2 lb beets any color
- 1/2 lb carrots any color
- 1/2 lb parsnip
- 1 turnip
- 1/2 rutabaga
- 1 small onion any variety
- 3 tbsp olive oil
- rosemary fresh
- thyme fresh
- sage fresh
- salt to taste
- pepper to taste
Instructions
- Preheat oven to 400° F. Coat a large sheet pan generously with olive oil to prevent sticking.
- Slice the top off of your garlic bulbs lengthwise to reveal cloves and place in an aluminum foil tent on sheet pan face side up. Drizzle with olive oil, salt and pepper. Close aluminum foil tent and bake for 15-20 minutes while you prepare the other vegetables.
- Chop the remainder of vegetables to your desired size, making sure they are relatively the same size (to ensure even cooking).
- Place vegetables in large bowl and toss with olive oil, salt and pepper.
- Roast uncovered (except for garlic) for 20 minutes.
Halfway through cooking (after the first 20 minutes):
- Remove sheet pan from oven and uncover the garlic so the tops are exposed to allow browning.
- Toss the fresh herbs in olive oil and add to sheet pan.
- Continue to roast for another 20-25 minutes or until vegetables are cooked through, tender and browned.
- Remove from oven and serve warm.
- **Garlic can be spread on bread, rolls, or squeezed out and mixed with other vegetables.
Video
Notes
Storage & Reheating: Store leftovers in an airtight container in the refrigerator for up to 4 days. Reheat on a sheet pan at 375° F for 8 to 10 minutes or microwave until warmed through. Freeze for up to 2 months. For make-ahead prep, chop vegetables up to 2 days ahead and refrigerate until ready to roast.
Nutrition
Calories: 208kcalCarbohydrates: 34gProtein: 3gFat: 7gSaturated Fat: 1gPolyunsaturated Fat: 1gMonounsaturated Fat: 5gSodium: 123mgPotassium: 766mgFiber: 8gSugar: 12gVitamin A: 15951IUVitamin C: 24mgCalcium: 78mgIron: 2mg
Rate This RecipePlease consider Leaving a 5-Star Review!
If you make this recipe, I would really appreciate it if you would give it a star rating and leave your review in the comments! If you have a picture of your finished dish, post it on Instagram using the hashtag #laurenslatest and tagging me @laurens_latest.