You have 0 items in your cart
BEST Cheesecake Recipe EVER without the Water Bath!
This post may contain affiliate sales links. Please read my disclosure policy.
This is literally the best cheesecake recipe ever. Seven simple ingredients. No water bath. No cracking ever. Friends, I have tested and re-tested this no-water bath cheesecake recipe to make sure it is the absolute best out there! It is the only recipe you’ll ever need for classic, jaw-dropping, super creamy cheesecake. Don’t take my word for it though…read through the 1600+ reader reviews in the comments and see that my method has been successful for many others as well.
Not into the whole baking thing? Check out my No-Bake Cheesecake! Looking for a holiday cheesecake? Try my delicious Pumpkin Cheesecake. See all of my favorite Cheesecake Recipes.

Seriously, this is the BEST Cheesecake Recipe
I am thrilled to be sharing this creamy dessert recipe with you today. Not only did I test this recipe a several times, but I also had 5 devoted readers test this recipe to double down my claim that this cheesecake doesn’t crack. Y’all, their cheesecakes looked just as good as mine did with no cracks! Every.single.one looked great. The cheesecake gods are smiling down on this recipe and I hope you love it as much as we all did.
Why Do Cheesecakes Crack?
There are several reasons why cheesecakes can get a grand canyon-sized crack down the center but through my recipe testing and research, I’ve found the main three reasons are: air bubbles, lumps in the batter and baking and cooling. Here’s how I’ve dealt with and adjusted my recipe to ensure these three things don’t cause any issues:
How to prevent air bubbles in Cheesecake
When you are using a hand or stand mixer, it has a tendency to incorporate air into any batter you make, not just cheesecake. Particularly after you add in eggs. When eggs get whipped, they hold that volume. So, we want to reduce the mixing time after we add in the eggs and remove any extra air bubbles.
How do we do this?
- Crack all four eggs into a bowl
- Whisk with a fork before adding them into the cheesecake batter
- Stir in the eggs last and mix until they are just incorporated
- Before pouring the batter into the graham cracker crust, tap the bowl on the counter for 30 to 45 seconds to remove as many air bubbles as possible
How to prevent lumps in Cheesecake batter
- Using room temperature cream cheese, eggs, and sour cream makes everything incorporate easier, thus more of a lump-free batter.
- Be diligent in scraping the sides of the bowl.
- You want to ensure the cheesecake batter is lump-free before adding in the eggs.
How to bake and cool Cheesecake to avoid cracking
Baking a cheesecake in a water bath helps moderate oven temperatures not only for baking but for cooling too. Since I hate water baths and think they should go die (see next section below), I had to MacGyver this whole cheesecake recipe to ensure it was baking at a lower oven temperature for a longer period and also cooling very slowly.
Once baking is finished and the oven gets turned off, you’ll notice the cheesecake still spends over an hour in the hot oven, not only to help finish baking it (called carryover cooking) but also to cool it gently and slowly. This is what gets you that beautiful, crack-free top.

Is a water bath necessary for a cheesecake?
NO! Use these recipe, and save yourself a headache! Cheesecake is a time-consuming, somewhat expensive dessert to make. I’d hate for you to wrap your springform pan in foil only to discover you didn’t wrap it well enough and now water is seeping into your cheesecake before it even hits the oven. That has happened to me a handful of times and I MAKE FOOD FOR A LIVING. It totally sucks. It not only wasted your time but it wasted that perfectly good food!
So, don’t give in to those other online recipes that call for water baths (filling a huge roasting pan with water for the springform pan to sit in). Me and my five recipe-testing readers proved otherwise. You can do better, even if this is your first time.
Cheesecake Ingredients
Like I mentioned above, you only need SEVEN simple ingredients for this recipe. Only 7! This is a classic cheesecake recipe, so really it’s all about using the best ingredients and enjoying the simplicity of this thick, extra creamy cheesecake.
- Graham Cracker Crumbs: Honeymaid is my favorite, but any brand is fine. You can grind your own or buy them as crumbs.
- Granulated Sugar: to sweeten the crust and the filling.
- Melted Butter: to hold the graham cracker crust together.
- Cream Cheese: I like using the Philadelphia brand; I think it’s slightly tangier than other off-brands out there. Make sure you are using room temperature, soft cream cheese.
- Sour Cream: adds an extra tang. This also needs to be at room temperature.
- Vanilla Extract: for flavor since this is a classic cheesecake.
- Eggs: needed for structure. Absolutely have these at room temperature and beat together before adding in.

How to make a Cheesecake
If you want to make sure your cheesecake doesn’t crack, please please please follow these directions as carefully as possible. Don’t be all Suzy-Homemaker thinking you can change this recipe however you like and still have it come out perfectly. I mean, maybe it will but I have tested this recipe as written so you can have success with this recipe as written. All the specific directions for this cheesecake recipe are in the recipe card below.
Step 1: Make the Buttery Graham Cracker Crust
Stir graham cracker crumbs (store bought or crumbed yourself in a food processor) , sugar and melted butter together and press into a 9-inch springform pan. Bake for 7 minutes in a 350° F oven. Set aside to cool.
Step 2: Make the Cheesecake Filling
In a large bowl, stir very soft cream cheese together with the granulated sugar. Stir in the vanilla and sour cream. Scrape the sides really really well and stir again to ensure there are no lumps.
Whisk eggs together in a separate bowl and slowly add to the cheesecake filling with the mixer on low speed. Once eggs are incorporated turn mixer off. Scrape the sides really well to ensure a very smooth batter. If there are lumps, stir them in by hand.
Step 3: Remove Air Bubbles
Tap bowl on the counter for 30-45 seconds to remove air bubbles. Air bubbles can contribute to why cheesecakes crack and we definitely want to prevent that. This is a small step, but makes a big difference.

Step 4: Bake the Cheesecake (without a water bath!)
Pour batter into graham cracker crust, smooth the top and bake. Bake for 30 minutes at 325° F. Reduce temperature to 250° F and continue cooking for 45 minutes more. Keep the oven door closed this entire time!
Once this time has elapsed, turn oven off and keep cheesecake inside for another 30 minutes for some carryover cooking without opening the oven door. After 30 minutes, crack oven door to let cheesecake cool slowly for one hour before removing.
At this point, cheesecake should be slightly warm. Bring cheesecake to room temperature on the counter (3-4 hours) before covering with plastic wrap and transferring to the fridge.
Do I Have To Use a Springform Pan?
The best baking pan for this cheesecake recipe is a 9-inch springform pan and don’t have a suggestion for an optional pan to use instead. You can definitely put this into a 10-incher, but definitely won’t fit into an 8.
Also, I know you can buy larger 9″x 3″ cake pans without the springform option, but just don’t see any good way to remove the whole cheesecake without ruining it. Moral of the story? Splurge and get the springform pan. Or find a friend and borrow one.
I’ve had readers bake this recipe in a 9×13 pan and it has absolutely worked! So keep that in mind as well. If you’re ok with cheesecake bars, then this is a great option for you.
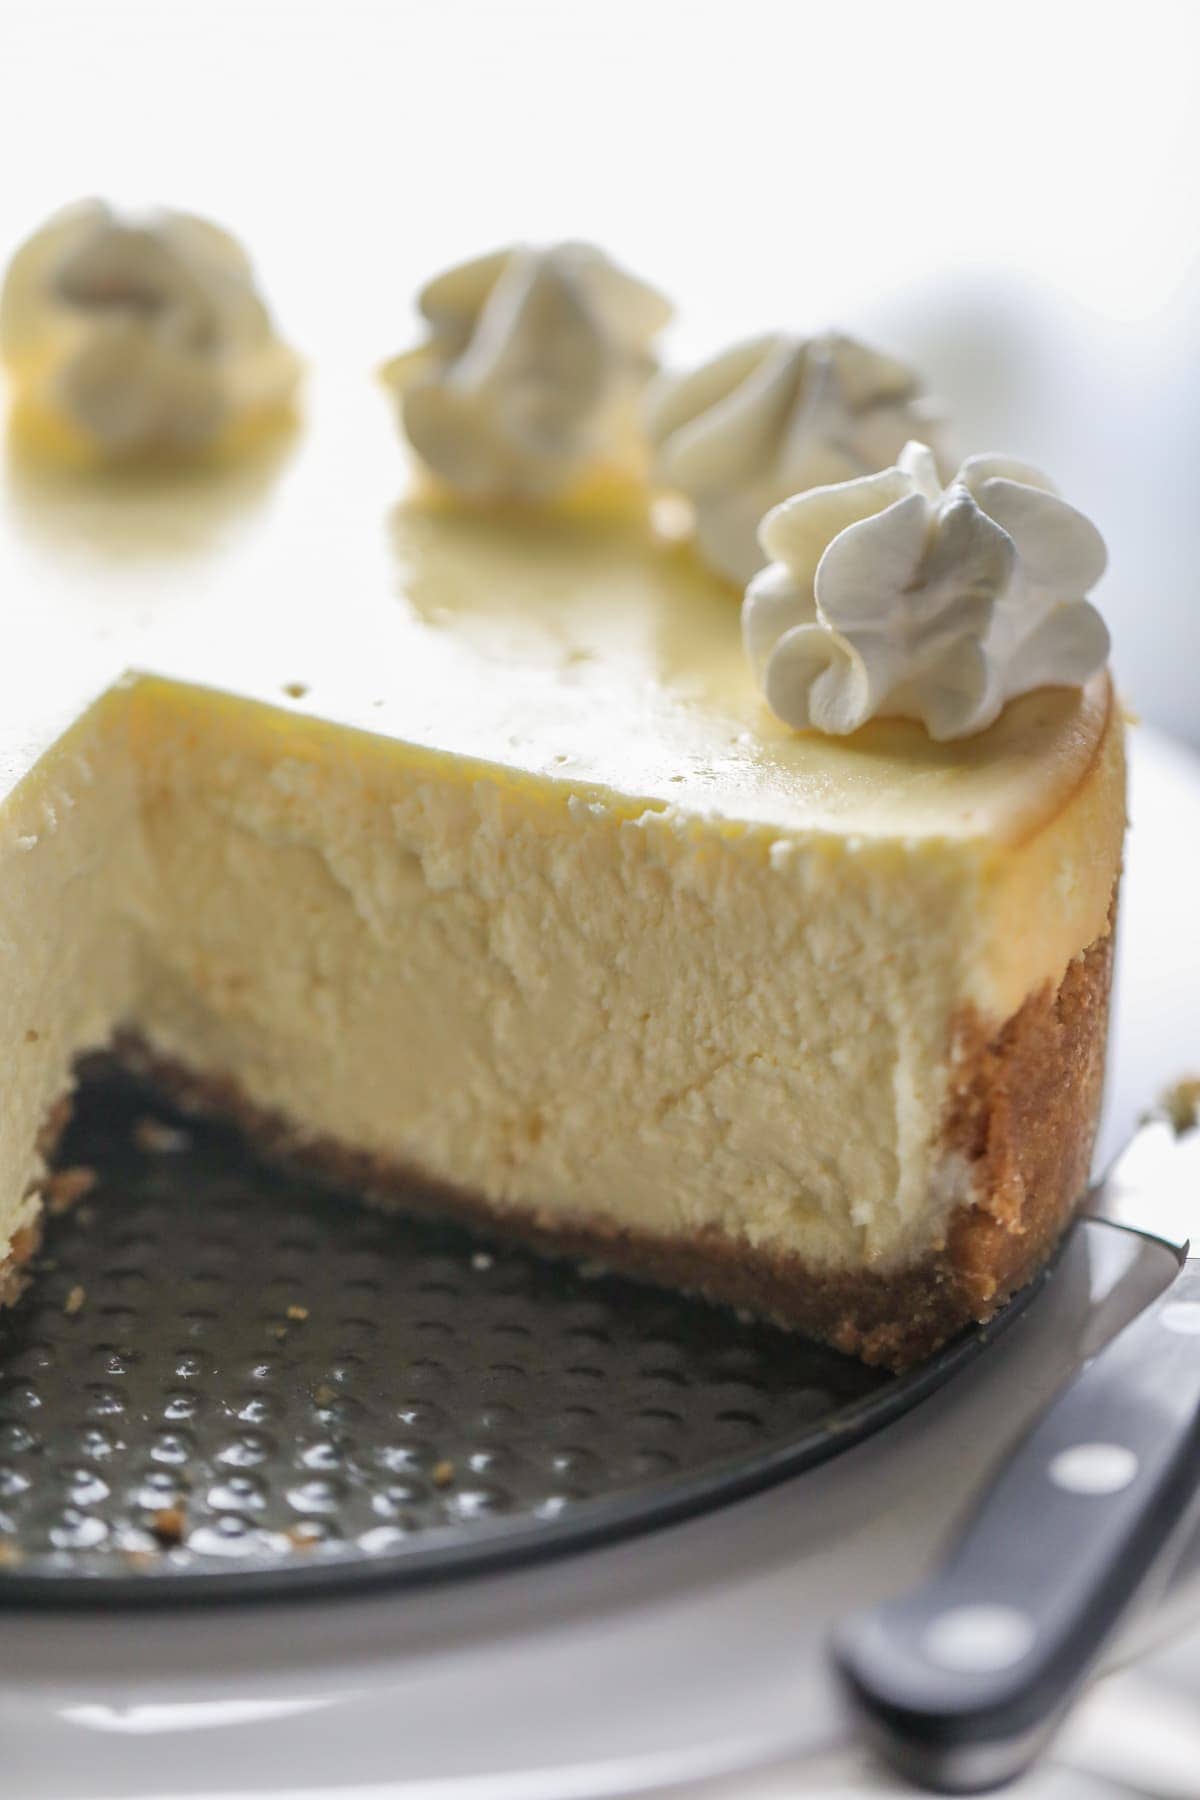
Step 5: Refrigerate & Serve Cheesecake
Once the cheesecake is at room temperature, you can cover and refrigerate until completely chilled. The beautiful thing about cheesecake is it’s a great dessert to make in advance because it stores so well in the fridge.
Refrigerate until chilled completely (6 hours to overnight). To serve, open the springform pan and remove the collar. Decorate as desired. Dip a sharp knife into hot water, wipe off any excess water and slice. I like to dip my knife in water between each slice to get really clean-looking pieces.

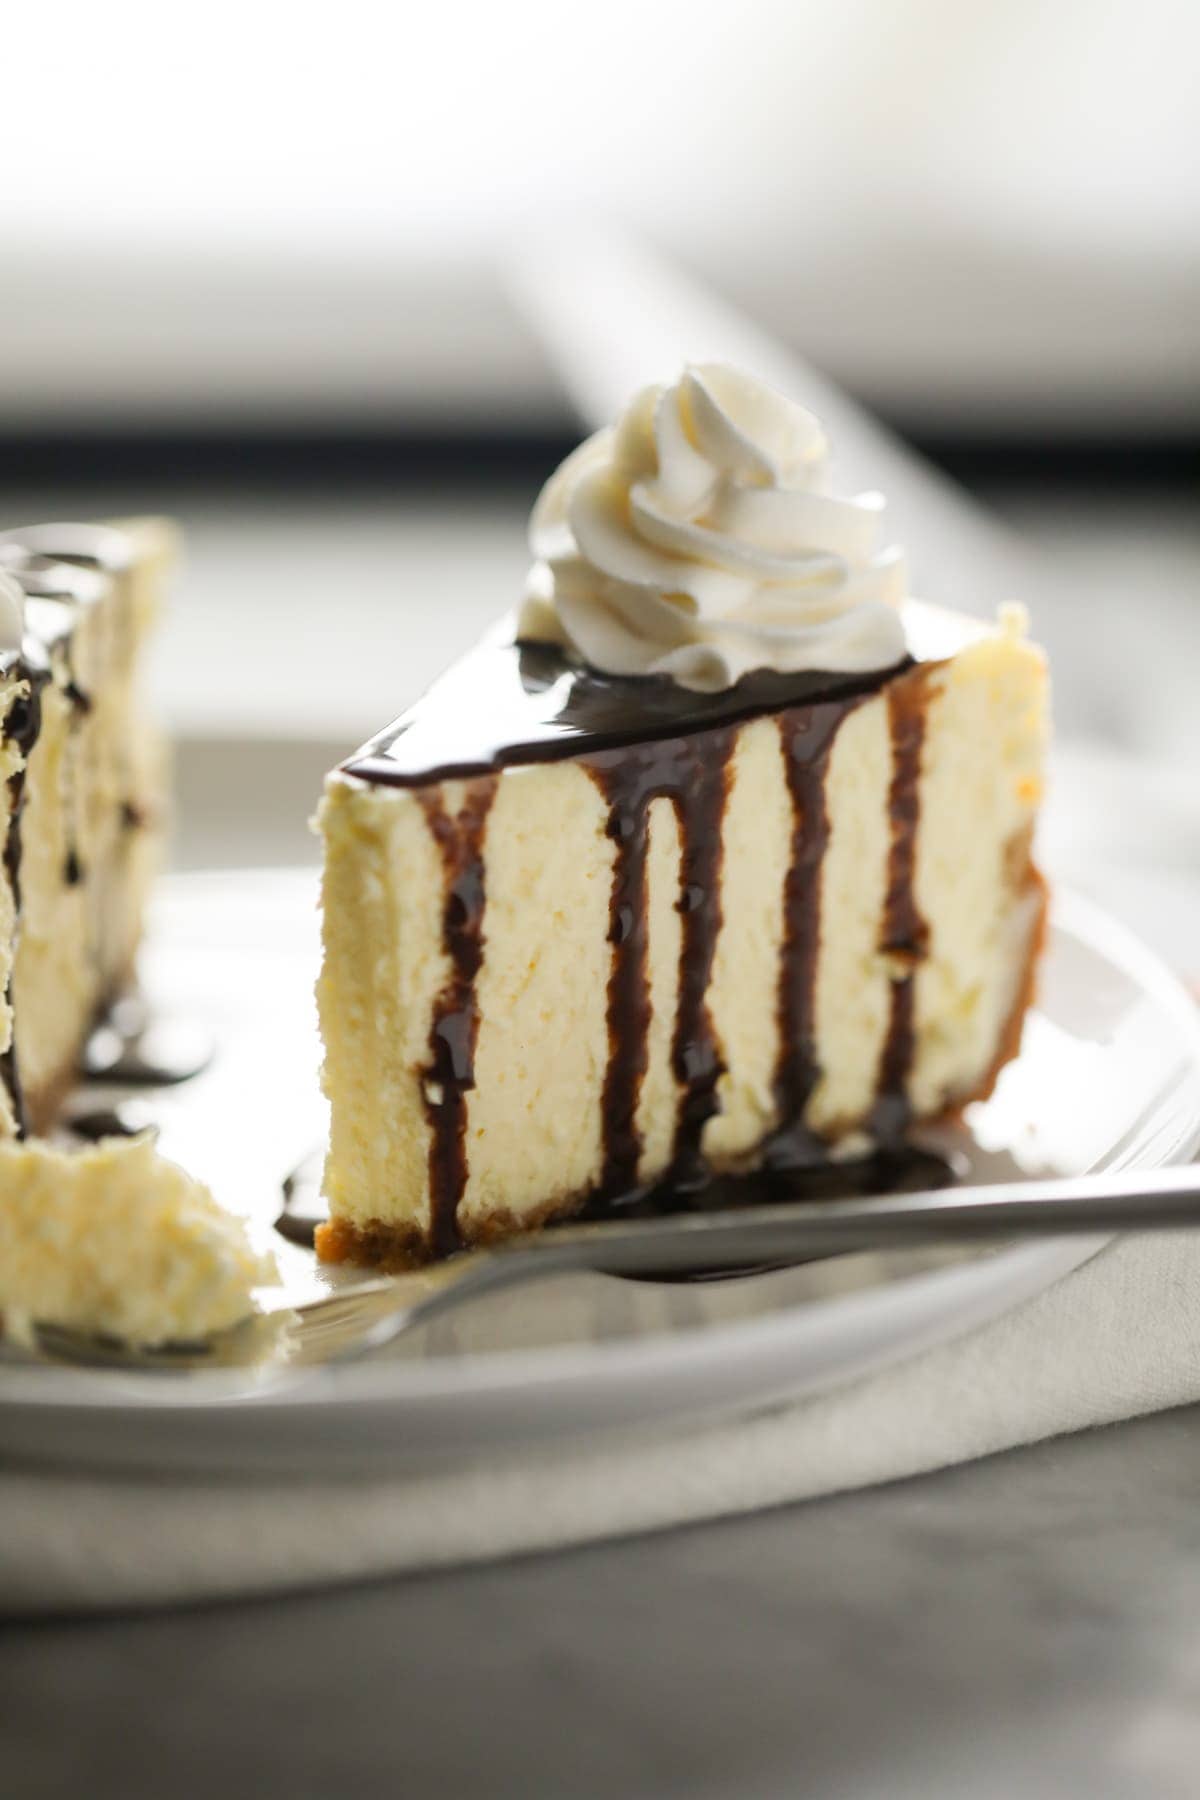
Best Cheesecake Toppings
Since this is a very basic, beautiful, and delicious cheesecake recipe, try to find delicious toppings that will help enhance the flavor. Here are a few classic ideas:
- cherry pie filling
- fresh berries like strawberries or raspberries
- strawberry sauce or blueberry sauce
- chocolate shavings, chocolate ganache, or chocolate sauce
- whipped cream
- lemon curd
- salted caramel sauce
- peanut butter sauce
For more ideas for your special occasions or next dinner party, be sure to check out all of my other cheesecake recipes here.

Best Cheesecake Recipe
This is literally the Best Cheesecake Recipe ever. Seven simple ingredients. No water bath. No cracking ever. It is the only recipe you'll ever need for classic, jaw-dropping, super creamy cheesecake. Follow my directions and it is simply fail proof!
Equipment
Ingredients
for the graham cracker crust-
- 1 1/4 cups graham cracker crumbs
- 4 tablespoons granulated sugar
- 5 tablespoons melted butter
for the cheesecake filling-
- 40 ounces cream cheese at room temperature (five 8 oz. packages; 2 1/2 lbs total)
- 1 1/4 cups granulated sugar
- 1/2 cup sour cream at room temperature
- 2 teaspoons vanilla extract
- 4 large eggs at room temperature
- any desired cheesecake toppings
Instructions
- Place oven racks in the center of the oven. Preheat oven to 350° F.
- In a medium sized bowl, stir graham cracker crumbs together with sugar and melted butter until well incorporated and mixture looks like damp sand. Using the bottom of a measuring cup, press crust into the bottom and half way up the sides of a 9-inch springform pan. Bake 7 minutes. Remove from oven and set aside.
- Reduce oven temperature to 325° F.
- In a large bowl or bowl of a stand mixer, mix cream cheese 30 seconds 'til smooth. Scrape the sides and bottom of the bowl and add in granulated sugar, sour cream and vanilla. Mix again until incorporated. Scrape the sides and bottom of the bowl and mix again briefly.
- Crack eggs into a separate bowl and whisk until well beaten. With the mixer on low, slowly pour the eggs into the cream cheese mixture and stop stirring once eggs have been incorporated. Remove bowl from mixer and scrape the sides and bottom again, ensuring the entire mixture is smooth. If there are a few small lumps, try to fold in using the rubber scraper.
- Once the batter is completely smooth and ready, tap the bowl on the counter for 30-45 seconds to remove as many air bubbles as possible. You should see them popping on the surface as you tap the bowl. Pour filling into the center of the graham cracker crust and gently smooth the top. Will be very full!
- Bake for 30 minutes at 325° F. Reduce temperature to 250° F and continue cooking for 45 minutes more. Once this time has elapsed, turn oven off and keep cheesecake inside for another 30 minutes for some carryover cooking without opening the oven door. Crack oven door to let cheesecake cool slowly for one hour before removing. At this point, cheesecake should be slightly warm. Bring cheesecake to room temperature on the counter (3-4 hours) before covering with plastic wrap and transferring to the fridge.
- Refrigerate until chilled completely (6 hours to overnight). To serve, open springform pan and remove collar. Decorate as desired. Dip a sharp knife into hot water, wipe off any excess water and slice. I like to dip my knife in water between each slice to get really clean-looking pieces.
Video
Notes
If you would like a thicker graham cracker crust, use 1 3/4 cups graham cracker crumbs, 5 tablespoons granulated sugar and 6 tablespoons melted butter. Press into the pan and bake for 8 minutes.
Nutrition
Calories: 573kcalCarbohydrates: 40gProtein: 9gFat: 43gSaturated Fat: 24gCholesterol: 194mgSodium: 469mgPotassium: 192mgFiber: 1gSugar: 32gVitamin A: 1606IUVitamin C: 1mgCalcium: 125mgIron: 1mg
Rate This RecipePlease consider Leaving a 5-Star Review!
How to store Homemade Cheesecake
Like I mentioned above, cheesecake is a fabulous make ahead dessert because it stores so so well in the fridge and freezer! Here’s how to do it.
How to store Cheesecake in the fridge
After your fully baked cheesecake has come to room temperature, refrigerate covered for up to one week.
How to store baked Cheesecake in the freezer
If you are a kitchen expert, you’ll know cream cheese by itself doesn’t freeze well but baked it does! Cheesecake is a perfect candidate for freezing! The best way to do so is to first, un-mold the cheesecake from the springform pan. Place into the freezer uncovered for about 4 hours or until its mostly solid. Remove springform bottom and wrap the cheesecake well in two layers of plastic wrap or aluminum foil. It will stay good for up to 3 months in the freezer.
To defrost, simply unwrap and transfer to a plate. Cover gently with plastic wrap and transfer to the fridge to defrost. Once defrosted, cut into slices and serve.
Best Homemade Cheesecake Recipe FAQ
What is the difference between New York style cheesecake and regular cheesecake?
New York style cheesecake” typically uses cream cheese as its main ingredient which gives it its dense, creamy texture and rich, tangy flavor. Regular cheesecakes use more cream (and sometimes sour cream) for a thinner, silkier texture. This allows it to take on a variety of other flavor profiles, such as fruit or chocolate.
How can I adjust the crust ingredients to get a thicker graham cracker crust?
If you would like a thicker graham cracker crust, use 1 3/4 cups graham cracker crumbs, 5 tablespoons granulated sugar and 6 tablespoons melted butter. Press into the pan and bake for 8 minutes.
More Cake Recipes to Try:
- Strawberry Cream Cake
- Black Forest Cake
- Molten Chocolate Lava Cake
- Vanilla Bean Cheesecake (Cheesecake Factory Copycat)
- Dark Chocolate Cheesecake (Cheesecake Factory Copycat)
I hope this will soon become your favorite cheesecake recipe! If you make this recipe, I would really appreciate it if you would give it a star rating and your review in the comments! If you have a picture of your finished dish, post it on Instagram using the hashtag #laurenslatest and tagging me @laurens_latest.


I’ve made this cheesecake twice and it is absolutely delish and so creamy! Question: I want to make two at once; can I cook them at the same time and if so, should I adjust the baking time? Thank you!
My absolute go to! Made me famous for cheesecakes at every holiday! Easy to follow and delicious!
I can’t wait to make this! I need it to work in a 6” cheesecake pan. Do you know how my baking time might be affected? (Obviously I will need to use less batter lol!)
This is my go-to cheesecake recipe and it always wins the crowd! Have you taken this recipe and made them into mini cheesecakes? With the recipe calling for a 9-inch springform pan, I was thinking about splitting it into two 4-inch ones. I’m just not sure about the cooking time.
Love that this is your go to thank you so much! 😊
Yes, you can absolutely turn this into mini cheesecakes or use smaller pans. Splitting the batter into two 4-inch pans should work well. The biggest change will be the baking time, since they’re smaller, they’ll bake faster.
I’d start checking them around 20–25 minutes, then keep an eye on the centers. You’re looking for the edges to be set with a slight jiggle in the middle. They’ll continue to firm up as they cool.
If you try it, I’d love to hear how they turn out!
Hands down my go to cheesecake recipe! It’s quick to learn and easy to follow! Works everytime if you follow the steps. Beautiful looking cheesecakes in the end!
I’ve made this recipe 7 times so far and no cracks. Everyone loves this cheesecake. I’ve got one in the oven now for a get together tomorrow. I sat the cheesecake mixture out on counter a lil longer than usual because my crust was not cooled enough. So…this one may crack because of the delay in putting in the oven I feel like. Time will tell. Gotta few hours left. 🥰
Can I make this recipe into a Key Lime cheesecake?
Not yet—but that sounds like it needs to happen 👀🍋 Would you want it more tart and classic, or creamy and mellow? I’m adding this to my list!
Please do!! Tart or mellow would be awesome!
Cheesecake
Best cheesecake i have ever made and this is my 6th cheesecake from this recipe and it is awesome!!! Thank you you took the dread out of making a cheesecake.
this was the best cheesecake I have ever made great recipe.
Great cheesecake! I did have mine cracking within 45 mins of it baking in the oven which was frustrating. The flavour and texture are amazing though!
I’m so glad you enjoyed the flavor and texture, that’s the most important part! Cheesecakes can sometimes crack as they bake, especially if the oven runs a little hot or the batter gets slightly overmixed, so you’re definitely not alone there. The good news is it doesn’t affect the taste at all, and a topping of whipped cream or chocolate ganache usually hides it perfectly. Thanks so much for making the recipe and taking the time to leave a comment!
My first time making a cheesecake but it turned out perfectly. Gorgeous and delicious too!
This is my go to cheesecake recipe. If I’m making a flavored cheesecake I still use this recipe and add zest, different extracts and even added key lime juice and it was still perfect.
Turned out great!!!
Perfect and yummy every time!! One of my most requested by family!! Thank you for the recipe!!
I haven’t tasted it yet but it definitely cracked on top. Hopefully it’ll still taste good.
Absolutely fabulous! I’ve made this recipe so many times, I still get compliments on it!
I’ve made this several times and each time it’s been amazing! My family knows if I’m bringing cheesecake for a dinner, I need the day before to “babysit” the cheesecake! Totally worth it🤗
This is my go to recipe for cheesecake! The texture of this cheesecake is excellent, and just as good as other recipes I’ve made that use water baths. (I hate using a water bath lol) I make this at least once per year for my fiance’s birthday
Help! I followed the directions exactly as described and when it was time to take it out of the oven, it had sunk and there were random holes in it. It also didn’t feel firm. Is it supposed to feel firm?
My favorite cheesecake recipe ever it turns out right every time
I followed the directions and was worried if it would come out right. It did! It was perfect and delicious.
This is the best ever. If you can’t make this you should just give up!🤣
I love this recipe! This is the only recipe I utilize to make cheesecake. It’s a little more time-consuming because there’s no water bath, but not by much.
I don’t even care about cracking! The top priorities for me are taste and texture and this recipe is a 5-star on both accounts. I made half the recipe because I only had 2.5 bricks of cream cheese so I baked it in a glass pie plate. Perfect.
best cheescake ever, I’ve been making it for a while. my family loves it.
Sorry I ment to give it 5 stars. I’ve made it several times and everyone loved it ,